이 버전에는 잘못된 편집 사항이 있을 수 있습니다. 최신 확인된 스냅샷으로 전환하십시오.
필요한 것
-
-
iMac 작업을 시작하기 전에: 컴퓨터 플러그를 뽑고 전원 버튼을 10초 동안 눌러 전원 장치의 축전기를 방전하세요.
-
-
-
이 단계는 번역되지 않았습니다. 번역을 도와주십시오
-
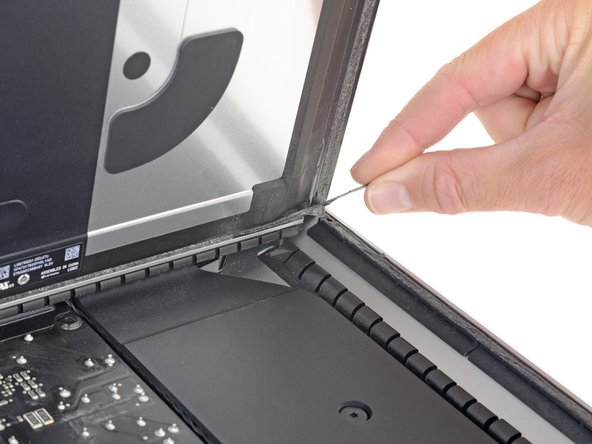
Grasp the small tab at the end of one of the bottom edge display adhesive strips and pull the adhesive toward the top of the iMac to remove it.
-
Repeat this step with the other adhesive strip and remove it.
-
-
이 단계는 번역되지 않았습니다. 번역을 도와주십시오
-
Lift the display up from the frame and remove it from the iMac.
-
It may be necessary to slowly lift from one side to peel against the remaining adhesive.
-
-
이 단계는 번역되지 않았습니다. 번역을 도와주십시오
-
Remove the following T10 Torx screws securing the hard drive brackets to the iMac:
-
Two 21 mm screws
-
One 9 mm screw
-
One 27 mm screw
-
-
이 단계는 번역되지 않았습니다. 번역을 도와주십시오
-
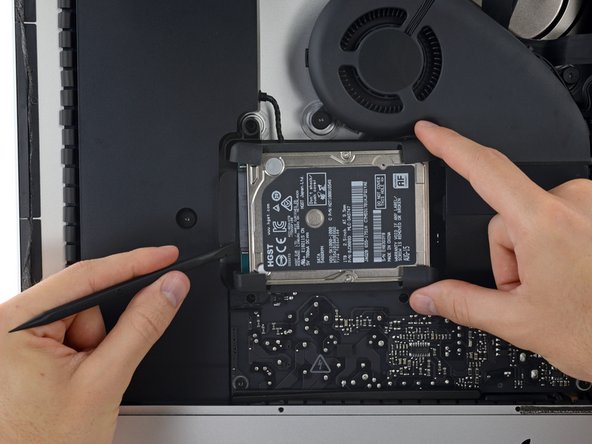
Lift the hard drive from the edge nearest the logic board and pull it slightly out of its recess.
-
-
이 단계는 번역되지 않았습니다. 번역을 도와주십시오
-
Use a spudger to disconnect the single SATA cable by prying it gently away from the hard drive.
-
Remove the hard drive assembly from the iMac.
-


다른 25명이 해당 안내서를 완성하였습니다.

댓글 3개
This tutorial is excellent but has the final step missing: how to replug the SATA connector given that it is stuck under the storage bay.
I had to unscrew the storage bay to be able to replug the SATA connector and follow the tutorial in reverse to finish it.
Don't try to remove the left speaker as it requires to remove the CPU fan first which adds extra steps to the process.
The most difficult part of the whole process was connecting the new HD to the connector (even if not stuck under the bay). There's not enough slack in the connector's cabling to allow use of one's fingers. It took me 20 minutes and the use of a couple of wooden popsicle sticks and a spudger to eventually nudge it in place. Otherwise, great tutorial Adam O'Camb!
2020 kaufte ich mir einen iMac 21,5 Zoll einfachste Ausführung (8GB RAM, 2,3 GhZ). Der Computer brauchte mindestens 65 Sekunden, um Applikationen hochzuladen, was die Arbeit mit dem Computer nahezu unmöglich machte. Letzte Woche habe ich die HDD-Festplatte dank des Reperatur-Kits von ifixit ausgetauscht. Seitdem funktioniert der Computer mühelos. Applikationen, Dokumente, Bilddateien lassen sich unter einer Sekunde öffnen. Man bekommt schon das Gefühl einen neuen iMac gekauft zu haben! Ich kann das Reperatur-Kit samt Anleitung nur wärmstens empfehlen. Hierbei ist allerdings zu beachten, dass die Reparatur genaustens nach Anleitung durchgeführt werden sollte. Kleiner Tipp: Wenn die Schrauben von dem Lautsprecher gelöst werden, lässt er sich leicht nach links verschieben. Damit ist das SATAkabel leichter zugänglich! Viel Erfolg!