주요 콘텐츠로 건너뛰기

iMac Intel 24" EMC 2111 Optical Drive Replacement

단지 전제 조건
이 안내서는 다른 가이드의 선행 작업으로 사용하기 위한 것입니다. 그 자체로는 불완전합니다.
  1. iMac Intel 24" EMC 2111 Optical Drive Replacement, Optical Drive: 1 단계, 이미지 1/1
    • Remove the strip of tape covering the optical drive cable connector.

  2. iMac Intel 24" EMC 2111 Optical Drive Replacement: 2 단계, 이미지 1/2 iMac Intel 24" EMC 2111 Optical Drive Replacement: 2 단계, 이미지 2/2
    • Gently pull the cable retainer on the optical drive cable ZIF socket toward the right side of the iMac.

    • The retainer should move about 1 mm and stop. Do not attempt to remove the retainer.

  3. iMac Intel 24" EMC 2111 Optical Drive Replacement: 3 단계, 이미지 1/1
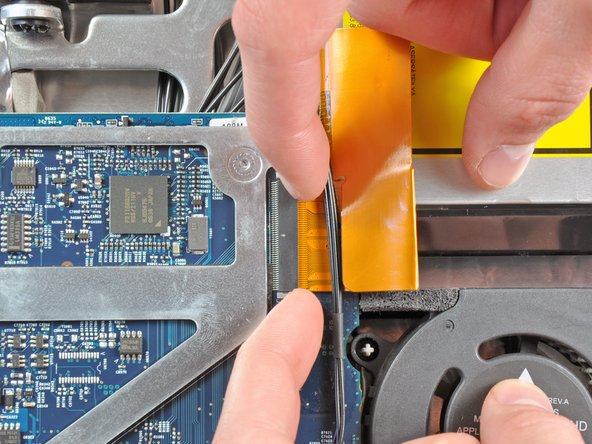
    • Pull the optical drive ribbon cable out of its socket, being careful not to rip it in the process.

  4. iMac Intel 24" EMC 2111 Optical Drive Replacement: 4 단계, 이미지 1/1
    • Pull the optical drive thermal sensor connector toward the right side of the iMac to disconnect it from the logic board.

  5. iMac Intel 24" EMC 2111 Optical Drive Replacement: 5 단계, 이미지 1/1
    • Peel off the strip of EMI tape attaching the right side of the optical drive to the rear case.

  6. iMac Intel 24" EMC 2111 Optical Drive Replacement: 6 단계, 이미지 1/1
    • Push down on the optical drive bracket retaining clip while pulling the top edge of the optical drive away from the rear case.

  7. iMac Intel 24" EMC 2111 Optical Drive Replacement: 7 단계, 이미지 1/2 iMac Intel 24" EMC 2111 Optical Drive Replacement: 7 단계, 이미지 2/2
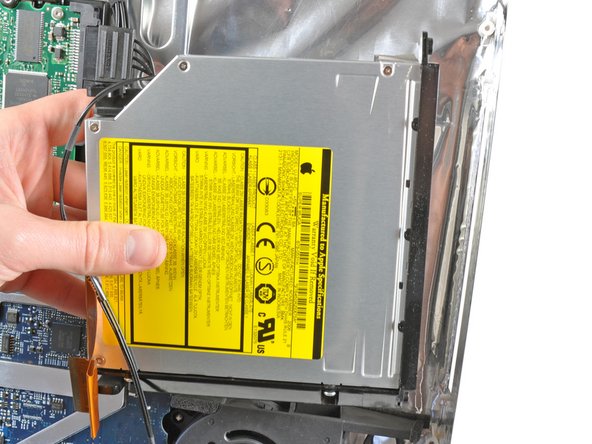
    • Rotate the optical drive slightly toward the bottom edge of the iMac while pulling it away from the rear case to release the lower retaining clip.

    • Pull the optical drive away from the right side of the rear case and remove it from the iMac.

결론

To reassemble your device, follow these instructions in reverse order.

Andrew Bookholt

586,139 평판

안내서 619개 작성하였습니다

댓글 0개

댓글 쓰기

조회 통계:

24 시간 전: 0

7일 전: 0

30일 전: 0

전체 시간: 240