소개
Your optical drive no longer works? Does it refuse to read CDs and DVDs? He grinds then ejects them all? All is not lost, all it takes is a little cleaning that won't cost you anything.
필요한 것
-
-
Stick a heavy-duty suction cup near each of the two top corners of the glass panel.
-
While lightly holding the suction cup against the glass, raise the movable handle until it is parallel with the other handle (as indicated by the third picture).
-
-
-
-
Remove the four T10 Torx screws securing the optical drive to the outer case.
-
-
-
Peel back the portion of aluminum tape highlighted in red, leaving the rest attached to the black plastic optical drive bracket.
-
-
-
Use the tip of a spudger to press each of the optical drive bracket tabs out of their slots on the bottom of the optical drive.
-
Rotate the optical drive bracket slightly away from the optical drive.
-
Pull the optical drive bracket away from the open end of the optical drive, minding any tabs that may get caught.
-
-
-
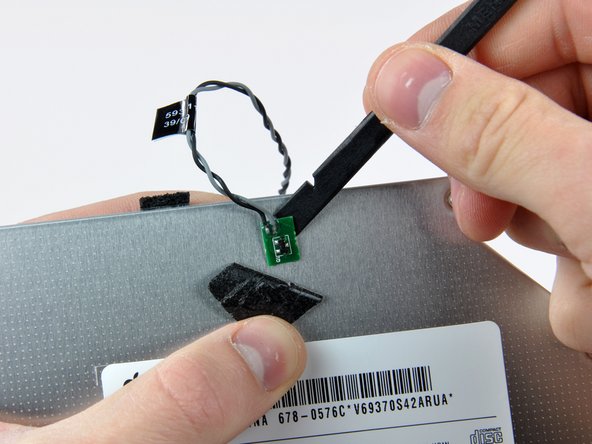
Use the tip of a spudger to peel back the piece of foam tape covering the optical drive thermal sensor.
-
Use the flat end of a spudger to carefully pry the thermal sensor up off the adhesive securing it to the optical drive.
-
If you have a disc or anything else stuck inside your optical drive, we have a guide to fix it.
-
-
-
Follow all super drive replacement steps for disassembly. Step 8 is absolutely unnecessary for the repair. Do not peel off the sensor from the optical drive.
-
Once the reader has been disassembled, all you have to do is unscrew the 5 small screws from the reader cover (the side where there are the labels). Remove the cover once the screws have been removed;
-
Plug in your vacuum cleaner and gently vacuum the entire interior, including the lens (beware of vacuum cleaners that are too powerful).
-
With a cotton swab previously dipped in rubbing alcohol, gently clean the lens.
-
reassemble the cover with the screws and reassemble everything.
-
Once everything is reassembled, start and cross your fingers. Usually it's just a dust issue.
-
Enjoy!!!
-


To reassemble your device, follow the instructions in reverse order.
To reassemble your device, follow the instructions in reverse order.
다음 번역가들에게 특별히 감사 드립니다:
100%

HelloMacOS님은 저희가 세상을 수리하는데 동참하신 분입니다! 기여하시겠습니까?
번역 시작하기 ›
