주요 콘텐츠로 건너뛰기

iMac Intel 27" Retina 5K Display Adhesive Strip Replacement

필요한 것

  1. iMac Intel 27" Retina 5K Display Adhesive Strip Replacement, Determine which adhesives you have: 1 단계, 이미지 1/1
    • Before you begin, make sure you have the right adhesive strips:

    • The 2012-2019 iMac adhesive strips have a microphone cutout and are numbered 16, 21, 22, 23, 25, and 26. They can be used on 27" iMacs from 2012-2019.

    • If your strips are numbered 11-16, follow the 2012-2015 iMac adhesive guide instead.

  2. iMac Intel 27" Retina 5K Display Adhesive Strip Replacement, Stabilize the iMac: 2 단계, 이미지 1/1
    이 단계에 사용된 도구:
    iMac Intel 27" Cardboard Service Wedge
    $4.99
    구매
    • With the hinge free to move, the iMac will be unbalanced and hard to work on. Repairs can be completed as shown, but are faster and easier with an iFixit cardboard service wedge.

    • Follow these assembly directions to put the service wedge together.

    • If you are not using an iMac service wedge, be very careful when installing and working behind the display—it can easily fall out and break if the iMac moves unexpectedly.

  3. iMac Intel 27" Retina 5K Display Adhesive Strip Replacement, Remove the old adhesive: 3 단계, 이미지 1/2 iMac Intel 27" Retina 5K Display Adhesive Strip Replacement, Remove the old adhesive: 3 단계, 이미지 2/2
    • Before you install new adhesive strips, remove all of the old adhesive from the perimeter of the rear enclosure.

    • If you are re-using your existing display, you must also remove the old adhesive from the back of the display.

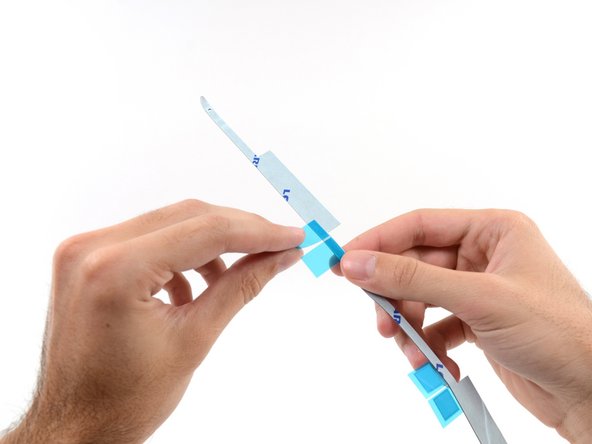
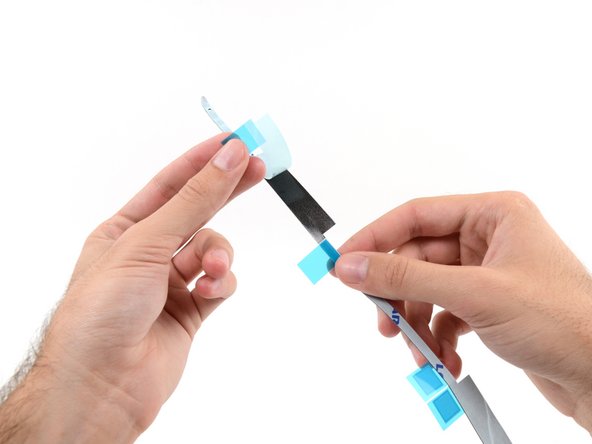
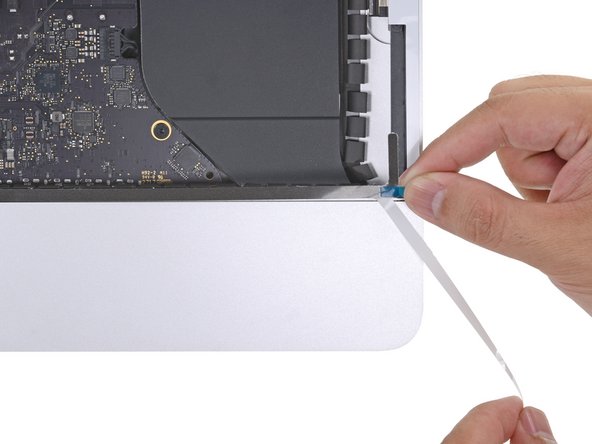
    • Peel off the adhesive strips using tweezers or your fingers. Start at the bottom and peel upward towards the top of the device.

    • After all the old adhesive is removed, carefully clean the surface with 90% (or greater) isopropyl alcohol and a lint-free cloth. Wipe in one direction, not back and forth.

    • Don't skip this step, or your new adhesive strips may not bond properly, and the display may fall out of your iMac.

  4. iMac Intel 27" Retina 5K Display Adhesive Strip Replacement, Lay out the adhesive strips: 4 단계, 이미지 1/2 iMac Intel 27" Retina 5K Display Adhesive Strip Replacement, Lay out the adhesive strips: 4 단계, 이미지 2/2
    • Lay out the adhesives strips beforehand so you won't accidentally install a strip in the wrong place:

    • Strip 22 on the top left

    • Strip 23 on the top right

    • Strip 21 on the right vertical

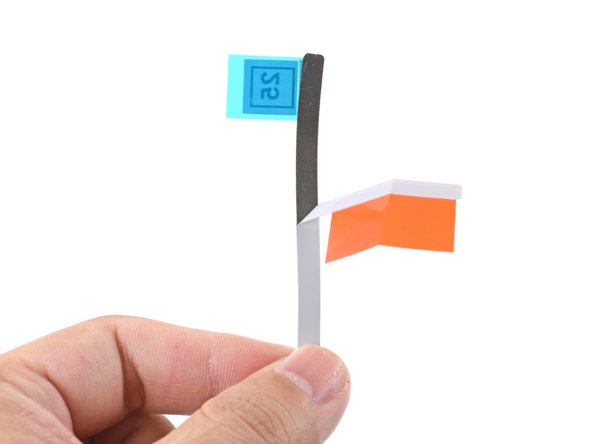
    • Strip 25 on the bottom right, dark side facing up.

    • Double check to make sure this strip has the necessary cutout for the microphone.

    • Strip 26 on the bottom left, dark side facing up

    • Strip 16 on the left vertical

  5. iMac Intel 27" Retina 5K Display Adhesive Strip Replacement, Install the right side adhesive: 5 단계, 이미지 1/3 iMac Intel 27" Retina 5K Display Adhesive Strip Replacement, Install the right side adhesive: 5 단계, 이미지 2/3 iMac Intel 27" Retina 5K Display Adhesive Strip Replacement, Install the right side adhesive: 5 단계, 이미지 3/3
    • Start with strip 21, which goes on the right vertical edge of the iMac frame.

    • Before you peel off any backing, line the adhesive strip up along the frame of the iMac to get an idea of where it goes.

    • Peel the short piece of backing off the back of the strip.

  6. iMac Intel 27" Retina 5K Display Adhesive Strip Replacement: 6 단계, 이미지 1/2 iMac Intel 27" Retina 5K Display Adhesive Strip Replacement: 6 단계, 이미지 2/2
    • Insert the tip of a spudger into the hole at the end of the strip where you just removed one layer of backing. Insert the spudger from the side that still has a layer of white backing on it.

  7. iMac Intel 27" Retina 5K Display Adhesive Strip Replacement: 7 단계, 이미지 1/3 iMac Intel 27" Retina 5K Display Adhesive Strip Replacement: 7 단계, 이미지 2/3 iMac Intel 27" Retina 5K Display Adhesive Strip Replacement: 7 단계, 이미지 3/3
    • With the spudger still poking through the hole in the adhesive strip, push the spudger tip into the corresponding hole in the frame of the iMac.

    • Using the hole and spudger to anchor the position of the adhesive strip, line the strip up against the right edge, gently pull down against the spudger to ensure the strip is taut, and stick it onto the frame.

  8. iMac Intel 27" Retina 5K Display Adhesive Strip Replacement: 8 단계, 이미지 1/3 iMac Intel 27" Retina 5K Display Adhesive Strip Replacement: 8 단계, 이미지 2/3 iMac Intel 27" Retina 5K Display Adhesive Strip Replacement: 8 단계, 이미지 3/3
    • Once you're satisfied that the top half of the adhesive strip is neatly aligned, peel longer blue piece of backing out from behind the strip.

    • If the top half isn't aligned properly, you can carefully peel it up and re-stick it before peeling off the lower backing strip. Be sure to use the spudger tip to anchor the top.

  9. iMac Intel 27" Retina 5K Display Adhesive Strip Replacement: 9 단계, 이미지 1/2 iMac Intel 27" Retina 5K Display Adhesive Strip Replacement: 9 단계, 이미지 2/2
    • Align the lower portion of the strip with the right edge of the frame, and stick it down.

  10. iMac Intel 27" Retina 5K Display Adhesive Strip Replacement: 10 단계, 이미지 1/2 iMac Intel 27" Retina 5K Display Adhesive Strip Replacement: 10 단계, 이미지 2/2
    • Use your finger to smooth out the strip. Make sure it is neatly aligned with the right side of the frame and that it sits flat.

    • Do not peel off the front adhesive backing yet.

  11. iMac Intel 27" Retina 5K Display Adhesive Strip Replacement, Install the top and left adhesives: 11 단계, 이미지 1/2 iMac Intel 27" Retina 5K Display Adhesive Strip Replacement, Install the top and left adhesives: 11 단계, 이미지 2/2
    • Work your way counter-clockwise around the perimeter of the iMac, adding three more adhesive strips in the same manner:

    • Strip 23 on the top right

    • Strip 22 on the top left

    • Strip 16 on the vertical left

    • These three strips have a hole at each end—always use the smaller hole for alignment for more precise placement.

    • On the iMac Intel 27" Retina 5K Display, the top-right strip's blue tabs will not line up with the top antenna in the same way as the non-5K model. This is perfectly acceptable and won't impact the performance of the strips or antenna.

  12. iMac Intel 27" Retina 5K Display Adhesive Strip Replacement, Install the bottom adhesives: 12 단계, 이미지 1/1
    • The next few steps will show you how to install the bottom right adhesive strip (strip 25), which includes a notch that must be aligned with the microphone.

    • Read through this step and the next four steps before you attempt the procedure.

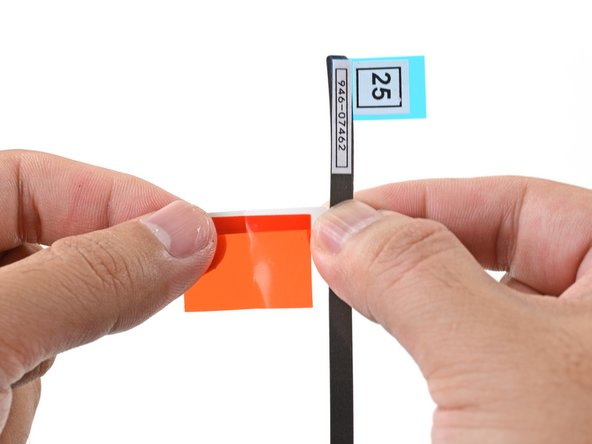
    • Grasp the red pull tab on strip 25 and pull to separate about 2 inches (5 cm) of white backing from the strip.

  13. iMac Intel 27" Retina 5K Display Adhesive Strip Replacement: 13 단계, 이미지 1/3 iMac Intel 27" Retina 5K Display Adhesive Strip Replacement: 13 단계, 이미지 2/3 iMac Intel 27" Retina 5K Display Adhesive Strip Replacement: 13 단계, 이미지 3/3
    • Fold the loose white backing to a right angle and pinch the crease with your fingers.

    • This exposes 2 inches of adhesive while folding the red tab out of the way.

  14. iMac Intel 27" Retina 5K Display Adhesive Strip Replacement: 14 단계, 이미지 1/3 iMac Intel 27" Retina 5K Display Adhesive Strip Replacement: 14 단계, 이미지 2/3 iMac Intel 27" Retina 5K Display Adhesive Strip Replacement: 14 단계, 이미지 3/3
    • The microphone hole is the center hole flanked by two larger holes.

    • Align the adhesive strip to the bottom edge by positioning the microphone notch over the microphone hole.

    • If your iMac does not have a microphone hole, align the right end of the strip such that the L-bend sits next to the right vertical adhesive. The L-bend should not overlap the right vertical adhesive.

    • The adhesive tears easily. Be careful not to pull on the strip with too much force.

    • Once you have aligned the strip, carefully set the left exposed edge onto the iMac to secure the alignment.

  15. iMac Intel 27" Retina 5K Display Adhesive Strip Replacement: 15 단계, 이미지 1/3 iMac Intel 27" Retina 5K Display Adhesive Strip Replacement: 15 단계, 이미지 2/3 iMac Intel 27" Retina 5K Display Adhesive Strip Replacement: 15 단계, 이미지 3/3
    • Peel away the white backing behind the strip to expose the remaining adhesive.

  16. iMac Intel 27" Retina 5K Display Adhesive Strip Replacement: 16 단계, 이미지 1/2 iMac Intel 27" Retina 5K Display Adhesive Strip Replacement: 16 단계, 이미지 2/2
    • Run your finger from left to right along the length of the adhesive strip to ensure it is straight and unwrinkled, pressing down as you go to adhere the strip to the iMac.

  17. iMac Intel 27" Retina 5K Display Adhesive Strip Replacement: 17 단계, 이미지 1/3 iMac Intel 27" Retina 5K Display Adhesive Strip Replacement: 17 단계, 이미지 2/3 iMac Intel 27" Retina 5K Display Adhesive Strip Replacement: 17 단계, 이미지 3/3
    • Repeat the previous steps for the bottom left adhesive strip (strip 26), aligning and placing it along the bottom left edge of the iMac.

    • The strip should be positioned such that the L-bend sits next to the left vertical adhesive. The L-bend should not overlap the left vertical adhesive.

    • Once you've applied all the adhesive strips, the iMac should look as shown in the second photo.

  18. iMac Intel 27" Retina 5K Display Adhesive Strip Replacement, Replace the display: 18 단계, 이미지 1/2 iMac Intel 27" Retina 5K Display Adhesive Strip Replacement, Replace the display: 18 단계, 이미지 2/2
    • Gently set the display in place over the iMac and align it carefully.

  19. iMac Intel 27" Retina 5K Display Adhesive Strip Replacement: 19 단계, 이미지 1/2 iMac Intel 27" Retina 5K Display Adhesive Strip Replacement: 19 단계, 이미지 2/2
    • Use painter's tape or masking tape to temporarily secure the bottom edge of the display to the iMac's enclosure.

    • The tape preserves the display's alignment, and allows you to safely swing the top edge of the display open to access the display cables.

  20. iMac Intel 27" Retina 5K Display Adhesive Strip Replacement, Test your repair: 20 단계, 이미지 1/3 iMac Intel 27" Retina 5K Display Adhesive Strip Replacement, Test your repair: 20 단계, 이미지 2/3 iMac Intel 27" Retina 5K Display Adhesive Strip Replacement, Test your repair: 20 단계, 이미지 3/3
    • At this point it's a good idea to test your repair, in order to make sure your iMac works properly before you seal it back up. Follow the next three steps to temporarily reconnect the display cables and boot up your iMac prior to pulling the protective film off the adhesive strips.

    • If you've already verified that your iMac is working correctly and are ready to seal it up, skip to step 22.

    • Gently insert the display data connector into its socket on the logic board. Be sure to press it straight into the socket, and insert it completely.

    • Flip the display data connector lock down onto the socket.

    • Insert the display power connector into its socket on the logic board.

  21. iMac Intel 27" Retina 5K Display Adhesive Strip Replacement: 21 단계, 이미지 1/2 iMac Intel 27" Retina 5K Display Adhesive Strip Replacement: 21 단계, 이미지 2/2
    • Set the display back on the iMac's rear enclosure.

    • At this time, plug in your iMac, power it on, and test your repair before sealing up the computer. Be sure to check for full functionality of any hardware you removed or disconnected.

    • When you are finished, shut the iMac down and unplug the power cord before you continue.

  22. iMac Intel 27" Retina 5K Display Adhesive Strip Replacement, Seal the iMac: 22 단계, 이미지 1/3 iMac Intel 27" Retina 5K Display Adhesive Strip Replacement, Seal the iMac: 22 단계, 이미지 2/3 iMac Intel 27" Retina 5K Display Adhesive Strip Replacement, Seal the iMac: 22 단계, 이미지 3/3
    • Verify that your iMac is turned off and unplugged from power before you continue.

    • After confirming that your iMac functions properly, disconnect the display cables and carefully lean the display forward.

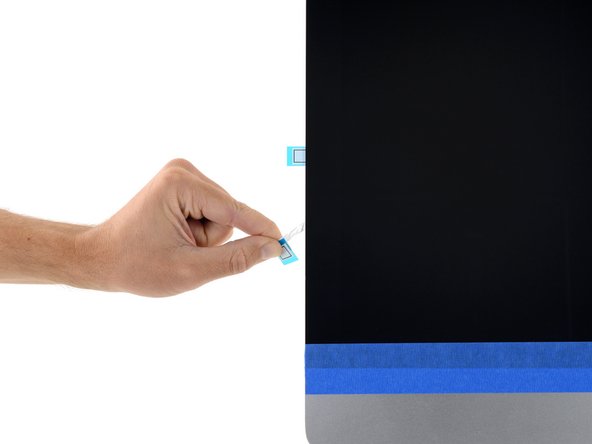
    • Remove the film from the two bottom strips by reaching in from above with a pair of tweezers and pulling the blue tabs straight up from the bottom edge of the display.

  23. iMac Intel 27" Retina 5K Display Adhesive Strip Replacement: 23 단계, 이미지 1/3 iMac Intel 27" Retina 5K Display Adhesive Strip Replacement: 23 단계, 이미지 2/3 iMac Intel 27" Retina 5K Display Adhesive Strip Replacement: 23 단계, 이미지 3/3
    • Reconnect the display power and data cables for the final time.

    • Remember to secure the metal retaining bracket on the display data cable.

  24. iMac Intel 27" Retina 5K Display Adhesive Strip Replacement: 24 단계, 이미지 1/3 iMac Intel 27" Retina 5K Display Adhesive Strip Replacement: 24 단계, 이미지 2/3 iMac Intel 27" Retina 5K Display Adhesive Strip Replacement: 24 단계, 이미지 3/3
    이 단계에 사용된 도구:
    Microfiber Cleaning Cloths
    $3.99
    구매
    • Check the glass directly in front of the webcam for dust and other contaminants. If necessary, wipe it down with a microfiber cloth before you seal up the display.

    • Steady the display with one hand as you remove the protective film in the following steps, or rest it lightly against the iMac's enclosure.

  25. iMac Intel 27" Retina 5K Display Adhesive Strip Replacement: 25 단계, 이미지 1/3 iMac Intel 27" Retina 5K Display Adhesive Strip Replacement: 25 단계, 이미지 2/3 iMac Intel 27" Retina 5K Display Adhesive Strip Replacement: 25 단계, 이미지 3/3
    • Remove one side of the protective film from the top left strip by pulling its tab straight up.

  26. iMac Intel 27" Retina 5K Display Adhesive Strip Replacement: 26 단계, 이미지 1/2 iMac Intel 27" Retina 5K Display Adhesive Strip Replacement: 26 단계, 이미지 2/2
    • Remove the other side of the protective film from the top left strip.

  27. iMac Intel 27" Retina 5K Display Adhesive Strip Replacement: 27 단계, 이미지 1/2 iMac Intel 27" Retina 5K Display Adhesive Strip Replacement: 27 단계, 이미지 2/2
    • Repeat the previous steps to remove the protective films from all the remaining adhesive strips.

  28. iMac Intel 27" Retina 5K Display Adhesive Strip Replacement: 28 단계, 이미지 1/2 iMac Intel 27" Retina 5K Display Adhesive Strip Replacement: 28 단계, 이미지 2/2
    • To ensure a strong bond, carefully tip the iMac flat on its back (with the screen facing straight up) and press carefully but firmly around all four edges of the display.

    • Remove the tape securing the display to the rear enclosure.

    • Check the display after 24 hours to make sure that it is not loose on the iMac.

결승점

다른 186명이 해당 안내서를 완성하였습니다.

Sam Goldheart

회원 가입일: 10/18/12

465,119 평판

안내서 538개 작성하였습니다

iFixit iFixit 회원

Staff

135 회원들

안내서 16,476개 작성하였습니다

댓글 24개

This guide works great. Replaced a 2015 IMAC 27" screen without any difficulty especially since I purchased the Ifixit tape kit and removal tools. Thanks guys and gals. Couldn't do it without you.

gordywat - 답글

will this work on late 2015 27"5k iMac

ffjones54 - 답글

Hello, I got a Late 2015 iMac 5K, are the stripes the same?

filmore - 답글

Yes this adhesive strip replacement kit works for the Late 2015 Retina 5K iMac. As mentioned in step 8, the tabs for strip 12 won't line up exactly the same as shown in the guide but it does not matter. It still works and will not interfere with that antenna.

smudge - 답글

댓글 쓰기

조회 통계:

24 시간 전: 19

7일 전: 93

30일 전: 444

전체 시간: 103,599