이 버전에는 잘못된 편집 사항이 있을 수 있습니다. 최신 확인된 스냅샷으로 전환하십시오.
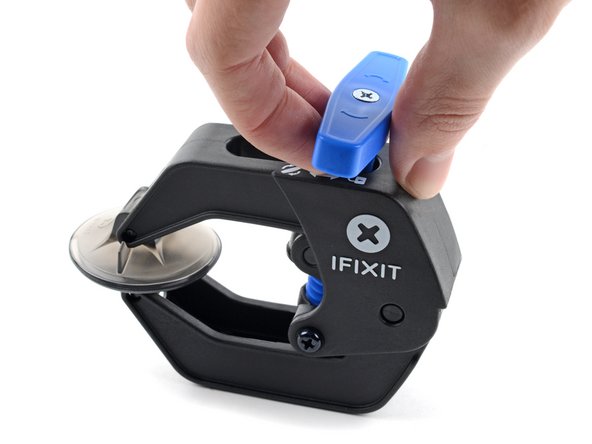
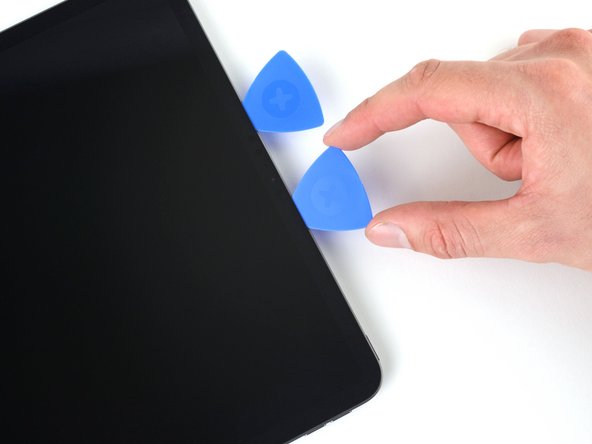
필요한 것
-
이 단계는 번역되지 않았습니다. 번역을 도와주십시오
-
Apply a heated iOpener to the right edge of the screen for two minutes.
-
-
이 단계는 번역되지 않았습니다. 번역을 도와주십시오
-
Pull the blue handle backward to unlock the Anti-Clamp's arms.
-
Place an object under your iPad so it rests level between the suction cups.
-
Position the suction cups near the middle of the right edge—one on the top, and one on the bottom.
-
Hold the bottom of the Anti-Clamp steady and firmly press down on the top cup to apply suction.
-
-
이 단계는 번역되지 않았습니다. 번역을 도와주십시오
-
Pull the blue handle forward to lock the arms.
-
Turn the handle clockwise 360 degrees or until the cups start to stretch.
-
Make sure the suction cups remain aligned with each other. If they begin to slip out of alignment, loosen the suction cups slightly and realign the arms.
-
-
이 단계는 번역되지 않았습니다. 번역을 도와주십시오
-
Wait one minute to give the adhesive a chance to release and present an opening gap.
-
If your screen isn't getting hot enough, you can use a hair dryer to heat along the right edge of the iPad.
-
Insert an opening pick under the screen when the Anti-Clamp creates a large enough gap.
-
Skip the next step.
-
-
이 단계는 번역되지 않았습니다. 번역을 도와주십시오
-
Apply a suction handle to the screen as close to the center of the right edge as possible.
-
Pull up on the suction handle with a strong, steady force to create a small gap between the frame and screen.
-
Insert an opening pick into the gap.
-
-
이 단계는 번역되지 않았습니다. 번역을 도와주십시오
-
The first magnet begins about 3 cm from the top of the iPad.
-
The second magnet begins about 3 cm from the bottom of the iPad.
-
-
이 단계는 번역되지 않았습니다. 번역을 도와주십시오
-
Slide your opening pick along the right edge of the screen to separate the adhesive.
-
Leave the pick inserted in the bottom right corner before continuing.
-
-
이 단계는 번역되지 않았습니다. 번역을 도와주십시오
-
Slide your opening pick around the bottom right corner of the screen to separate the adhesive.
-
Leave your pick in the bottom right corner to prevent the adhesive from resealing.
-
-
이 단계는 번역되지 않았습니다. 번역을 도와주십시오
-
Apply a heated iOpener to the bottom edge of the screen for two minutes.
-
-
이 단계는 번역되지 않았습니다. 번역을 도와주십시오
-
Insert a second opening pick under the bottom right corner of the screen.
-
Slide your pick to the bottom left corner to separate the bottom adhesive.
-
-
이 단계는 번역되지 않았습니다. 번역을 도와주십시오
-
Rotate your opening pick around the bottom left corner of the screen.
-
Leave your pick in the bottom left corner to prevent the adhesive from resealing.
-
-
이 단계는 번역되지 않았습니다. 번역을 도와주십시오
-
The upper cutout begins 4 cm from the top of the frame and is 3 cm long.
-
The middle cutout begins 12 cm from the top of the frame and is 3 cm long.
-
The bottom cutout is 4 cm from the bottom of the frame and is 3 cm long.
-
-
이 단계는 번역되지 않았습니다. 번역을 도와주십시오
-
Insert a third opening pick under the bottom left corner of the screen.
-
Slide your pick to the top left corner to slice the left adhesive, making sure to avoid the cutouts shown in the previous step.
-
Leave the pick inserted in the top left corner before continuing.
-
-
이 단계는 번역되지 않았습니다. 번역을 도와주십시오
-
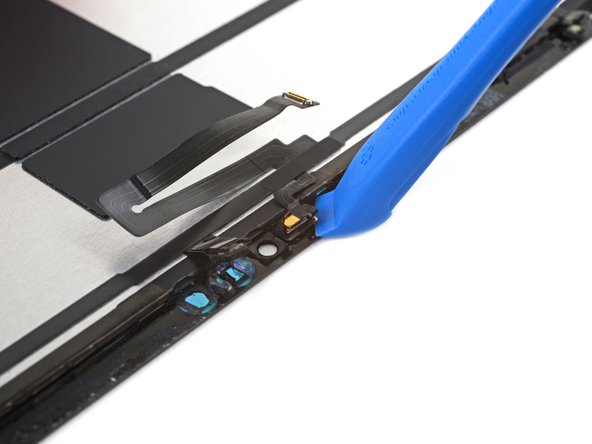
Slide your opening pick around the top left corner of the screen.
-
Leave your pick in the top left corner to prevent the adhesive from resealing.
-
-
-
이 단계는 번역되지 않았습니다. 번역을 도와주십시오
-
While the top edge adhesive softens, note the following:
-
There are two ambient light sensors near the corners. Don't insert your pick more than 1 mm here.
-
The front-facing camera and additional sensors are in the center of the top edge. Don't insert your pick here—there is less than 1 mm of adhesive and you may damage the components.
-
-
이 단계는 번역되지 않았습니다. 번역을 도와주십시오
-
Slide your opening pick 9 cm toward the top right edge, stopping just before the camera assembly.
-
Leave your pick inserted before continuing.
-
-
이 단계는 번역되지 않았습니다. 번역을 도와주십시오
-
Insert a new opening pick on the other side of the camera assembly, 4 cm from the previous pick.
-
Slide your pick to the top right corner to slice the remaining adhesive.
-
-
이 단계는 번역되지 않았습니다. 번역을 도와주십시오
-
Grab two opposing corners of the screen and lift up to separate it from the frame.
-
Shift the screen towards the bottom right corner of the frame until the ribbon cable near the top edge is uncovered.
-
-
이 단계는 번역되지 않았습니다. 번역을 도와주십시오
-
Use a Phillips screwdriver to remove the two screws securing the upper cable shield:
-
One 2.0 mm-long screw
-
One 1.8 mm-long screw
-
-
이 단계는 번역되지 않았습니다. 번역을 도와주십시오
-
Use tweezers, or your fingers, to grab and remove the upper cable shield.
-
-
이 단계는 번역되지 않았습니다. 번역을 도와주십시오
-
Use the tip of a spudger to pry up and disconnect the upper sensors press connector.
-
-
이 단계는 번역되지 않았습니다. 번역을 도와주십시오
-
Grip the right edge of the screen and open it like a book.
-
Lay the screen down over the left edge of the iPad.
-
-
이 단계는 번역되지 않았습니다. 번역을 도와주십시오
-
Use a Phillips screwdriver to remove the five screws securing the display cable bracket:
-
Four 1.1 mm-long screws
-
One 2.0 mm-long screw
-
-
이 단계는 번역되지 않았습니다. 번역을 도와주십시오
-
Use a spudger to pry up and disconnect the two top display cable press connectors.
-
-
이 단계는 번역되지 않았습니다. 번역을 도와주십시오
-
Use a spudger to pry up and disconnect the two bottom display cable press connectors.
-
-
이 단계는 번역되지 않았습니다. 번역을 도와주십시오
-
Peel back the tape from the display cable bracket located at the bottom right of the screen.
-
-
이 단계는 번역되지 않았습니다. 번역을 도와주십시오
-
Continue peeling the tape along its outer edge until the bracket is fully exposed.
-
-
이 단계는 번역되지 않았습니다. 번역을 도와주십시오
-
Use a Phillips screwdriver to remove the two 1.3 mm-long screws securing the display cable bracket.
-
-
이 단계는 번역되지 않았습니다. 번역을 도와주십시오
-
Peel off the tape connecting the display and digitizer cables.
-
-
이 단계는 번역되지 않았습니다. 번역을 도와주십시오
-
Use a spudger to pry up and disconnect the bottom display cable press connector on the screen.
-
Use tweezers to bend the bottom press connector away from the screen—exposing the top press connector.
-
-
이 단계는 번역되지 않았습니다. 번역을 도와주십시오
-
Use a spudger to pry up and disconnect the top display cable press connector on the screen.
-
-
이 단계는 번역되지 않았습니다. 번역을 도와주십시오
-
Use your fingers to peel the display cable from the screen.
-
Remove the display cable.
-
-
이 단계는 번역되지 않았습니다. 번역을 도와주십시오
-
The top sensor assembly is composed of four sensors:
-
Two ambient light sensors
-
One proximity sensor
-
One microphone
-
-
이 단계는 번역되지 않았습니다. 번역을 도와주십시오
-
Insert one arm of your angled tweezers between the ambient light sensor and the screen.
-
Pry up to separate the sensor from the screen.
-
Repeat this procedure for the other ambient light sensor.
-
-
이 단계는 번역되지 않았습니다. 번역을 도와주십시오
-
Insert one arm of your angled tweezers between the proximity sensor cable and the screen.
-
Slide the tweezers toward the screen while prying to separate the sensor from the screen.
-
-
이 단계는 번역되지 않았습니다. 번역을 도와주십시오
-
Slide an opening tool under the microphone to separate its adhesive.
-
Pry up to separate the microphone from the screen.
-
-
이 단계는 번역되지 않았습니다. 번역을 도와주십시오
-
Slide an opening pick under the top sensor assembly cable to separate it from the screen.
-
-
이 단계는 번역되지 않았습니다. 번역을 도와주십시오
-
Continue sliding your opening pick along the top sensor assembly until it's completely separated from the screen.
-
Remove the top sensor assembly.
-
-
이 단계는 번역되지 않았습니다. 번역을 도와주십시오
-
Align the top sensor assembly on your replacement screen.
-
Use Tesa tape, or similar double-sided tape, to secure the cables to the screen.
-
Use E6000 adhesive, or similar adhesive, to secure the sensors to their cutouts on the screen.
-


다른 40명이 해당 안내서를 완성하였습니다.


댓글 33개
My Face ID no longer works?
Most likely you may have damaged the flex of proximity sensor.
Check connector
Check placement with flash light make sure everything is aligned correctly
why not get a new flex cable from ebay or aliexpress
imab -
What size of that tape do you need for this iPad? Thanks
What tool do you use to restore true tone ?
I do not think there is a way without OEM Screen or serial transferring such as with iPhone X MAX screen repairs you would use
I will have to look into it when I have time for you
I have the original screen. It’s still working, the glass is just completely shattered.
Is face id working
Yes, it’s working
Thanks couldnt find a guide for the 11 and the facial id threw me off
Was working on one for the 11 but I am to busy repairing lately. But they are identical pretty
Yes it is just like phones only on the iPad Air 2&3 and the Pro Series
I forgot to turn off the power of the ipad and the LCD backlight went out. How can I fix it?
It would be a board level repair you can send out for microsoldering iPad rehab can do
Thanks for the feed back
The cable that was supposed to be reused was damaged during the swap. Where can i get a replacement?
goober2432 - 답글
what glue do you use to attach the face id flex to the new screen?
Hi Mark,
I have lost two screws and I am wondering what are the dimensions of all the screws in my iPad pro 12.9 3rd Gen so I can replace them? I don't want to put the wrong ones in because I have heard that's bad!
@rebeccaperth I might have a recycled ipad pro at my work I can sell you the screws email me at info@icarefargo.com
Question, if I rip the digitizer flex cable to the LCD. (The one with two pins) can you solder the flex cable back together?
Quick question even though it might sound stupid but could the 2021 screen work with the 2018/2020 model?
The guide doesn't show the part regarding the face ID. And it's the most sensitive one. Good guide despite that though.
Thank you for making the guide. It really helped me replace a friend's iPad Pro 12.9 4th generation cracked screen. I did it yesterday, and it only took me a whole day! 😆
I broke the display cables when prying of a badly broken screen, is it possible to buy them seperately, the ones thad did not come with the new screen?
Hi there.
Yes, we sell them! Here's the link!
The first step in the tutorial is, "Allow your iPad's battery to fully drain before starting this repair. A charged battery may catch fire if damaged during the repair."
Ok, but that's not so simple. Is there a guide to efficiently and quickly draining the battery? Something besides app-oriented drains (like watching 6 hours of videos, turning the brightness up, etc.).
Wow, this was nerve-wracking. The top 4 sensors, didn't realize they are all glued on, so pulling them off, thought I broke them. After doing my best to put it back together again (used a tiny bit of crazy glue), everything worked! Getting those tiny screws back in was difficult (mostly getting them to seat on the screwdriver). I bought the glass kit, and suggested tool kit, and clamp, but missed out on the tape (figured it was included). Also came with a sheet of outer tape, but the kit already had it assembled. So once I concluded that was the case, I just took a small strip of the new stuff and used it to "tape" down the 4 sensor array.
On the bottom left corner, I tore off a small piece of copper tape by accident. Not sure if it is functional in any way. There was another in the bottom center. Pretty much part of the black adhesive. Hopefully that doesn't create issues.
But the weirdest thing of all, my shipment literally included a single card: a king of spades. Why?!