이 안내서에는 최근 변경 사항이 더 있습니다. 최신 비검증 버전으로 전환하십시오.
소개
使用本指南更换iPad液晶显示屏。
필요한 것


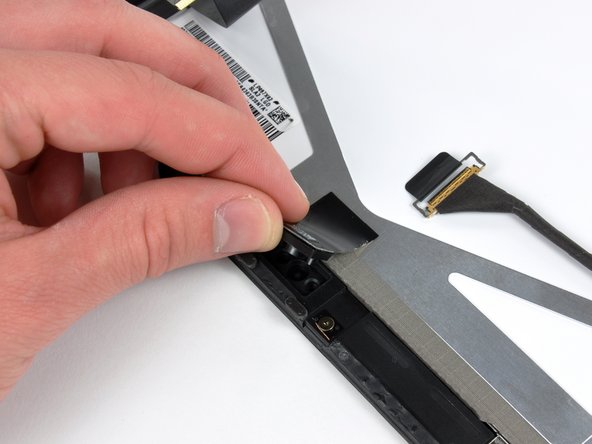


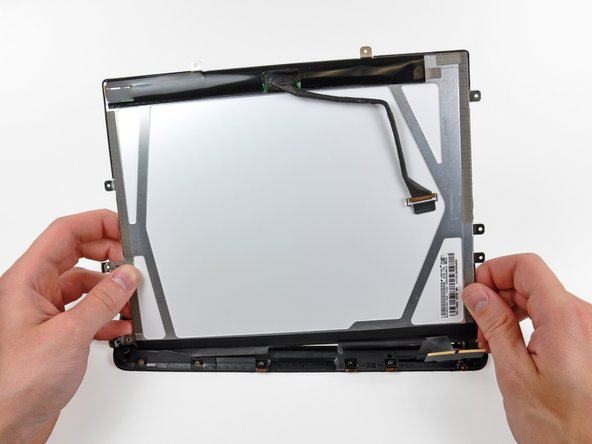


请倒序重组你的设备。
请倒序重组你的设备。
다른 79명이 해당 안내서를 완성하였습니다.

댓글 4개
So what if ive snapped off one of the retaining flaps? Ive seen in the past when ive snapped them off before i could just plug it in, slap on some kapton tape and it was fine. This time i cant get the bottom of the digitizer to work on new glass. I put on the old glass and the bottom works just fine. the bottom flap is the one that broke, but why would the old glass work just fine, but the new glass does nothing on the bottom half?
Just replaced my lcd using this guide. Not easy, but doable. Took about an hour and a half. broke about half of the clips that hold the assembly in, but moved the remaining ones around so that it is secure. I recommend buying replacement clips if you aren't comfortable with that. Also, this guide says to use a Torx T5 screwdriver. Other sites say T4. It is most definitely T5. I bought the wrong one first and had to get a new one. Home Depot has an 8 in 1 Torx tool for 6 bucks that is great. Thank you iFixit for saving me hundreds that I would have spent on a new iPad!
Don't worry about buying more replacment clips -- if you still have them on the left edge, not having the clips on the top and bottom isn't noticeable.
Styg -
When reassembling at the last step (inserting the screen assembly into the back cover), do NOT simply do the reverse of what you did to take it out. Instead, insert the right edge first (with the plastic tabs). The metal tabs on the left edge (and top and bottom edges if you have any left) are flexible, so it is very easy to snap the left edge of the screen into the back cover AFTER the right edge is in place. If you put the left edge in first, you'll have a much tougher time trying to get the plastic tabs on the right edge into back cover.