주요 콘텐츠로 건너뛰기

iPhone 4S - Charging Dock Connector & Loud Speaker and WiFi Antenna Replacement

보관된 가이드
해당 안내서는 단지 역사적인 목적으로 보관됩니다. 최신 버전 안내서를 사용하여 수리 하십시오.

필요한 것

동영상 개요

  1. iPhone 4S - Charging Dock Connector & Loud Speaker and WiFi Antenna Replacement, Dock Connector: 1 단계, 이미지 1/1
    • If present, remove the small strip of tape covering one of the dock connector screws.

  2. iPhone 4S - Charging Dock Connector & Loud Speaker and WiFi Antenna Replacement: 2 단계, 이미지 1/2 iPhone 4S - Charging Dock Connector & Loud Speaker and WiFi Antenna Replacement: 2 단계, 이미지 2/2
    • Use a plastic opening tool to flip up the retaining flap on the home button ribbon cable ZIF socket.

    • Be sure you are prying up on the hinged retaining flap, not the socket itself.

  3. iPhone 4S - Charging Dock Connector & Loud Speaker and WiFi Antenna Replacement: 3 단계, 이미지 1/1
    • Use a pair of tweezers to pull the home button ribbon cable out of its socket.

    • There are tiny components on the back side of the ribbon, so be careful not to damage them upon ribbon removal.

  4. iPhone 4S - Charging Dock Connector & Loud Speaker and WiFi Antenna Replacement: 4 단계, 이미지 1/1
    • Carefully pull the rubber microphone holder out of its tube in the bottom edge of the iPhone.

  5. iPhone 4S - Charging Dock Connector & Loud Speaker and WiFi Antenna Replacement: 5 단계, 이미지 1/1
    • Remove the two 1.3 mm Phillips screws securing the dock connector to the case of the iPhone.

  6. iPhone 4S - Charging Dock Connector & Loud Speaker and WiFi Antenna Replacement: 6 단계, 이미지 1/1
    • Remove the tiny rubber spacer near the dock connector.

  7. iPhone 4S - Charging Dock Connector & Loud Speaker and WiFi Antenna Replacement: 7 단계, 이미지 1/2 iPhone 4S - Charging Dock Connector & Loud Speaker and WiFi Antenna Replacement: 7 단계, 이미지 2/2
    • Use the edge of a plastic opening tool to peel the dock connector and its cable off the black plastic case of the iPhone.

    • If you are replacing the dock connector with a new part, make sure to transfer the rubber casing around the microphone. You can do this using a spudger.

  8. iPhone 4S - Charging Dock Connector & Loud Speaker and WiFi Antenna Replacement: 8 단계, 이미지 1/2 iPhone 4S - Charging Dock Connector & Loud Speaker and WiFi Antenna Replacement: 8 단계, 이미지 2/2
    • Pry the dock connector away from its opening at the bottom of the iPhone.

    • Remove the dock connector.

  9. iPhone 4S - Charging Dock Connector & Loud Speaker and WiFi Antenna Replacement, Speaker Enclosure: 9 단계, 이미지 1/1
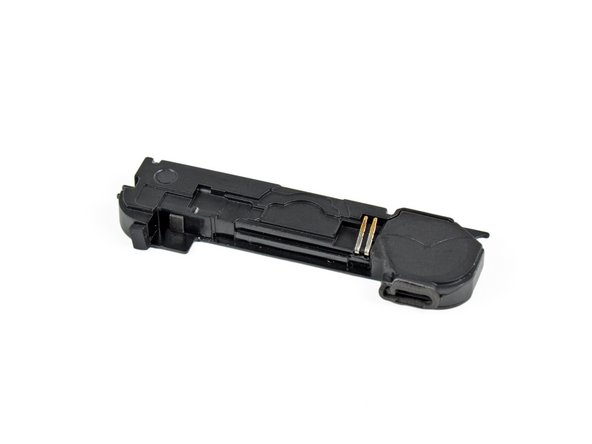
    • Speaker enclosure remains.

결론

To reassemble your device, follow these instructions in reverse order.

다른 19명이 해당 안내서를 완성하였습니다.

ZFix

회원 가입일: 12/09/13

191,182 평판

안내서 330개 작성하였습니다

Master Techs Master Techs 회원

Community

322 회원들

안내서 2,521개 작성하였습니다

댓글 0개

댓글 쓰기

조회 통계:

24 시간 전: 0

7일 전: 0

30일 전: 0

전체 시간: 10,623