주요 콘텐츠로 건너뛰기

iPhone 5c Screen Replacement

보관된 가이드
해당 안내서는 단지 역사적인 목적으로 보관됩니다. 최신 버전 안내서를 사용하여 수리 하십시오.

필요한 것

  1. iPhone 5c Screen Replacement, Taking out bottom screws: 1 단계, 이미지 1/1
    • Take out the pentolope screws from the bottom of the iPhone next to the speakers.

  2. iPhone 5c Screen Replacement, Pulling up screen: 2 단계, 이미지 1/1
    • Get suction cup and pull up.

    • Note: Use a guitar pick and pry up to lift screen easily.

  3. iPhone 5c Screen Replacement, Unplugging battery: 3 단계, 이미지 1/2 iPhone 5c Screen Replacement, Unplugging battery: 3 단계, 이미지 2/2
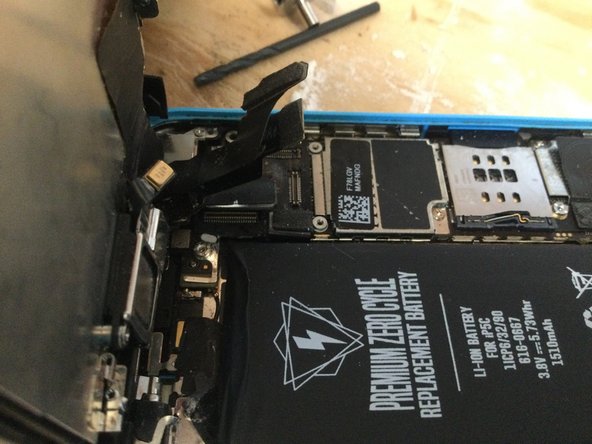
    • Unplug battery take out Phillips head screws on the cover and unplug the battery.

  4. iPhone 5c Screen Replacement, Removing shield and cables: 4 단계, 이미지 1/3 iPhone 5c Screen Replacement, Removing shield and cables: 4 단계, 이미지 2/3 iPhone 5c Screen Replacement, Removing shield and cables: 4 단계, 이미지 3/3
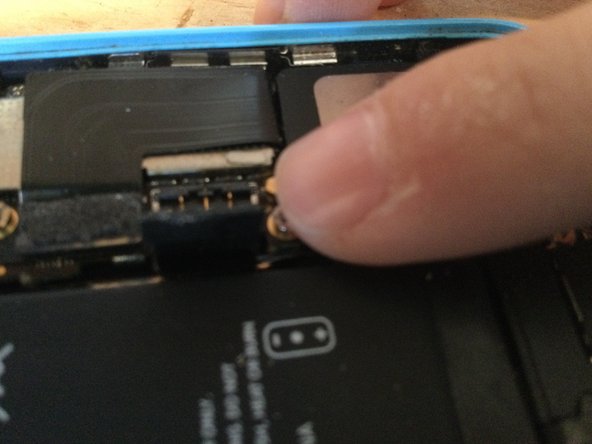
    • Take off screen cables by removing the shield with four Phillips head screws

  5. iPhone 5c Screen Replacement, Remove front facing camera and microphone: 5 단계, 이미지 1/1
    • Remove camera and micro bracket with its two Phillips head screws.

    • Note: small sticker needs to be pulled up from front facing camera.

  6. iPhone 5c Screen Replacement, Removing screen back plate: 6 단계, 이미지 1/1
    • Remove back plate with six Phillips head screws.

  7. iPhone 5c Screen Replacement, Removing home button: 7 단계, 이미지 1/2 iPhone 5c Screen Replacement, Removing home button: 7 단계, 이미지 2/2
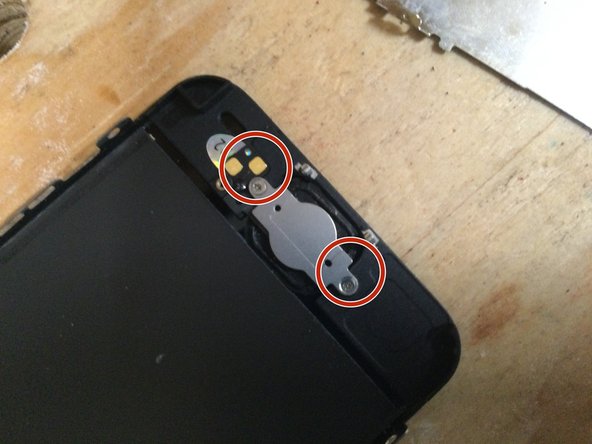
    • Remove home button bracket and take out the home button. (You may need to use a guitar pick to loosen home button adhesive).

결론

To reassemble your device, follow these instructions in reverse order.

다른 5명이 해당 안내서를 완성하였습니다.

ncstate8910

회원 가입일: 12/01/21

259 평판

안내서 1개 작성함

댓글 0개

댓글 쓰기

조회 통계:

24 시간 전: 0

7일 전: 0

30일 전: 0

전체 시간: 937