이 버전에는 잘못된 편집 사항이 있을 수 있습니다. 최신 확인된 스냅샷으로 전환하십시오.
필요한 것
-
-
분해를 시작하기 전에 iPhone 전원을 끄세요.
-
Lightning 포트 양 옆에 위치한 3.4mm Pentalobe/펜타로브/별나사 두 개를 풀어주세요.
-
-
-
이 단계는 번역되지 않았습니다. 번역을 도와주십시오
-
Remove the following Phillips screws over the camera bracket:
-
One 1.9 mm screw
-
One 2.4 mm screw
-
-
이 단계는 번역되지 않았습니다. 번역을 도와주십시오
-
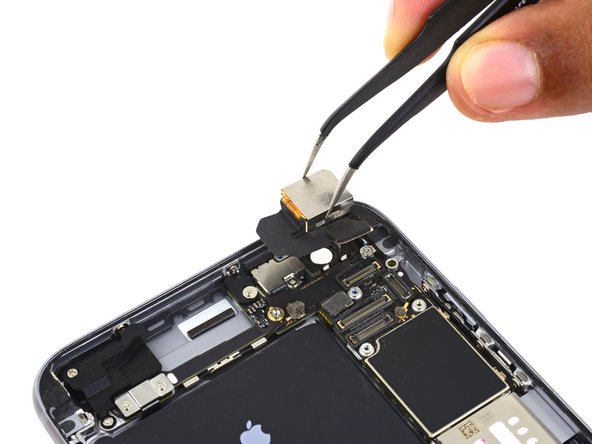
Disconnect the iSight camera connector from its socket on the logic board.
-
-
이 단계는 번역되지 않았습니다. 번역을 도와주십시오
-
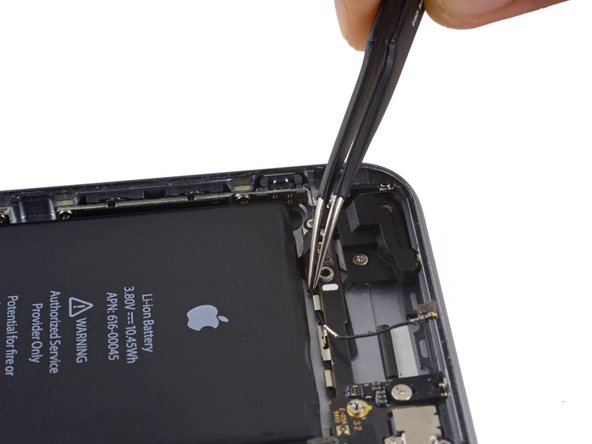
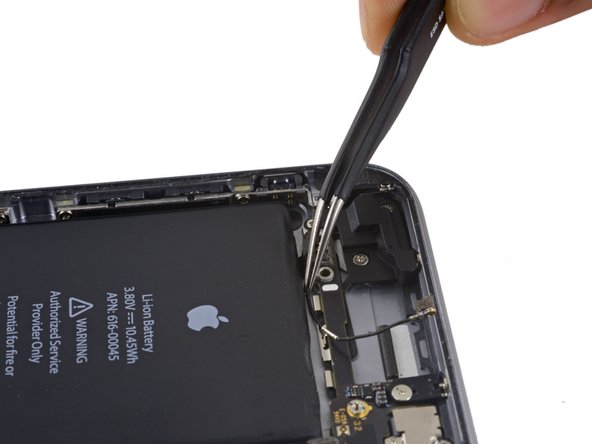
Insert the flat end of the spudger between the iSight camera and rear casing.
-
Gently pry the camera out from its housing.
-
-
이 단계는 번역되지 않았습니다. 번역을 도와주십시오
-
Insert a SIM eject tool into the hole in the SIM tray.
-
Press to eject the SIM tray.
-
-
이 단계는 번역되지 않았습니다. 번역을 도와주십시오
-
Remove the single 1.4 mm Phillips screw holding the NFC bracket in place.
-
-
이 단계는 번역되지 않았습니다. 번역을 도와주십시오
-
Remove the two 2.7 mm Phillips screws securing the audio control cable bracket to the logic board.
-
-
이 단계는 번역되지 않았습니다. 번역을 도와주십시오
-
Disconnect the audio control cable by prying its connector straight up from its socket on the logic board.
-
-
이 단계는 번역되지 않았습니다. 번역을 도와주십시오
-
Disconnect the cellular antenna cable by prying its connector straight up from its respective socket on the logic board.
-
-
이 단계는 번역되지 않았습니다. 번역을 도와주십시오
-
Disconnect the Wi-Fi diversity antenna cable by prying its connector up from the logic board.
-
-
이 단계는 번역되지 않았습니다. 번역을 도와주십시오
-
Disconnect the power button flex cable from its socket on the logic board.
-
-
이 단계는 번역되지 않았습니다. 번역을 도와주십시오
-
Use the flat end of a spudger to disconnect the Lightning connector flex cable from the logic board.
-
-
이 단계는 번역되지 않았습니다. 번역을 도와주십시오
-
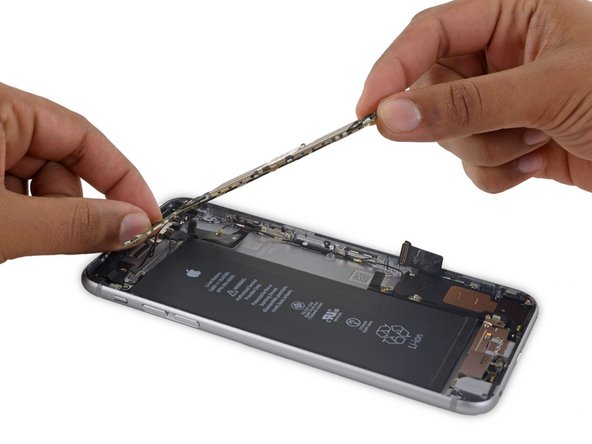
Deroute the antenna cable from the two clips on the right edge of the logic board.
-
-
이 단계는 번역되지 않았습니다. 번역을 도와주십시오
-
Remove the following screws:
-
One 1.3 mm Phillips screw
-
One 2.6 mm Phillips screw
-
One 2.2 mm standoff screw
-
-
이 단계는 번역되지 않았습니다. 번역을 도와주십시오
-
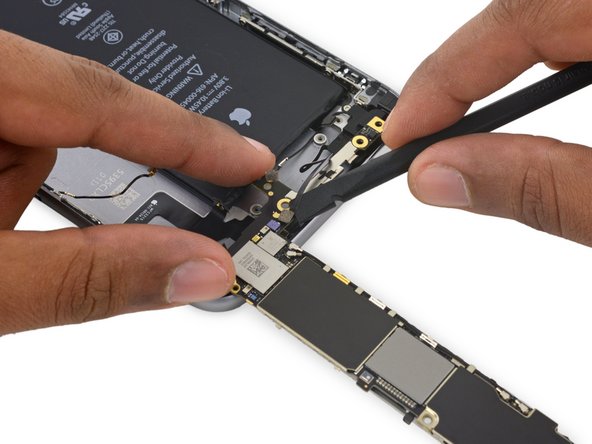
Deroute the upper left cellular antenna cable from the first logic board clip by nudging it out from under the clip, towards the battery.
-
-
이 단계는 번역되지 않았습니다. 번역을 도와주십시오
-
Continue derouting the cellular antenna cable from the second and third logic board clips.
-
Use the pointed tip of a spudger to gently pry the cellular antenna cable from the middle logic board clip.
-
-
이 단계는 번역되지 않았습니다. 번역을 도와주십시오
-
Remove the final 2.0 mm Phillips screw directly below the SIM card reader.
-
-
이 단계는 번역되지 않았습니다. 번역을 도와주십시오
-
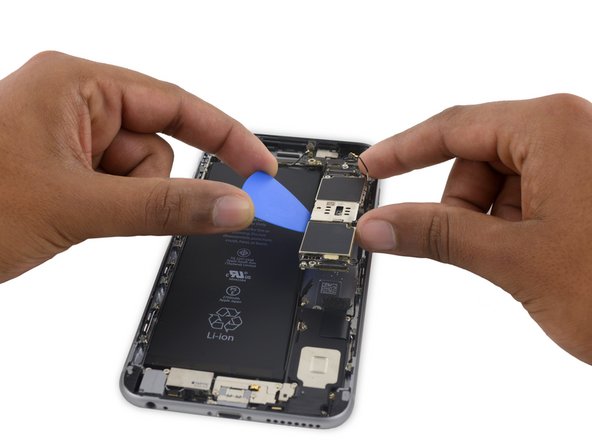
Carefully raise—but do not remove—the logic board, lifting it from the bottom edge nearest the Lightning connector.
-
-
이 단계는 번역되지 않았습니다. 번역을 도와주십시오
-
Tip the logic board up to a vertical position to expose the single antenna connector on the underside, near the top edge of the board.
-
-
이 단계는 번역되지 않았습니다. 번역을 도와주십시오
-
Gently lay the logic board upside-down, with the top portion resting against the rear case of the iPhone.
-
Use the flat end of the spudger to disconnect the Wi-Fi/Bluetooth antenna cable from its socket on the back of the logic board.
-
-
이 단계는 번역되지 않았습니다. 번역을 도와주십시오
-
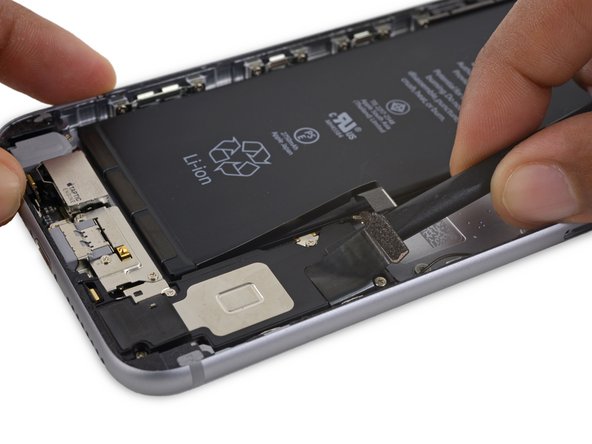
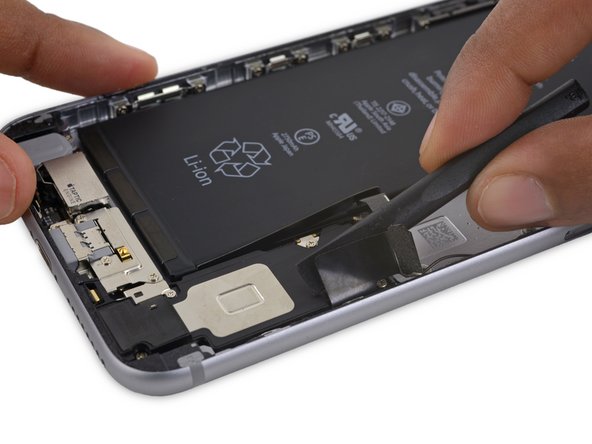
Use the flat end of a spudger to peel the Lightning connector flex cable off the speaker.
-
-
이 단계는 번역되지 않았습니다. 번역을 도와주십시오
-
Remove the following three Phillips screws from the Taptic Engine cable bracket:
-
Two 3.5 mm screws
-
One 2.7 mm screw
-
Remove the bracket.
-
-
이 단계는 번역되지 않았습니다. 번역을 도와주십시오
-
Remove the five Phillips screws securing the speaker to the rear case:
-
Two 2.7 mm screws
-
One 2.5 mm screw
-
One 1.5 mm screw
-
One 1.7 mm screw
-
-
이 단계는 번역되지 않았습니다. 번역을 도와주십시오
-
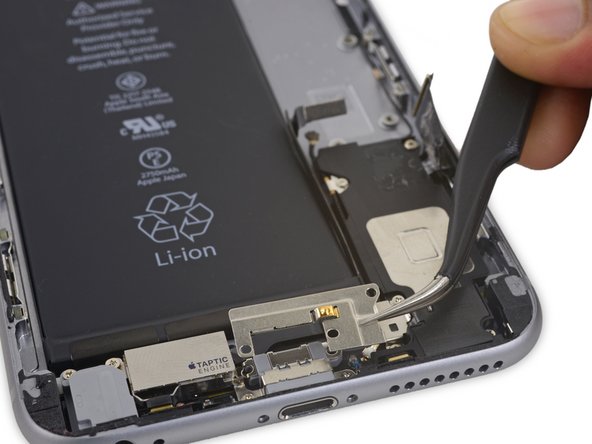
Deroute the Wi-Fi diversity antenna cable from its rubber sleeve.
-
If the white water damage indicator sticker makes it difficult to deroute the antenna cable, gently peel the sticker back for better access.
-
-
이 단계는 번역되지 않았습니다. 번역을 도와주십시오
-
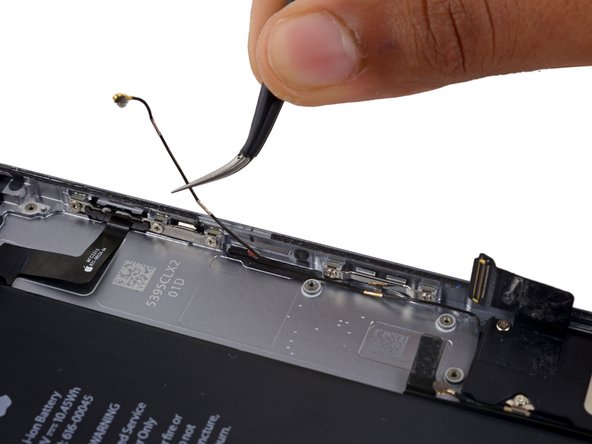
Use a pair of tweezers to disconnect the Wi-Fi diversity antenna cable from the Lightning connector flex cable.
-
-
이 단계는 번역되지 않았습니다. 번역을 도와주십시오
-
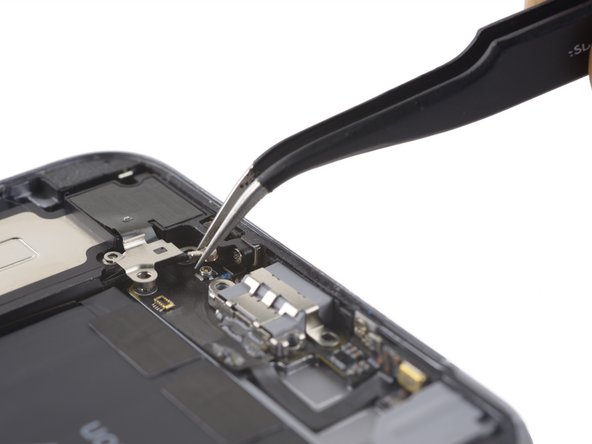
Remove the final 2.6 mm Phillips screw securing the speaker to the rear case.
-
-
이 단계는 번역되지 않았습니다. 번역을 도와주십시오
-
Use the flat end of a spudger to lift the speaker assembly out of its housing.
-
Remove the speaker assembly.
-