소개
This guide shows how to remove the iPod Video's case.
필요한 것
-
-
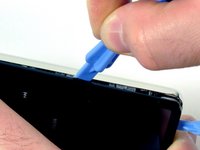
Insert the iPod opening tool into the left side of the iPod, with the edge of the tool pointing towards the metal back.
-
A small guitar pick can be extremely helpful in opening the iPod. Simply insert it and slide the pick around the case to free the clips to streamline the process.
-
Gently enlarge the existing crevice by wiggling the iPod opening tool and moving it to the left.
-
Continue doing so until the entire side of the iPod is loose.
-
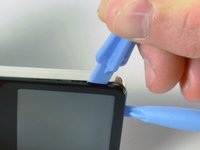
You can then insert an iPod opening tool to the right of the Hold button. Be very careful while inserting the tool, as the display is very fragile.
-
-
-
-
Gently glide the iPod opening tool on the top of the display, making sure to free the retaining clips.
-
The other sides of the iPod should now easily come loose. If they do not, use iPod opening tools on the right side of the iPod in the same way as on the left side of the iPod.
-
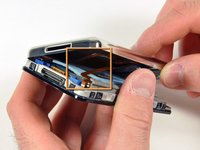
Separate the front of the iPod from the back about an inch (or a couple of centimeters).
-
-
이 단계에 사용된 도구:Tweezers$3.99
-
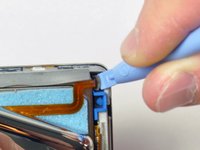
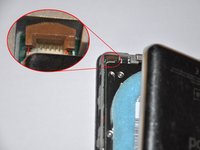
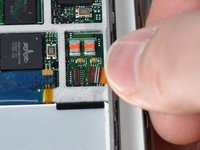
Use angled tweezers or an iPod opening tool to slide up the brown connector latch, holding the orange battery ribbon cable in place. Make sure you pull from both sides of the latch. You only need to lift the brown connector latch up about 1-2mm to free the cable. Do not lift more or remove the latch, or you might pull the white connector with it!
-
Remove the cable from the connector.
-


To reassemble your device, follow these instructions in reverse order.
다른 2명이 해당 안내서를 완성하였습니다.

1가이드 댓글
If you are careful keeping the two halves close to each other, you can skip step 9. Reconnecting these ribbon cables is the most delicate part of the process.