주요 콘텐츠로 건너뛰기

iPod 5th Generation (Video) Hard Drive Replacement with a CF or SDHC/SDXC Memory Card

필요한 것

  1. iPod 5th Generation (Video) Hard Drive Replacement with a CF or SDHC/SDXC Memory Card, Case: 1 단계, 이미지 1/1
    • Before opening your iPod, ensure that the hold switch is in the locked position. The slider should be all the way to the right if your iPod is facing you.

  2. iPod 5th Generation (Video) Hard Drive Replacement with a CF or SDHC/SDXC Memory Card: 2 단계, 이미지 1/1
    • Opening the iPod can be challenging. Do not get discouraged if it takes you a few tries before the iPod is opened.

    • Free the first retainer clip on the bottom of the iPod using the iPod opening tool. The tool's edge should point towards the metal back case to prevent scratching the plastic front.

  3. iPod 5th Generation (Video) Hard Drive Replacement with a CF or SDHC/SDXC Memory Card: 3 단계, 이미지 1/1
    • Use this photo of the OPENED iPod for the reference, in order to locate the areas where the retaining clips are - 4 per side, one on top and two at the bottom. It should save you a lot of frustration and help avoid scratching the plastic cover.

  4. iPod 5th Generation (Video) Hard Drive Replacement with a CF or SDHC/SDXC Memory Card: 4 단계, 이미지 1/3 iPod 5th Generation (Video) Hard Drive Replacement with a CF or SDHC/SDXC Memory Card: 4 단계, 이미지 2/3 iPod 5th Generation (Video) Hard Drive Replacement with a CF or SDHC/SDXC Memory Card: 4 단계, 이미지 3/3
    • There are four retaining clips on each side of the iPod. An iPod opening tool will be used to separate the plastic front from the metal back of the iPod.

    • Insert the iPod opening tool into the left side of the iPod, with the edge of the tool pointing towards the metal back.

    • A small guitar pick can be extremely helpful in opening the iPod. Simply insert it and slide the pick around the case to free the clips to streamline the process.

    • Gently enlarge the existing crevice by wiggling the iPod opening tool and moving it to the left.

    • Continue doing so until the entire side of the iPod is loose.

    • You can then insert an iPod opening tool to the right of the Hold button. Be very careful while inserting the tool, as the display is very fragile.

  5. iPod 5th Generation (Video) Hard Drive Replacement with a CF or SDHC/SDXC Memory Card: 5 단계, 이미지 1/2 iPod 5th Generation (Video) Hard Drive Replacement with a CF or SDHC/SDXC Memory Card: 5 단계, 이미지 2/2
    • Gently glide the iPod opening tool on the top of the display, making sure to free the retaining clips.

    • The other sides of the iPod should now easily come loose. If they do not, use iPod opening tools on the right side of the iPod in the same way as on the left side of the iPod.

    • Separate the front of the iPod from the back about an inch (or a couple of centimeters).

    • The iPod casing is now open, but don't completely separate the two halves just yet. Two ribbon cables are still connecting the back panel to the rest of the iPod.

  6. iPod 5th Generation (Video) Hard Drive Replacement with a CF or SDHC/SDXC Memory Card: 6 단계, 이미지 1/2 iPod 5th Generation (Video) Hard Drive Replacement with a CF or SDHC/SDXC Memory Card: 6 단계, 이미지 2/2
    • Use angled tweezers or an iPod opening tool to slide up the brown connector latch, holding the orange battery ribbon cable in place. Make sure you pull from both sides of the latch. You only need to lift the brown connector latch up about 1-2mm to free the cable. Do not lift more or remove the latch, or you might pull the white connector with it!

    • Don't lift up too far or you could pull the battery connector out of the logic board.

    • Make sure to slide the brown connector directly upwards. The connector is frail and will break if it is accidentally shifted to the side. The connector has hooks at the bottom to hold the cable in place. As soon as you break one of the arms you will have problems putting the battery cable back on. If it breaks put the cable in the slot and then push the brown holder in place to keep the cable from slipping out.

    • Remove the cable from the connector.

  7. iPod 5th Generation (Video) Hard Drive Replacement with a CF or SDHC/SDXC Memory Card: 7 단계, 이미지 1/1
    • You should now have one orange ribbon cable still attaching the front case to the back.

    • At this point you are able to remove and replace the blue rubber bumpers, or continue with separating the case.

    • Separating the case is not necessary to complete battery replacement but may facilitate ease of replacement. It does require removing an extra cable at some risk of damage during removal.

  8. iPod 5th Generation (Video) Hard Drive Replacement with a CF or SDHC/SDXC Memory Card: 8 단계, 이미지 1/1
    • Lift up the hard drive to expose the headphone jack ribbon connector (indicated by the yellow box).

    • If the hard drive bumpers come loose, make sure to put them back with the notch as shown in the picture.

  9. iPod 5th Generation (Video) Hard Drive Replacement with a CF or SDHC/SDXC Memory Card: 9 단계, 이미지 1/2 iPod 5th Generation (Video) Hard Drive Replacement with a CF or SDHC/SDXC Memory Card: 9 단계, 이미지 2/2
    • With the iPod opening tool, gently lift the brown tab of the headphone ribbon cable connector. The tab will rotate up 90 degrees, releasing the ribbon cable.

    • Using your fingers, pull out the headphone jack ribbon cable.

  10. iPod 5th Generation (Video) Hard Drive Replacement with a CF or SDHC/SDXC Memory Card: 10 단계, 이미지 1/1
    • The front and back of the iPod should now be completely separated.

  11. iPod 5th Generation (Video) Hard Drive Replacement with a CF or SDHC/SDXC Memory Card, Hard Drive: 11 단계, 이미지 1/2 iPod 5th Generation (Video) Hard Drive Replacement with a CF or SDHC/SDXC Memory Card, Hard Drive: 11 단계, 이미지 2/2
    • Use a small iPod opening tool to release the black hinge holding the hard drive ribbon cable. The tab will rotate up 90 degrees towards the logic board, releasing the ribbon cable.

    • Use your forefinger to hold the ribbon cable in place; disconnect the drive from the ribbon cable.

    • Make sure the hard drive rubber side bumpers are attached to the drive being installed. Use the hard drive rubber side bumper installation guide to accomplish this task.

    • If necessary, the blue foam padding on the hard drive might also need to be transferred to the replacement drive.

  12. iPod 5th Generation (Video) Hard Drive Replacement with a CF or SDHC/SDXC Memory Card, CF or SDHC/SDXC Memory instead of HDD: 12 단계, 이미지 1/3 iPod 5th Generation (Video) Hard Drive Replacement with a CF or SDHC/SDXC Memory Card, CF or SDHC/SDXC Memory instead of HDD: 12 단계, 이미지 2/3 iPod 5th Generation (Video) Hard Drive Replacement with a CF or SDHC/SDXC Memory Card, CF or SDHC/SDXC Memory instead of HDD: 12 단계, 이미지 3/3
    • Now connect the ZIF to CF converter to the iPod's ZIF ribbon cable. You can also use a SD - CF adapter but not all will work.

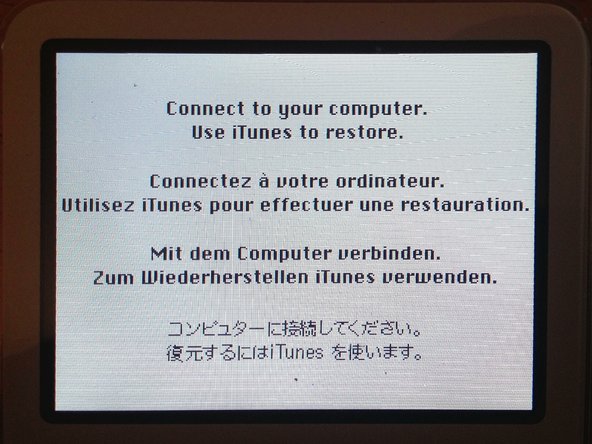
    • After reassembly you have to restore the iPod with iTunes.

결론

To reassemble your device, follow these instructions in reverse order.

다른 82명이 해당 안내서를 완성하였습니다.

Tsutomu Niimi

회원 가입일: 11/22/11

1,430 평판

안내서 1개 작성함

댓글 20개

I bought this CF to SD converter http://www.amazon.com/gp/product/B000YZG...

and it won't fit in a 30gb model.. just FYI for people who were thinking about doing this install with an SD converter. I might still look for another one, but might wait till CF goes down in price.. or for the ice age.

Tony - 답글

@tony - had the same problem initially - then realised that you can dismantle the SD to CF adapter to make it much thinner. See this video for instructions: http://vimeo.com/30075882

Chris Bailey - 답글

I was succcessful using the following parts in my 60GB iPod 5G

http://www.amazon.com/Card-1-8-inch-Adap...

http://www.amazon.com/Digigear-SDXCF-Ext...

Used a 64gb Sandisk Micro SD (in a regular SD adapter), and it restored through iTunes no problem

Jeff Nixon - 답글

I’m used the same 64gb card,but it did not work.The ipod still in the Apple logo.Could you give me some ideals,thank you.

Lee Haruki -

1. I had an 80gb 5th gen ipod classic. i upgraded my ipod to a 128gb SD which worked without issue (i’m not sure what the limitations are but my ipod came up saying it was a 128gb ipod).

2. I used the following parts:

a. Micro SATA Cables CF Card to 1.8 inch ZIF Adapter for IPOD

b. Optimal Shop SD CF Card Adapter Wireless WiFi SD MMC SDHC SDXC Slot to CF Type I Compact Flash Memory CF Card Adapter High Speed for SLR Camera

c. SanDisk 128GB Ultra UHS-I Class 10 SDXC Memory Card, Black, Standard Packaging (SDSDUNC-128G-GN6IN)

3. I bought the following tools Warmstor 21 Pieces Premium Opening Pry Tool Screwdriver Set Repair Kit for… but only used the flat head screw driver and GB-5A opening tool.

dstanis280 -

댓글 쓰기

조회 통계:

24 시간 전: 21

7일 전: 231

30일 전: 976

전체 시간: 119,578