소개
Use this guide to replace your Nano's front panel assembly. A new front panel assembly will provide a new front glass panel, digitizer, and LCD. The LCD is non-separable from the digitizer.
필요한 것
-
-
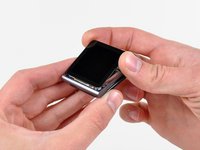
Use a heat gun or hair dryer to soften the adhesive securing the perimeter of the front panel assembly to the outer case.
-
-
-
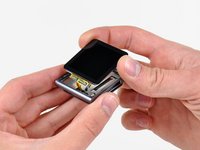
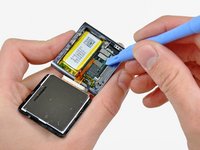
While the front panel is still warm, use the edge of an opening tool to pry it from the headphone jack side of the front panel assembly out of the Nano.
-
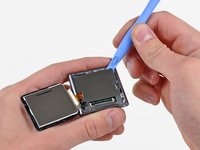
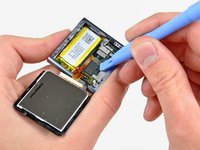
Continue prying the perimeter of the front panel assembly out of the outer casing, being careful not to damage the display data cable held under its left edge.
-
-


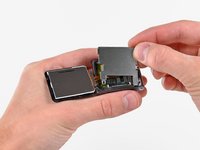


To reassemble your device, follow these instructions in reverse order.
다른 120명이 해당 안내서를 완성하였습니다.

10가이드 댓글
Don't forget to include in your repair the adhesive to hold the new screen on. It does not come with the new display. I as unable to find it at iFixit's site but was able to get it here for $10 incl p&p: http://www.badgizmorepair.com/product/ip...
By the time I paid for the screen, opening tool and glue it turned out to be more economical and less hassle to take it to the Apple store (albeit less satisfying than doing it yourself). I suggest you forego the opening tool if you have a good flat blade jewelers screwdriver. A fine temporary fix for not having the correct screen glue is a piece of packing tape. It leaves the iPod open to the elements though, so I highly recommend the correct glue in order to avoid water leaking in around the edge of the screen.
You will also need a very small jewellers or electronics screwdriver for the two screws. I just managed it with an oversized flathead driver.
dmcgleenan - 답글
i had bought these part and succeeded in repair my drown ipod using these guides (luckily only the lcd that didnt work). and it work nicely. thanks
bubba12250 - 답글
Thanks for the guide. Very useful and easy to follow.
Had some issues with getting the screen off initially, but that was due to the glass along the headphone jack side being cracked into several small little shards (hence the reason for following the guide ;)
Used a replacement screen (incl. toolkit and replacement precut adhesive) that I purchased from ebay for around US$10 (free shipping).