주요 콘텐츠로 건너뛰기

iPod Touch 2nd Generation Display Replacement

보관된 가이드
해당 안내서는 단지 역사적인 목적으로 보관됩니다. 최신 버전 안내서를 사용하여 수리 하십시오.

필요한 것

  1. 주의: 1-4 단계들은 진행 중으로 표시된 안내서에서 제공되었습니다.

    iPod Touch 2nd Generation Display Replacement, Front Panel: 1 단계, 이미지 1/2 iPod Touch 2nd Generation Display Replacement, Front Panel: 1 단계, 이미지 2/2
    • Wedge the PX 3688 plastic opening tool between the glass front panel and the plastic frame. Start near the top where the volume control buttons are located and stay on one side of iPod.

    • Turn the tool in a hinge-like rotation away from the iPod and pry the glass panel out of its case.

    • Be careful to work at a slow and gentle pace. Avoid breaking anything inside the iPod, especially the screen.

  2. iPod Touch 2nd Generation Display Replacement: 2 단계, 이미지 1/1
    • Make sure not to slide the tool along the edge once you’ve managed to wedge it between the screen and panel. Repeat the process of prying the tool into a point along one of the edges and remove the tool to insert it at another point.

  3. iPod Touch 2nd Generation Display Replacement: 3 단계, 이미지 1/2 iPod Touch 2nd Generation Display Replacement: 3 단계, 이미지 2/2
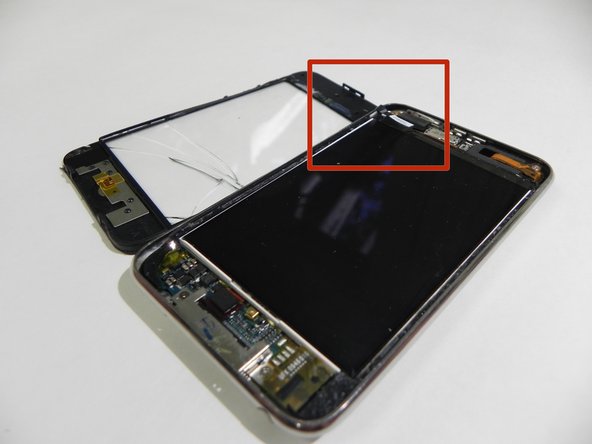
    • Work your way around the iPod, prying the front panel up, until it is completely separated from the clips.

    • Lift the front panel out of the bottom case.

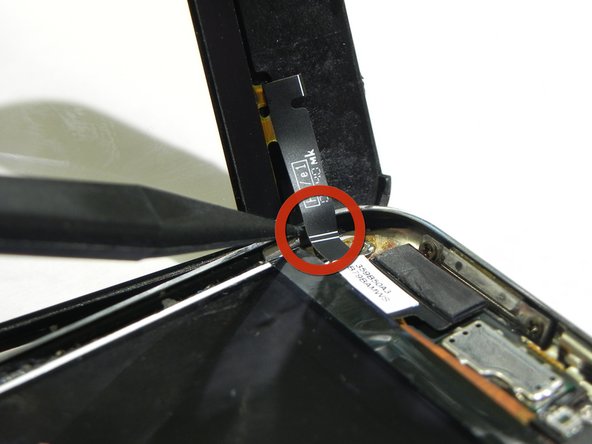
    • Be careful not to damage the touch screen connector cable still attached near the upper left corner of the iPod.

  4. iPod Touch 2nd Generation Display Replacement: 4 단계, 이미지 1/1
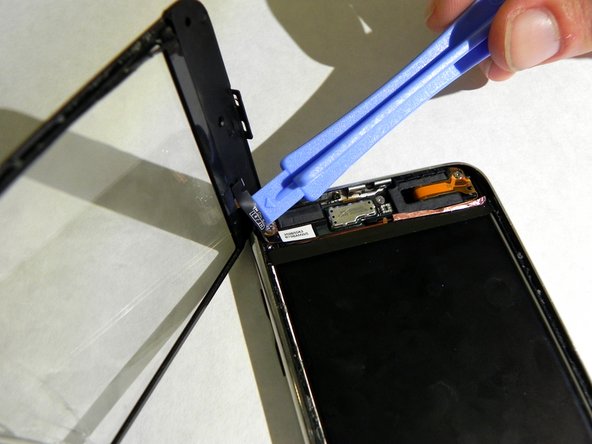
    • Using the PX 3688, pry the touch screen cable connector off the top logic board.

    • Check the front panel for any damage. Be careful not to scratch the front panel on the underside of the black portions.

    • Clean the face of the display and the inner face of the front panel.

  5. iPod Touch 2nd Generation Display Replacement, Display: 5 단계, 이미지 1/1
    • Remove the Phillips screw in the top left corner attaching the metal tray to the rear panel.

  6. iPod Touch 2nd Generation Display Replacement: 6 단계, 이미지 1/2 iPod Touch 2nd Generation Display Replacement: 6 단계, 이미지 2/2
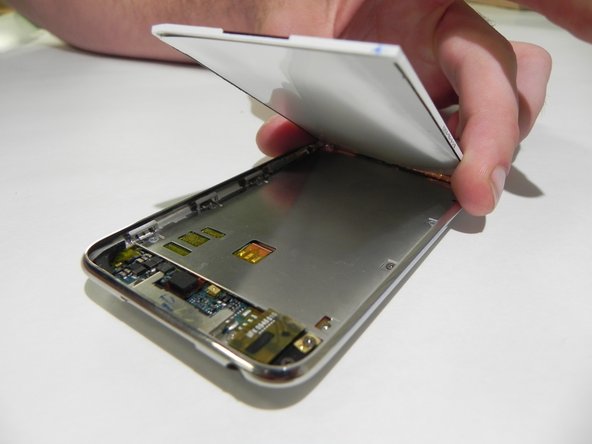
    • Insert a PX 3688 plastic opening tool with the edge angled up, toward the underside of the display, between the white plastic backlight and the metal beneath it.

    • Pry the lower edge of the display up until it's at about a 45 degree angle with the rest of the iPod.

    • Hold the display in this position with one hand for the next step to avoid damaging the display ribbon cable.

  7. iPod Touch 2nd Generation Display Replacement: 7 단계, 이미지 1/1
    • Remove the seven Phillips screws securing the metal display tray to the rear panel with a Phillips #00 screwdriver.

    • Keep track of the screws for reassembly. The two darker screws belong in the holes in the tray nearest the bottom edge.

  8. iPod Touch 2nd Generation Display Replacement: 8 단계, 이미지 1/1
    • Place the display back in the metal display tray.

    • Use a PX 3688 plastic opening tool to peel the copper tape off the top edge of the display.

    • Do not peel off the copper tape that is attached to the metal display tray.

  9. iPod Touch 2nd Generation Display Replacement: 9 단계, 이미지 1/1
    • Lift the bottom of the display and rotate it towards the top edge of the iPod.

    • Use the spudger tool to lift the metal display tray and rotate it toward the top edge of the iPod on top of the display.

  10. iPod Touch 2nd Generation Display Replacement: 10 단계, 이미지 1/1
    • Use a spudger tool to pry the display cable connector off its socket on the logic board.

    • The logic board is beneath where the Home button used to be.

  11. iPod Touch 2nd Generation Display Replacement: 11 단계, 이미지 1/2 iPod Touch 2nd Generation Display Replacement: 11 단계, 이미지 2/2
    • Lift the metal tray slightly (the battery is attached to the underside) and remove the display from the iPod.

    • Make sure the delicate cable is not caught. The display ribbon is under the metal display tray.

결론

Now your replacement screen is on. Just follow these instructions in reverse to reassemble!

다른 2명이 해당 안내서를 완성하였습니다.

Shannon Murphy

회원 가입일: 04/05/12

681 평판

안내서 3개 작성하였습니다

Cal Poly, Team 15-16, Forte Spring 2012 Cal Poly, Team 15-16, Forte Spring 2012 회원

CPSU-FORTE-S12S15G16

5 회원들

안내서 3개 작성하였습니다

댓글 0개

댓글 쓰기

조회 통계:

24 시간 전: 0

7일 전: 1

30일 전: 1

전체 시간: 1,498