주요 콘텐츠로 건너뛰기

iRobot Roomba 4100 Main Brush Replacement

  1. iRobot Roomba 4100 Main Brush Replacement, Brush Guard: 1 단계, 이미지 1개 중 1개
    • Lay the Roomba upside down on a flat surface with the blue strip away from you.

  2. iRobot Roomba 4100 Main Brush Replacement: 2 단계, 이미지 2개 중 1개 iRobot Roomba 4100 Main Brush Replacement: 2 단계, 이미지 2개 중 2개
    • Use your index fingers to pull the yellow tabs towards you.

    • While still pulling the yellow tabs with your index fingers, tilt up the brush guard.

    • For reassembly, make sure to push in the brush guard until it clicks into place.

  3. iRobot Roomba 4100 Main Brush Replacement: 3 단계, 이미지 1개 중 1개
    • Pull back the brush guard to unhook it from the latches.

    • Remove the brush guard by lifting it up and out of the Roomba.

    • This picture has a change in orientation to illustrate the latches. Continue disassembling the Roomba with the blue strip away from you.

  4. iRobot Roomba 4100 Main Brush Replacement, Main Brush: 4 단계, 이미지 1개 중 1개
    • Set the brush guard aside.

    • The main brush is the bristly one that is closest to the blue strip.

  5. iRobot Roomba 4100 Main Brush Replacement: 5 단계, 이미지 2개 중 1개 iRobot Roomba 4100 Main Brush Replacement: 5 단계, 이미지 2개 중 2개
    • Remove the main brush by grabbing it and pulling it up and out of the Roomba.

    • For reassembly, orient the Roomba with the battery closest to you:

    • First, insert the black end of the main brush into the black square opening on the right side.

    • Second, lay the main brush back into place.

결론

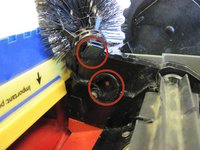
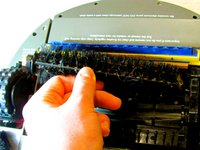
To reassemble your device, follow these instructions in reverse order.

작성자

4다른 기여자 명과 함께

Samantha Barrett

회원 가입일: 01/13/14

501 평판

안내서 5개를 작성함

Cal Poly, Team 17-5, Forte Winter 2014 Cal Poly, Team 17-5, Forte Winter 2014 회원

CPSU-FORTE-W14S17G5

5 회원들

안내서 6개를 작성함

댓글 0개

댓글 쓰기

조회 통계:

지난 24시간: 3

지난 7일: 13

지난 30일: 17

전체 시간: 836