주요 콘텐츠로 건너뛰기

iRobot Roomba 551 Faceplate Replacement

필요한 것

  1. iRobot Roomba 551 Faceplate Replacement, Side Brush: 1 단계, 이미지 1/1
    • Place your Roomba upside-down on a hard surface.

    If all you need off is the faceplate, skip all of the screwdriver-based steps, and just remove the dirt bin(step 7) and start from step 11 at the rear.

    David Forrest - 답글

  2. iRobot Roomba 551 Faceplate Replacement: 2 단계, 이미지 1/1
    • While holding the side brush in place, use a Phillips #1 screwdriver to remove the 4.5mm screw from the center of the brush.

  3. iRobot Roomba 551 Faceplate Replacement: 3 단계, 이미지 1/1
    • Gently pull upwards on the brush to remove it.

  4. iRobot Roomba 551 Faceplate Replacement, Bottom Plate: 4 단계, 이미지 1/1
    • Rotate the Roomba upside-down so the bottom is facing towards you.

  5. iRobot Roomba 551 Faceplate Replacement: 5 단계, 이미지 1/2 iRobot Roomba 551 Faceplate Replacement: 5 단계, 이미지 2/2
    • Using a Phillips #2 screwdriver, remove the captive screws that hold the bottom plate in place.

  6. iRobot Roomba 551 Faceplate Replacement: 6 단계, 이미지 1/1
    • Carefully lift the bottom plate.

    • The battery is only secured in place by the bottom plate, and may fall out once the bottom plate is removed.

  7. iRobot Roomba 551 Faceplate Replacement, iRobot Roomba 551 Dirt Bin Replacement: 7 단계, 이미지 1/1
    • Push on the dirt bin release button, and pull gently.

    Might as well do this first, so you don’t dump dirt everywhere when flipping Roomba over.

    maccentric - 답글

  8. iRobot Roomba 551 Faceplate Replacement, Bumper: 8 단계, 이미지 1/3 iRobot Roomba 551 Faceplate Replacement, Bumper: 8 단계, 이미지 2/3 iRobot Roomba 551 Faceplate Replacement, Bumper: 8 단계, 이미지 3/3
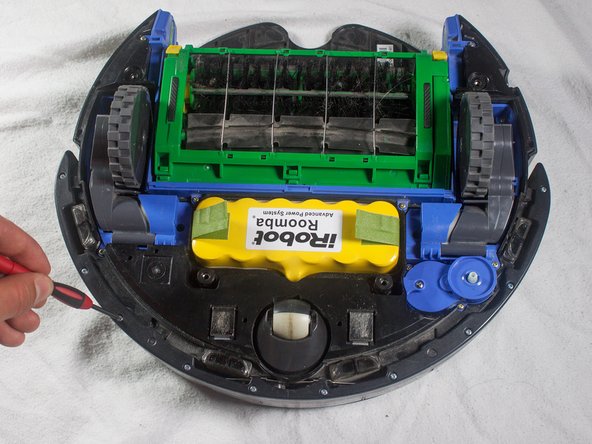
    • With a Phillips #1 screwdriver, remove the ten 12mm screws located along the bottom of the bumper.

  9. iRobot Roomba 551 Faceplate Replacement: 9 단계, 이미지 1/1
    • Lift the bottom cover and set it to the side.

  10. iRobot Roomba 551 Faceplate Replacement: 10 단계, 이미지 1/2 iRobot Roomba 551 Faceplate Replacement: 10 단계, 이미지 2/2
    • Flip the Roomba over, grasp the bumper, and gently lift to remove.

    • The battery is not secured in place once the bottom plate has been removed, and may fall out when the Roomba is turned right-side up.

  11. iRobot Roomba 551 Faceplate Replacement, Faceplate: 11 단계, 이미지 1/3 iRobot Roomba 551 Faceplate Replacement, Faceplate: 11 단계, 이미지 2/3 iRobot Roomba 551 Faceplate Replacement, Faceplate: 11 단계, 이미지 3/3
    • Pull up on the front of the faceplate until the friction locks pop out of place.

  12. iRobot Roomba 551 Faceplate Replacement: 12 단계, 이미지 1/2 iRobot Roomba 551 Faceplate Replacement: 12 단계, 이미지 2/2
    • Continue around the outside of the Roomba, pulling up on the faceplate to free all of the outer friction locks.

  13. iRobot Roomba 551 Faceplate Replacement: 13 단계, 이미지 1/2 iRobot Roomba 551 Faceplate Replacement: 13 단계, 이미지 2/2
    • Grab the faceplate by the outer edge and pull upwards, freeing the center friction locks in the process.

결론

To reassemble your device, follow these instructions in reverse order.

다른 한 분이 해당 안내서를 완성하였습니다.

Aaron Jacobs

회원 가입일: 01/31/14

540 평판

안내서 4개 작성하였습니다

Cal Poly, Team 13-14, Regan Winter 2014 Cal Poly, Team 13-14, Regan Winter 2014 회원

CPSU-REGAN-W14S13G14

4 회원들

안내서 19개 작성하였습니다

댓글 한 개

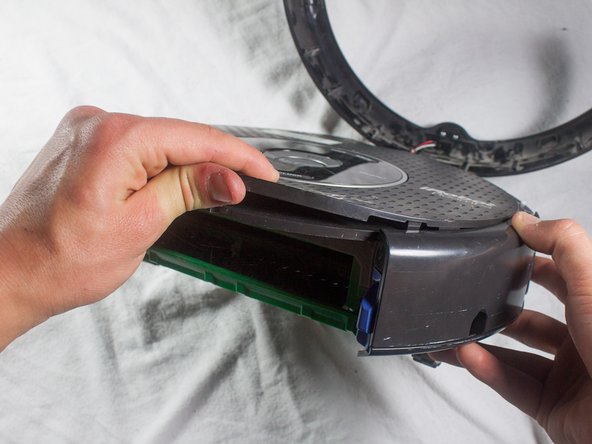
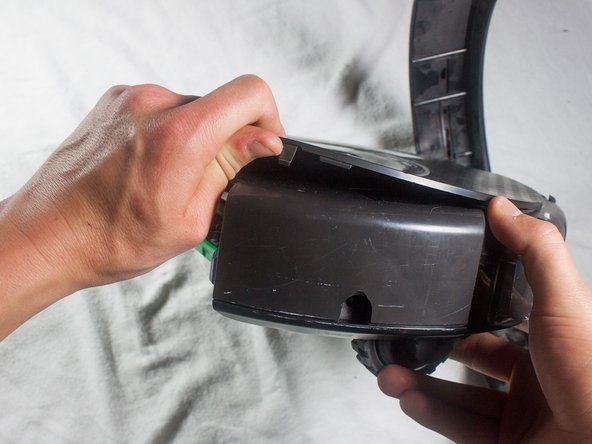
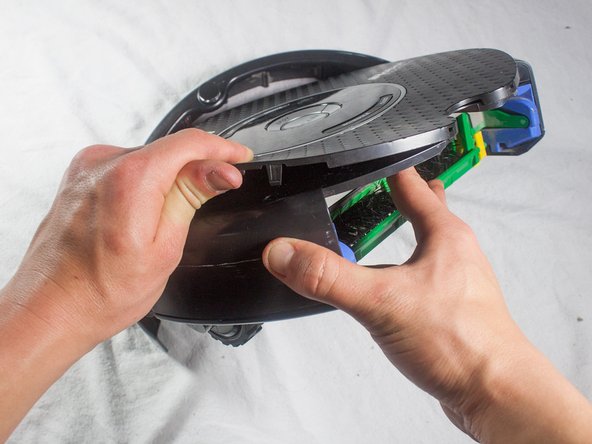
If all you need off is the faceplate, you can start at step 11 and skip the 1-10. The bottom and bumper assemblies seem completely unrelated to the faceplate. I removed the dirt bin and started lifiting at the back edge, then worked around the faceplate and it just popped off with no damage.

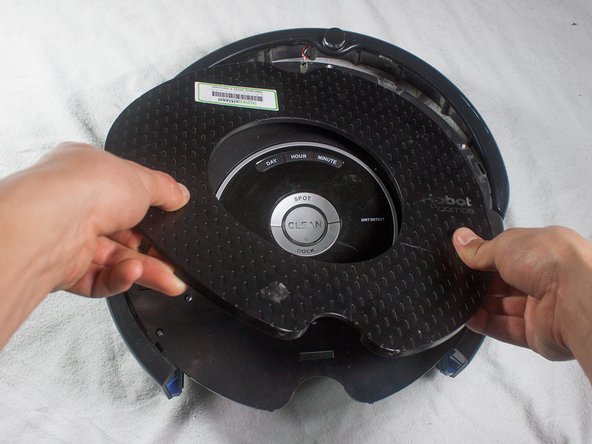
There are 4 long friction tabs around the circumference, and no tabs at the center. Once the outer friction tabs are free, the center circle of the faceplate comes off cleanly, leaving the display panel, control buttons and the chrome-ish ring. Under the 'IR' in the IRobot logo on the faceplate is the SCI port, more plastic and a number of screws to get to the motherboard.

David Forrest - 답글

댓글 쓰기

조회 통계:

24 시간 전: 0

7일 전: 0

30일 전: 2

전체 시간: 1,041