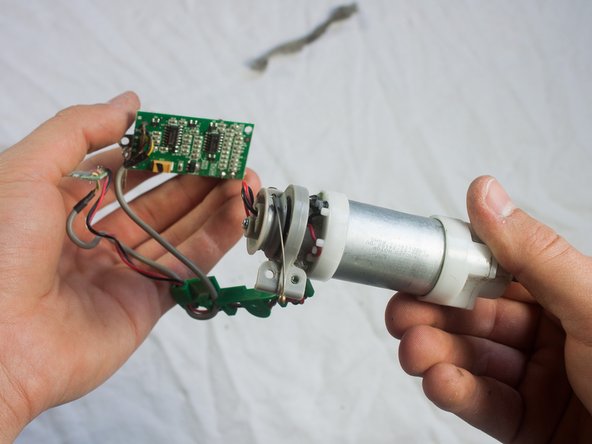
주요 콘텐츠로 건너뛰기

iRobot Roomba 551 Main Brush Motor Replacement

필요한 것

  1. iRobot Roomba 551 Main Brush Motor Replacement, Side Brush: 1 단계, 이미지 1/1
    • Place your Roomba upside-down on a hard surface.

  2. iRobot Roomba 551 Main Brush Motor Replacement: 2 단계, 이미지 1/1
    • While holding the side brush in place, use a Phillips #1 screwdriver to remove the 4.5mm screw from the center of the brush.

  3. iRobot Roomba 551 Main Brush Motor Replacement: 3 단계, 이미지 1/1
    • Gently pull upwards on the brush to remove it.

  4. iRobot Roomba 551 Main Brush Motor Replacement, Bottom Plate: 4 단계, 이미지 1/1
    • Rotate the Roomba upside-down so the bottom is facing towards you.

  5. iRobot Roomba 551 Main Brush Motor Replacement: 5 단계, 이미지 1/2 iRobot Roomba 551 Main Brush Motor Replacement: 5 단계, 이미지 2/2
    • Using a Phillips #2 screwdriver, remove the captive screws that hold the bottom plate in place.

  6. iRobot Roomba 551 Main Brush Motor Replacement: 6 단계, 이미지 1/1
    • Carefully lift the bottom plate.

    • The battery is only secured in place by the bottom plate, and may fall out once the bottom plate is removed.

  7. iRobot Roomba 551 Main Brush Motor Replacement, iRobot Roomba 551 Dirt Bin Replacement: 7 단계, 이미지 1/1
    • Push on the dirt bin release button, and pull gently.

  8. iRobot Roomba 551 Main Brush Motor Replacement, Brush Case: 8 단계, 이미지 1/1
    • Use a Phillips #1 screwdriver to loosen the 4 captive screws around the case .

  9. iRobot Roomba 551 Main Brush Motor Replacement: 9 단계, 이미지 1/1
    • Grab the brush case and pull upwards to remove.

  10. iRobot Roomba 551 Main Brush Motor Replacement, Main Brush Motor: 10 단계, 이미지 1/3 iRobot Roomba 551 Main Brush Motor Replacement, Main Brush Motor: 10 단계, 이미지 2/3 iRobot Roomba 551 Main Brush Motor Replacement, Main Brush Motor: 10 단계, 이미지 3/3
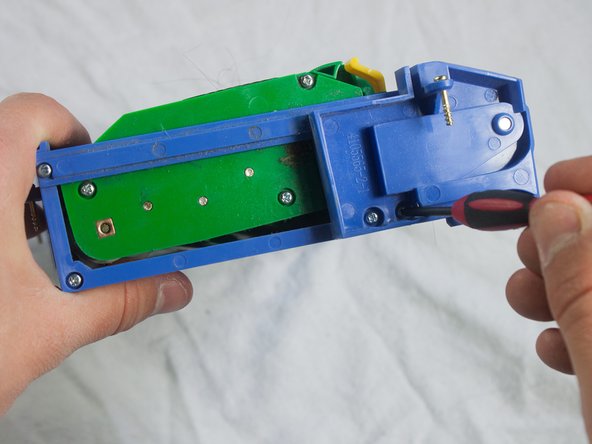
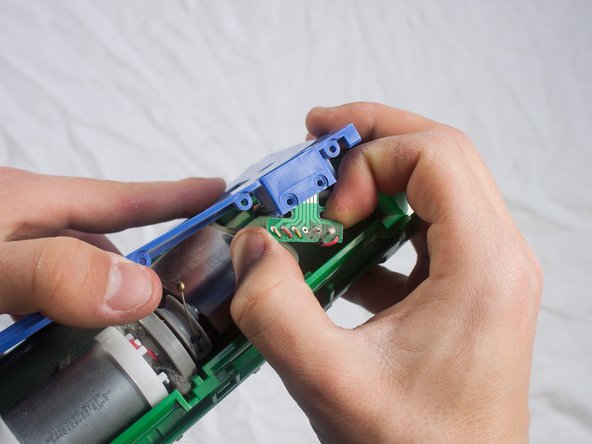
    • Use a Phillips #1 screwdriver to remove the 9.5mm screws from the side of the brush case, and pull to detach.

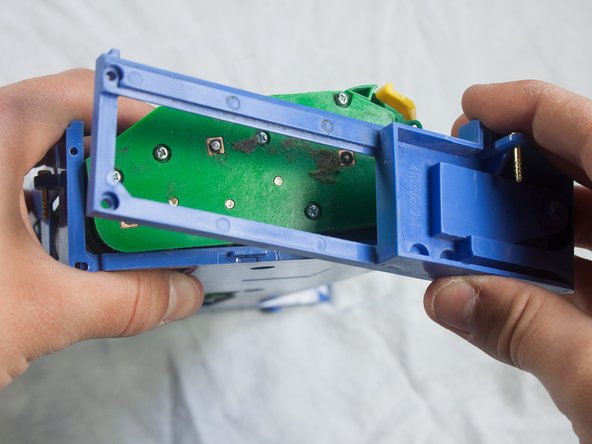
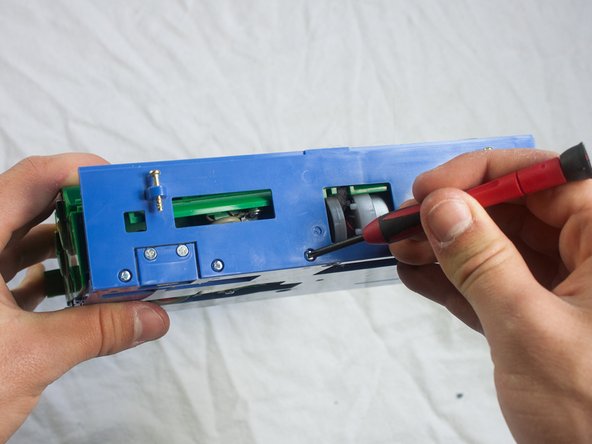
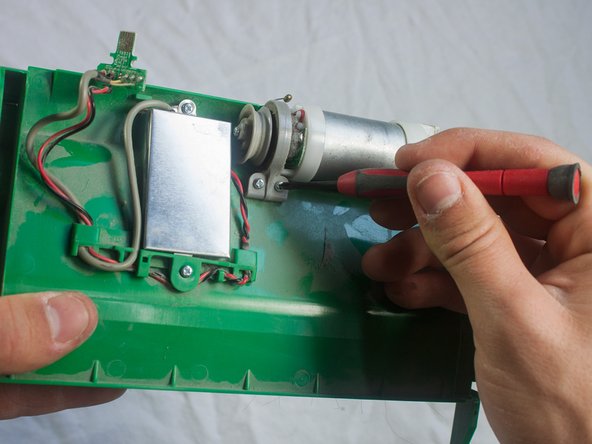
    • Repeat for the opposite side of the brush case.

  11. iRobot Roomba 551 Main Brush Motor Replacement: 11 단계, 이미지 1/3 iRobot Roomba 551 Main Brush Motor Replacement: 11 단계, 이미지 2/3 iRobot Roomba 551 Main Brush Motor Replacement: 11 단계, 이미지 3/3
    • Use a Phillips #1 screwdriver to remove the three 5.0mm screws from the back of the brush case.

    • Pull off the back of the brush case.

  12. iRobot Roomba 551 Main Brush Motor Replacement: 12 단계, 이미지 1/2 iRobot Roomba 551 Main Brush Motor Replacement: 12 단계, 이미지 2/2
    • Use a Phillips #1 screwdriver to remove the two 1.5mm screws securing the chip in place.

    • Remove the chip from its housing in the blue brush case.

  13. iRobot Roomba 551 Main Brush Motor Replacement: 13 단계, 이미지 1/2 iRobot Roomba 551 Main Brush Motor Replacement: 13 단계, 이미지 2/2
    • Use a Phillips #1 screwdriver to remove the two 5.5mm screws securing the motor in place.

  14. iRobot Roomba 551 Main Brush Motor Replacement: 14 단계, 이미지 1/2 iRobot Roomba 551 Main Brush Motor Replacement: 14 단계, 이미지 2/2
    • Use a Phillips #1 screwdriver to remove the two 4.5mm screws on the top and bottom of the metal plate.

    • Pull out the motor and metal covering.

  15. iRobot Roomba 551 Main Brush Motor Replacement: 15 단계, 이미지 1/3 iRobot Roomba 551 Main Brush Motor Replacement: 15 단계, 이미지 2/3 iRobot Roomba 551 Main Brush Motor Replacement: 15 단계, 이미지 3/3
    • Use a Phillips #1 screwdriver to remove the two 3.5mm screws on the corners of the circuit board.

    • Gently pull out the circuit board.

결론

To reassemble your device, follow these instructions in reverse order.

다른 2명이 해당 안내서를 완성하였습니다.

John McTigue

회원 가입일: 01/31/14

331 평판

안내서 3개 작성하였습니다

Cal Poly, Team 13-14, Regan Winter 2014 Cal Poly, Team 13-14, Regan Winter 2014 회원

CPSU-REGAN-W14S13G14

4 회원들

안내서 19개 작성하였습니다

댓글 0개

댓글 쓰기

조회 통계:

24 시간 전: 0

7일 전: 2

30일 전: 8

전체 시간: 3,744