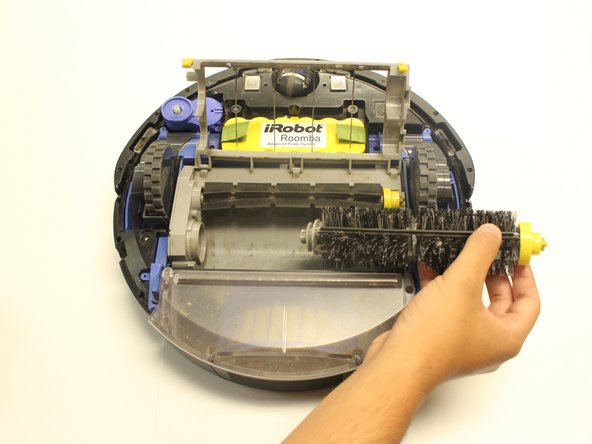
주요 콘텐츠로 건너뛰기

iRobot Roomba 595 Pet Series Main Brush Replacement

필요한 것

  1. iRobot Roomba 595 Pet Series Main Brush Replacement, Secondary Brush: 1 단계, 이미지 1/1
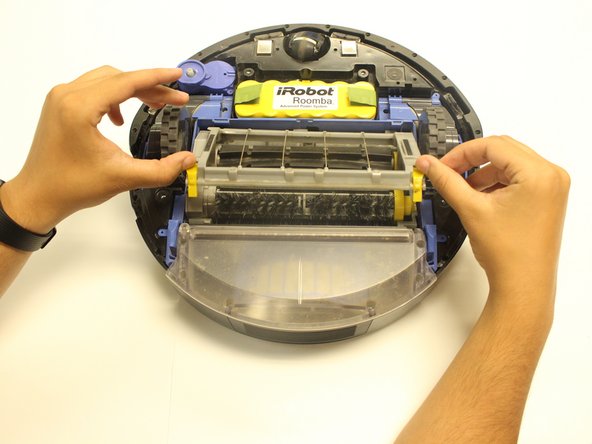
    • Flip the Roomba upside down. Using the Phillips #0 screwdriver, carefully remove the 5 mm screw holding the brush in place.

  2. iRobot Roomba 595 Pet Series Main Brush Replacement: 2 단계, 이미지 1/1
    • Gently pull the brush up and remove it from the device.

  3. iRobot Roomba 595 Pet Series Main Brush Replacement, Main Brush: 3 단계, 이미지 1/2 iRobot Roomba 595 Pet Series Main Brush Replacement, Main Brush: 3 단계, 이미지 2/2
    • Remove the four 10mm screws with a Phillips #1 screwdriver. Gently lift off the external covering for the Roomba's underside.

  4. iRobot Roomba 595 Pet Series Main Brush Replacement: 4 단계, 이미지 1/3 iRobot Roomba 595 Pet Series Main Brush Replacement: 4 단계, 이미지 2/3 iRobot Roomba 595 Pet Series Main Brush Replacement: 4 단계, 이미지 3/3
    • Press lightly on the yellow tabs and lift the cage cover containing the brush.

  5. iRobot Roomba 595 Pet Series Main Brush Replacement: 5 단계, 이미지 1/2 iRobot Roomba 595 Pet Series Main Brush Replacement: 5 단계, 이미지 2/2
    • Lift the brush from the right side and slide it from its container within the Roomba.

결론

To reassemble your device, follow these instructions in reverse order.

다른 한 분이 해당 안내서를 완성하였습니다.

Dale Shirley-Potopsingh

회원 가입일: 10/02/17

446 평판

안내서 4개 작성하였습니다

USF Tampa, Team S10-G5, Thompson Fall 2017 USF Tampa, Team S10-G5, Thompson Fall 2017 회원

USFT-THOMPSON-F17S10G5

3 회원들

안내서 5개 작성하였습니다

댓글 0개

댓글 쓰기

조회 통계:

24 시간 전: 0

7일 전: 2

30일 전: 7

전체 시간: 607