주요 콘텐츠로 건너뛰기

Reemplazo del ensamblaje del cable del botón de encendido del iPhone 6

알림: 귀하는 선행 작업 안내서를 편집하고 계십니다. 변경된 사항들은 이 선행 작업 단계를 포함하는 안내서 2개에 영향을 미칩니다.

영어
스페인어
5 단계
iPhone 6 Power Button Cable Assembly Replacement: 0 단계, 이미지 1개 중 1개
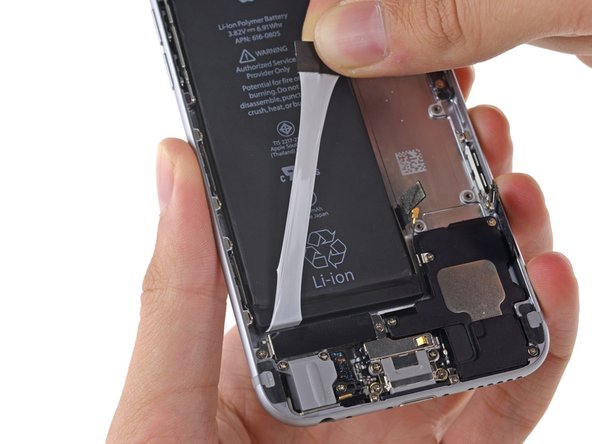
  • When you feel increased resistance from the adhesive strip, pull it gently around the lower left corner of the battery.

  • Don't allow the adhesive strip to snag on the corner of the battery, or it may tear or break off.

  • Continue pulling the adhesive tab upward and away from the left edge of the battery, allowing it to slowly slide out from between the battery and the rear case, until the strip comes free from the iPhone.

  • If you removed both adhesive strips successfully, skip the next two steps and continue on Step 46.

  • If either of the adhesive strips broke off underneath the battery and could not be retrieved, continue with the next step below.

Cuando sienta una mayor resistencia de la tira adhesiva, tire suavemente alrededor de la esquina inferior izquierda de la batería.

No permita que la tira adhesiva se enganche en la esquina de la batería, ya que podría desgarrarse o romperse.

Continúa tirando de la pestaña adhesiva hacia arriba y lejos del borde izquierdo de la batería, permitiendo que se deslice lentamente entre la batería y la carcasa trasera, hasta que la tira se libere del iPhone.

Si retiró ambas tiras adhesivas con éxito, omita los siguientes dos pasos y continúe con el Paso 46.

Si alguna de las tiras adhesivas se rompió debajo de la batería y no se pudo recuperar, continúe con el siguiente paso.

귀하의 기여는 오픈 소스 Createive Commons 라이선스 하에 허가되었습니다.