4 단계 번역중
4 단계


-
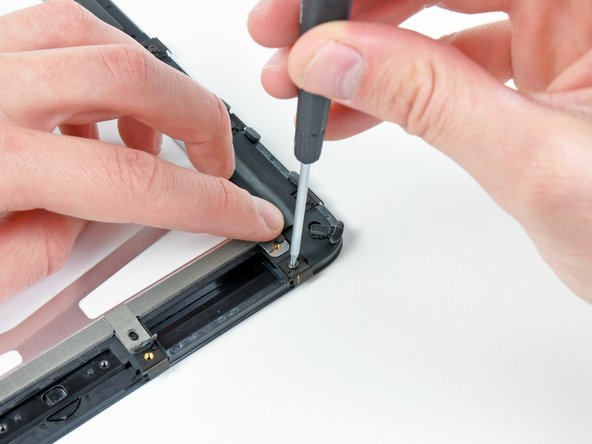
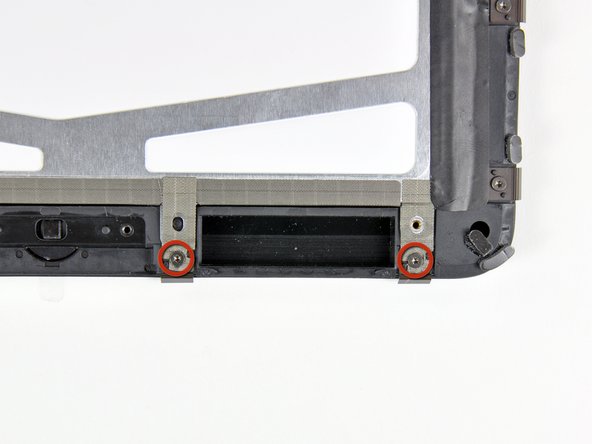
Hold back the strips of EMI tape along the lower edge of the LCD as you remove the two T5 Torx screws securing the retaining clips shown.
-
Stick the tape down against the new clips and reinstall the two T5 Torx screws.
귀하의 기여는 오픈 소스 Createive Commons 라이선스 하에 허가되었습니다.