주요 콘텐츠로 건너뛰기

Reemplazo del conjunto de bobina/motor de Andis Master Clippers

영어
스페인어

5 단계 번역중

5 단계
Andis Master Clippers Motor/Coil Assembly Replacement: 0 단계, 이미지 2개 중 1개 Andis Master Clippers Motor/Coil Assembly Replacement: 0 단계, 이미지 2개 중 2개
  • Note: Black being {Negative} goes with the Black wire, Red being {Positive} goes with red wire. However, in this case the red wire goes with the white wire (it all depends on how the manufacturer ships it). The white wire extends from the Attached power cord

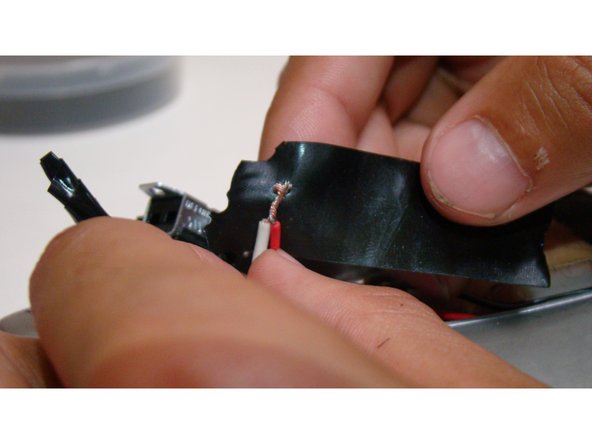
  • Twist the red wire that is coming from the Coil Assembly with the white one, and the black wire with the black one.

  • CAUTION: Match the wires correctly, Black with Black, and Red with White. If you matched the wrong wire, it will cause the clippers to have a short circuit (electrical malfunction) when you plug the electrical cord into an outlet.

  • After you have twisted the wires together, use electrical tape to wrap the stripped wires. Leave some tape over the ends of the wires, and below the cutoff of the rubber around the wire as shown in the photo. Wrap the tape around the wires as tight as possible.

  • To complete this repair and reassembly, follow these steps in reverse, starting from the end of step 3 up to the beginning of step 1

Nota: El negro {Negativo} va con el cable negro, el rojo {Positivo} va con el cable rojo. Sin embargo, en este caso el cable rojo va con el cable blanco (todo depende de cómo lo envíe el fabricante). El cable blanco se extiende desde el cable de alimentación adjunto.

Tuerce el cable rojo que sale del Conjunto de Bobina con el blanco y el cable negro con el negro.

PRECAUCIÓN: Haz coincidir los cables correctamente, negro con negro y rojo con blanco. Si conectaste el cable incorrecto, la cortadora tendrá un cortocircuito (mal funcionamiento eléctrico) cuando conectes el cable eléctrico a un tomacorriente.

Después de haber trenzado los cables, usa cinta aislante para envolver los cables pelados. Deja un poco de cinta adhesiva sobre los extremos de los cables y debajo del corte de goma alrededor del cable como se muestra en la foto. Envuelve la cinta alrededor de los cables lo más apretado posible.

Para completar esta reparación y reensamblaje, sigue estos pasos a la inversa, comenzando desde el final del paso 3 hasta el comienzo del paso 1.

귀하의 기여는 오픈 소스 Createive Commons 라이선스 하에 허가되었습니다.