알림: 귀하는 선행 작업 안내서를 편집하고 계십니다. 변경된 사항들은 이 선행 작업 단계를 사용하는 안내서에 영향을 미칩니다.
8 단계 번역중
8 단계


-
We interrupt this teardown to bring you: more
cowbellteardown! -
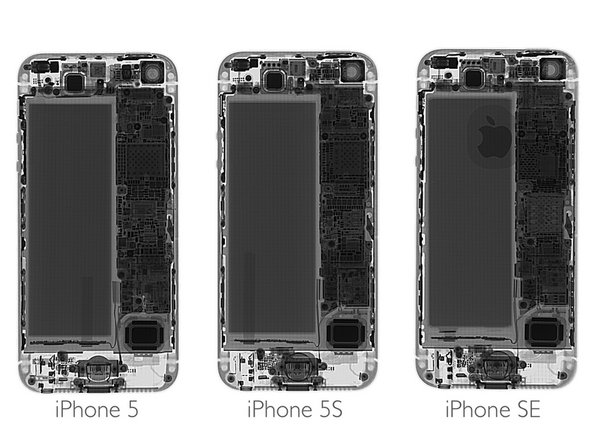
Our friends at Creative Electron have been getting their teardown on, X-ray style!
-
We have for your enjoyment, three generations of iPhone 5 configurations.
-
Really, the only obvious change is the addition of the bi-metal Apple logo.
-
That, and the addition of the Touch ID cable between the 5 and 5s (unfortunate placement still intact in the SE, too).
귀하의 기여는 오픈 소스 Createive Commons 라이선스 하에 허가되었습니다.