알림: 귀하는 선행 작업 안내서를 편집하고 계십니다. 변경된 사항들은 이 선행 작업 단계를 포함하는 안내서 2개에 영향을 미칩니다.
11 단계 번역중
11 단계


-
It's time to switch sides. Remove your book or foam block and place it under the opposite side of your MacBook Pro.
-
Repeat the procedure from the prior steps to separate the two battery cells on this side:
-
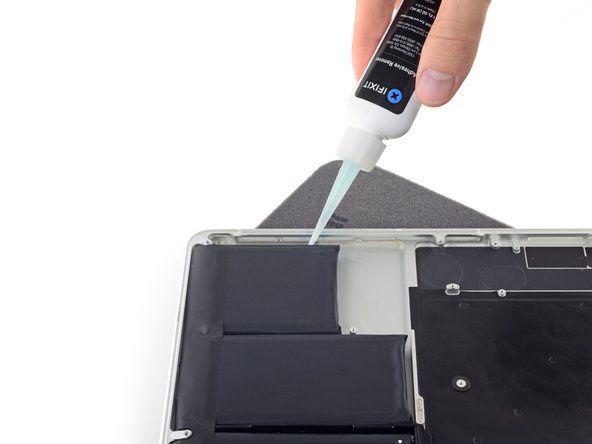
Apply your adhesive remover to the elevated edge of the outer battery cell, and wait 2-3 minutes for it to penetrate.
-
Work one corner of a plastic card underneath the battery cell, and slide the card fully underneath the battery cell to separate it.
-
Do the same for the adjacent cell.
-
Leave your plastic card in place or flip the battery cells over to prevent them from re-adhering during the following steps.
귀하의 기여는 오픈 소스 Createive Commons 라이선스 하에 허가되었습니다.