주요 콘텐츠로 건너뛰기

why! N650DU CD / DVD RW drive

필요한 것

  1. why! N650DU CD / DVD RW drive, The Batteries: 1 단계, 이미지 1/3 why! N650DU CD / DVD RW drive, The Batteries: 1 단계, 이미지 2/3 why! N650DU CD / DVD RW drive, The Batteries: 1 단계, 이미지 3/3
    • Unlock the button without spring

    • Slide the battery up while unlocking the button with spring

  2. why! N650DU CD / DVD RW drive, Access to major components: 2 단계, 이미지 1/3 why! N650DU CD / DVD RW drive, Access to major components: 2 단계, 이미지 2/3 why! N650DU CD / DVD RW drive, Access to major components: 2 단계, 이미지 3/3
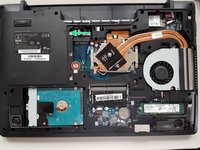
    • Unscrew the two large screws circled in red

    • Unscrew the two small screws circled in green

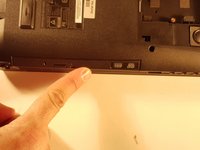
    • Slide the plate down and lift the

  3. why! N650DU CD / DVD RW drive, CD / DVD RW drive: 3 단계, 이미지 1/3 why! N650DU CD / DVD RW drive, CD / DVD RW drive: 3 단계, 이미지 2/3 why! N650DU CD / DVD RW drive, CD / DVD RW drive: 3 단계, 이미지 3/3
    • Unscrew the screw circled in red

    • Push the drive to the location indicated by the green arrow

    • Remove the drive from its location

결론

To reassemble your device, Follow these instructions in reverse order.

다음 번역가들에게 특별히 감사 드립니다:

fr en

100%

irlanda님은 저희가 세상을 수리하는데 동참하신 분입니다! 기여하시겠습니까?
번역 시작하기 ›

Felice Suglia

회원 가입일: 06/15/13

31,100 평판

안내서 264개 작성하였습니다

댓글 0개

댓글 쓰기

조회 통계:

24 시간 전: 0

7일 전: 1

30일 전: 9

전체 시간: 183