주요 콘텐츠로 건너뛰기

필요한 것

해당 분해도는 수리 안내서가 아닙니다. Apple Extended Keyboard II 수리는 저희 서비스 설명서를 사용하십시오.

  1. Apple Extended Keyboard II Teardown, The Apple Extended Keyboard II: 1 단계, 이미지 1/3 Apple Extended Keyboard II Teardown, The Apple Extended Keyboard II: 1 단계, 이미지 2/3 Apple Extended Keyboard II Teardown, The Apple Extended Keyboard II: 1 단계, 이미지 3/3
    • Ahh, the Apple Extended Keyboard II. Some argue it's the best keyboard ever made. I'm just here to tear it down. Some specs:

    • Model No. M0312 and M3501

    • Manufactured by Alps Electric or Mitsumi in Japan, Ireland, Mexico, or The United States

    • Plate-mount Alps cream dampened, Alps White, Alps Salmon, or Mitsumi White switches

    • The Caps Lock is a special locking switch - it stays down, just like a typewriter!

    • Two Apple Desktop Bus (ADB) Ports

    • 108-key (ANSI) and 109-key (ISO) layouts

    • PBT Keycaps (well, except for the spacebar)

  2. Apple Extended Keyboard II Teardown: 2 단계, 이미지 1/2 Apple Extended Keyboard II Teardown: 2 단계, 이미지 2/2
    • Here's the keyboard we will be working on today. She's not beautiful, but she's mine.

    • My AEKII is a US made with Alps switches.

    • Be extremely careful when working with vintage plastics. They are very brittle and can break easily.

    • While the keys are PBT plastic, the case and spacebar are ABS. ABS plastics yellow over time.

    • Interestingly, this keyboard came with a number of plastic overlays that sat over the function keys to show their, well, function. Often you will find the area around the function keys has yellowed much less than the rest of the keyboard, as seen in photo 3.

  3. Apple Extended Keyboard II Teardown: 3 단계, 이미지 1/3 Apple Extended Keyboard II Teardown: 3 단계, 이미지 2/3 Apple Extended Keyboard II Teardown: 3 단계, 이미지 3/3
    • The keyboard is held in by just one philips head screw on the back! Flip over your keyboard and unscrew that bad boy.

    • Once unscrewed, flip over the keyboard and release the clips from the top. A plastic opening tool may be helpful, but they are fairly loose.

    A credit card can be used to release the clips as well.

    Krishna Sadasivam - 답글

  4. Apple Extended Keyboard II Teardown: 4 단계, 이미지 1/3 Apple Extended Keyboard II Teardown: 4 단계, 이미지 2/3 Apple Extended Keyboard II Teardown: 4 단계, 이미지 3/3
    • Remove the top of the case from the keyboard.

    • Say hello to the keyboard switches!

  5. Apple Extended Keyboard II Teardown: 5 단계, 이미지 1/3 Apple Extended Keyboard II Teardown: 5 단계, 이미지 2/3 Apple Extended Keyboard II Teardown: 5 단계, 이미지 3/3
    • The two ADB connectors need to be removed from their brackets.

    • Use a fingernail or a spudger to push the surface mount port upwards.

    • Don't just shove up the port - it's delicate. Guide it up with your fingers slowly.

    • When it's possible, grab the top of the green PCB and lift the board out of it's small mount.

    • Repeat this for both ports.

  6. Apple Extended Keyboard II Teardown: 6 단계, 이미지 1/3 Apple Extended Keyboard II Teardown: 6 단계, 이미지 2/3 Apple Extended Keyboard II Teardown: 6 단계, 이미지 3/3
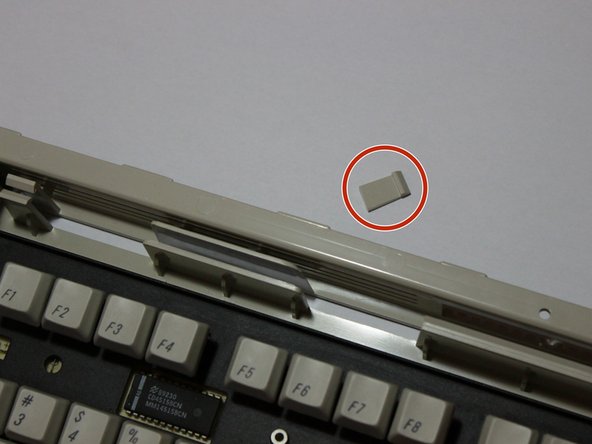
    • Two plastic tabs hold the keyboard's PCB and switches in place.

    • Use your thumbs to carefully press the tabs backwards. Reach under with your forefingers to release the board from the clips.

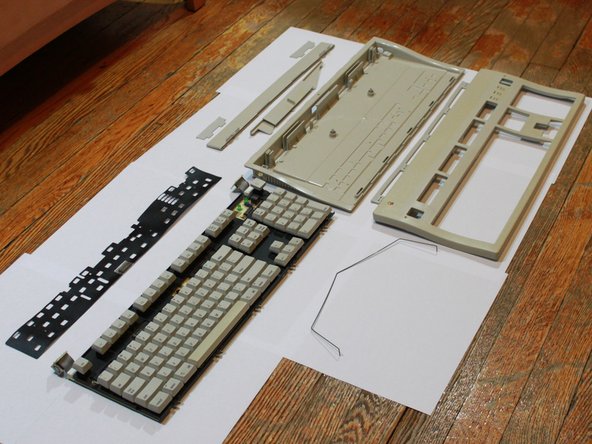
    • Lift the entire PCB assembly up and away from the keyboard case.

    • Be sure to lift up and out, as there are five small sets of clips gripping the bottom.

  7. Apple Extended Keyboard II Teardown: 7 단계, 이미지 1/3 Apple Extended Keyboard II Teardown: 7 단계, 이미지 2/3 Apple Extended Keyboard II Teardown: 7 단계, 이미지 3/3
    • Now we can take a closer look at the PCB!

    • The brains of this keyboard is a Toshiba TC4515BP binary controller.

    • A Fairchild CD4515BCN Decoder

    • A GD54/74LS04 Hex Inverter

    • 3 green indicator LEDs

    The Toshiba chip is NOT a TC4515BP (that's effectively the next chip listed). It's an 80C49AP.

    matthackmann - 답글

    Hi there, do you know if another 80C49AP but with a different number after the dash that follows should work as a replacement?

    rockinkat -

    The decoder, while it's a 4515BC, could be one of several makers. The one shown in the photo is a National Semiconductor part, the one in mine is a Motorola part (MC14515BCP).

    Matt Balmer - 답글

  8. Apple Extended Keyboard II Teardown: 8 단계, 이미지 1/3 Apple Extended Keyboard II Teardown: 8 단계, 이미지 2/3 Apple Extended Keyboard II Teardown: 8 단계, 이미지 3/3
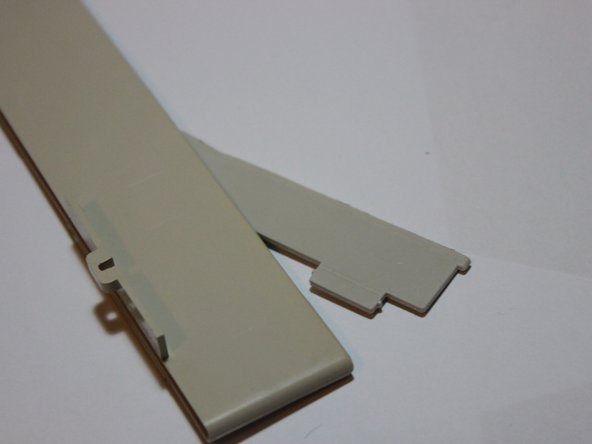
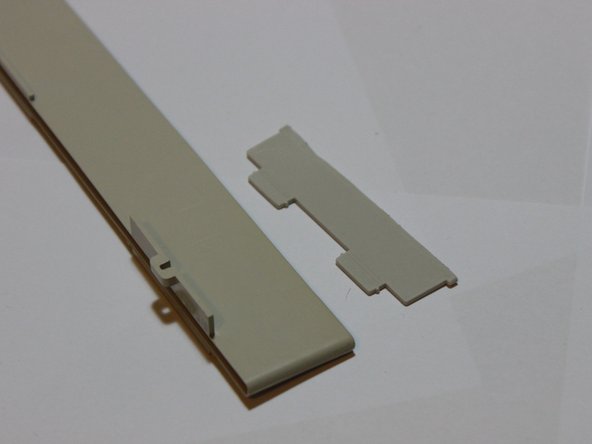
    • Remove the spring bar from the foot.

    • Release three sets of clips from the foot by pressing outward while lifting up. The back will need to be bowed out in order to remove the larger bump used as a control switch in the center.

    • It is very easy to break a tab - I had a casualty doing this teardown :[

    • Lift the foot up and away from the case. It should easily separate into two parts.

  9. Apple Extended Keyboard II Teardown: 9 단계, 이미지 1/3 Apple Extended Keyboard II Teardown: 9 단계, 이미지 2/3 Apple Extended Keyboard II Teardown: 9 단계, 이미지 3/3
    • Remove the protective foil by releasing seven small tabs.

    • This is easiest to do if you start from one side, apply downward pressure, and continue to each subsequent set of clips.

  10. Apple Extended Keyboard II Teardown: 10 단계, 이미지 1/2 Apple Extended Keyboard II Teardown: 10 단계, 이미지 2/2
    • Remove a small rubber cap from a small hole.

    • I have no idea what this is for.

  11. Apple Extended Keyboard II Teardown: 11 단계, 이미지 1/3 Apple Extended Keyboard II Teardown: 11 단계, 이미지 2/3 Apple Extended Keyboard II Teardown: 11 단계, 이미지 3/3
    • Remove the rubber feet from the base of the board and foot. Just pull up!

  12. Apple Extended Keyboard II Teardown: 12 단계, 이미지 1/3 Apple Extended Keyboard II Teardown: 12 단계, 이미지 2/3 Apple Extended Keyboard II Teardown: 12 단계, 이미지 3/3
    • All done!

    • To reassemble the keyboard, follow this guide in reverse order.

    • Again, note that vintage plastic is very brittle. Be very careful with your tabs - I lost one!

    • Bye bye, tab. Good thing there were two of you.

afischer15

회원 가입일: 04/06/11

204 평판

안내서 2개 작성하였습니다

댓글 한 개

Super helpful guide! I recently restored an old AEK2 that had a bad “C” key. With this guide, I was able to easily take it apart and found out that the key was oxidized and bad. Now that my keyboard has a new keyswitch, I can use it with my modern Macs.

Krishna Sadasivam - 답글

댓글 쓰기

조회 통계:

24 시간 전: 3

7일 전: 20

30일 전: 91

전체 시간: 14,959