소개
This year’s iteration of the Apple Watch can be your trainer, doctor, guardian, and now, live-in nurse! How’d Apple fit all these personalities into one watch? Let’s find out why everyone is falling so hard for this watch—with a teardown!
If you can’t get enough repair and teardown content, we have just the prescription for you: two to three Instagrams a day, Facebook during lunch, a newsletter once a week, and a tweet when the craving is too much.
필요한 것
동영상 개요
-
-
Apple Watch patient profile:
-
LTPO OLED Retina display with Force Touch
-
Custom-designed Apple 64-bit dual-core S4 SiP (System in Package)
-
Optional LTE and UMTS, built in GPS/GLONASS/Galileo/QZSS, NFC, Wi-Fi 802.11b/g/n 2.4 GHz, and Bluetooth 5.0
-
Improved accelerometer and gyroscope, optical and electrical heart sensors, microphone, speaker, barometric altimeter, and ambient light sensor
-
Water resistance rating (up to 50 meters)
-
WatchOS 5
-
-
-
While these black squares may look outwardly similar, X-rays from our experts at Creative Electron reveal radically different insides.
-
Already our subject (left) presents with some differences from the Series 3 (right)—the back sports an all-new optical sensor in the middle, surrounded by a new electrode.
-
Other immediate differences from the "old" 42 mm version: the corners are noticeably rounder for more of that squircle look, and the side button now sits flush with the case.
-
Seen from the side, the Series 4 is noticeably slimmer than the Series 3 (by 0.7 mm)—but it's actually thicker than the original.
-
From the look of things, a good deal of that slimming is thanks to the new display.
-
-
-
A quick checkup on the all-ceramic-and-sapphire-crystal back details:
-
Watch, check.
-
Series 4, check.
-
A laundry list of features, including water resistance to 50 meters.
-
Optical sensor, right in the middle this time.
-
Big ring-shaped electrical sensor—that's new.
-
Inside one of the wrist band slots, we find a new model number, A2008—and in the other, the serial number, plus a small air vent hole for pressure equalization.
I think the marking and texts are laser engraved.
-
-
-
Swinging our iOpener pendulum back and forth, your crown is getting heavier and heavier. Your wristbands sink into the cushions... Hey Siri, turn on DND.
-
Now we can place our blade under the edge of this shiny display without scaring our patient.
-
This approved method has been tried and tested on several occasions, although we've yet to determine how much water resistance is restored afterward.
-
With its familiar trinity of cables safely unplugged, we can take a closer look at the display.
They used the iOpener to heat up the screen first and placed it directly on the device for those who did not pick up on it.
Can someone enlighten me on the purpose of that tape holding the ribbon cables? It seems to have a copper sheeting and is also connected to the body of the watch….is it some kind of heat sink or thermal protection for the battery below it?
Hi ,i would also like to know what the purpose of this tape is ,accidentaly ripped one end of it ,the one closer to 3D force touch connector and after this my Watch is stuck at Apple logo ,anyone ?
Mario W -
Hi, I have the same issue also is not possible find the complete flex connector with these two ribbons included
-
-
-
With the screen in isolation, we get a better look at the contours of the new display. The extra pixels and increased screen-to-body ratio come thanks to rounded-off corners, a la iPhone X, XS, and XS Max.
-
The 44 mm model's display now covers 977 sq mm, compared to 740 sq mm on the 42 mm Series 3.
-
Meanwhile, the 40 mm model spans 759 sq mm, versus 563 sq mm on its 38 mm predecessor.
-
On the back we spot three chip packages, of which two are sealed shut, while the third bears no markings whatsoever behind its metal shield.
-
-
-
On our way to the battery, we encounter the now-standard tri-point. Sorry pentalobe, Apple seems to have a new favorite these days.
-
Disconnecting what we think is the battery leads to a moment of confusion as we realize the battery is still tethered down by its flex cable. So what did we just disconnect?
-
Probably wasn't important... right?
-
The actual battery flex cable has been rerouted from its location on the Series 3, and now lies sandwiched underneath the battery and above the main board. With that dispatched, let's pop it out!
Is the Taptic Engine still being used instead of rumble pack.
-
-
-
-
Here's the built-in battery powering the Watch—no self-winding action here!
-
... Or it might be 1.12 Wh, depending on which side of this battery you believe.
-
Regardless, that's down about 17% in capacity from the 1.34 Wh of the 42 mm Series 3 (although still more than the 38 mm model's 1.07 Wh battery from our most recent teardown).
-
Now who wants to do the math on volume? 0.7 mm thinner but 2 mm taller comes out to …
-
… just enough to give the battery its daily 18 hours of runtime, apparently!
Hello.Small correction to the battery.
1.07 Wh is in the watch 38mm series 3.
The watch 42 mm is 1.34 Wh
Series 4 44 mm has 1.113 Wh is less about 20%
Hi Dariusz, you’re right. It is indeed 20% less than the 42 mm Series 3. Our Series 3 Teardown was a 38 mm Version. I will edit the step to avoid confusion.
Official numbers from Apple:
40mm: 0.86 Wh
44mm: 1.12 Wh
38mm: 1.07 Wh
42mm: 1.34 Wh
What about battery capacity of GPS vs LTE?
-
-
-
After the battery connector's hide-and-seek shenanigans, we're more prepared for a Force Touch gasket switcheroo.
-
Its flex connector now lies in the completely opposite corner, with twin cables that are stacked instead of spread out side-by-side. Very streamlined.
-
That Taptic engine, by contrast, looks about the same as we remember it, if a little squashed-looking. Let's have a closer look.
Hi, what are the twin cables mentionned ? I unfortunately screwed one connecter from the bottom left of the watch (top corner right on the picture step 8, is it replaceable?
Antoine D. - 답글
Hey Antoine. You have to look for an Apple Watch (44 mm Series 4/5) Force Touch Sensor Gasket. here in the shop
-
-
-
Here we have the component responsible for shaking things up—the Taptic Engine, also known as an electromagnetic oscillating linear actuator.
-
Compared to the shakers of yore, this is a much thinner design, but it's also longer.
-
Android device makers? Not so much.
-
-
-
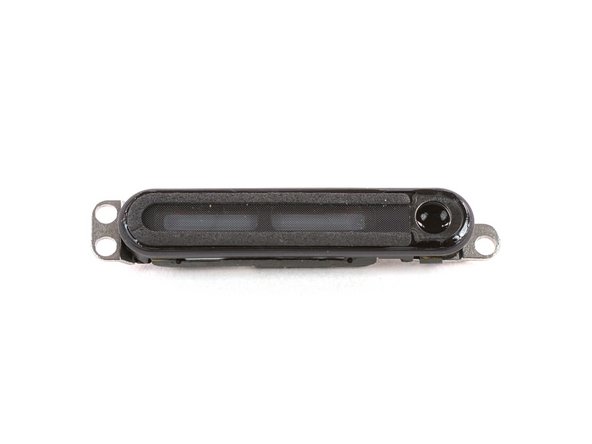
Next up, we surgically remove the new noisemaker—that's alleged to be 50% louder, and maybe harder, better, faster?
-
Now that the microphone has migrated over near the digital crown, the speaker can take advantage of that space for more volume.
-
A silicone gasket seals the speaker to make its water-expelling magic possible, much like it did on last year's version.
-
Update: It turns out there's a tiny tunnel from the air vent we saw in Step 3, passing through the chassis and right into the path of this little sensor. So it probably doesn't need any help from the speaker grille, but we still think it's most likely a barometer.
-
-
-
Finally, we get to the core of all things: the Apple-designed S4 system-in-package.
-
Good news, everyone! The S4 is secured only with screws, and pops right out—a welcome change from the fiercely-glued SiPs of years past.
-
As always, the package itself is encased in a solid block of resin, meaning most of its secrets will be difficult to extract. Thankfully though, the RF components remain a little more exposed:
-
Avago AFEM-8087 (likely front-end module)
-
OU JQ
-
YY MEH ECE (this looks like a Bosch part, likely the fancy new accel + gyro)
-
Avago E827 I2033 0836
-
ST Microelectronics ST33G1M2 32-bit MCU with ARM SecurCore SC300—the same eSIM we found in the last Apple Watch and in the iPhone XS and iPhone XS Max.
Hey whats the function of the copper sticker und whats the right name of it?
iv been trying to find the answer to this question as well! this is my own wild guess but it could serve as either a heat sink (seeing as it connects to the body of the watch? or maybe some kind of heat protector for the battery thats just underneath or perhaps it serves as some kind of grounding property…. but yeah I too would love to have a definitive answer…
We’re also not absolutely sure, but support Asio’s guess on a combination of a heat sink and grounding element. It may even shield the logic board from external interference.
Quelle est la fonction de l'autocollant en cuivre et quel est le bon nom?
hi I would like to know which is the wifi antenna. Grazie.
Do you have assembly parts for that?
Are the S4 SiPs all the same between different sizes? ( 40mm vs 44mm , nike+ vs no nike)
-
-
-
In our effort to push out the heart sensor array, the whole bottom pops out. Turns out they weren't kidding about more access through the bottom case.
-
We spot a magnet in the middle for holding the Watch to the charger, the charging coil itself, and some new silicon:
-
A88 AY10
-
18206 00D5
-
That's a very tidy array of black pads lying under the S4 package—possibly for heat dissipation? Or maybe they are just comfy pillows for keeping its stress levels low.
Does it look like the foam is conductive?
It also appears the bottom is just press-fitted with the O ring offering the water & dust sealing and wedge so the back doesn’t come off. For sure a better design than the glued backs in the older series. The trick will be getting the back on without damaging the O ring, a touch of scuba divers O ring grease will be needed.
Any idea what kind of chips the A88 AY10 and 18206 00D5 are and who provides them?
-
-
-
This golden donut is likely a streamlined antenna, as we've not seen the fiddly brackets or golden gaskets of yesteryear.
-
Meanwhile, we've come to the headline feature: new electrical heart sensors (ECG) to complement existing optical sensors.
-
These electrodes detect tiny changes in electrical polarization across your skin as your heart beats. The S4 then interprets that data to compute and analyze your heart rhythm.
-
-
-
Time to dig into that second electrode—the all-new digital crown. We pull off some pieces and quickly find the fun parts.
-
Grab your magnifying glass—we're entering micro-world.
-
The internal golden cylinder has micro scratches on it, allowing an optical encoder (the little black box on the ribbon cable) to track its rotation.
-
The springy bracket behind the cylinder likely conducts the electrical signal from your finger through to the watch, completing the ECG circuit.
-
The tiny switch behind that spring acts as the crown's mechanical button. Plus, there's a nice gasket on the exterior crown shaft for ingress proofing.
-
-
-
The original Apple Watch was revolutionary upon its release, but the yearly updates have been mostly minor—until now.
-
Where the first Watch was awkwardly layered together and used too much glue, the Series 4 feels much more thoughtfully laid out.
-
Apple pundit John Gruber has compared this to the leap in design brought by the iPhone 4, and we might even go a bit further and call it an iPhone 5: a device that knows its priorities, and wants to look as elegant inside as out.
-
If this watch didn't get your heart rate up, maybe it's time for a double iPhone teardown?
-
Big thanks to Creative Electron for helping out! Now only one thing remains. Drumroll please ...
-
- Watch band replacements remain fast and simple, and are even backward-compatible with previous models.
- Screen replacements are difficult but do-able—it's the first thing to come off, and detaches via simple ZIF connectors.
- Battery replacements are pretty straightforward, once you're inside.
- While not proprietary, incredibly tiny tri-point screws are a repair hinderance. And they are all over the place.
- Several component flex cables are mounted directly to the S4 package, requiring skilled microsoldering to replace.
- The resin-encased S4 system makes most board-level repairs impossible.


최종 결론
수리 용이성 점수


(10은 가장 쉬운 수리를 뜻합니다)

팀

댓글 52개
So how much of the inside is actually accessible and serviceable from the back of the device?
That looks a lot less hard to remove and put back without losing waterproofing (looks like it even has a silicone gasket…)
Besides the sensors attached to the bottom cover, it doesn’t look like you can get to the battery and other components from that side. The S4 blocks everything and it’s much too large to remove from the bottom out. Much of the screw heads are also facing away from the bottom side.
bert -
It is not possible to access the internals from the back, the back is locked to the case with screws from the inside.
Tom Chai -
wait, are you not opening up the SiP?
It is resin encased, not very easy to do.
Dillan -
About the sensor from Bosch, it should be Bosch Sensortek if it is right. Sensortek is the company for consumer electronics, Bosch it self only sells sensors for automotive.
Zu deutsch:
Bei dem Sensor handelt es sich vermutlich tatsächlich um ein Produkt von Bosch. Allerdings verkauft Bosch selbst nur an Automotive Kunden und die Sensoren für Consumer kommen von der Tochtergesellschaft Bosch Sensortek. Einfach der vollständigkeit halber.
Ich habe für Bosch im Halbleiterwerk in Reutlingen gearbeitet und auch solche Chips im Bereich Lithographie bewegt.
TheLOD2010 - 답글
appears to be 6; the contacts are visible in the last picture below the speaker on the top left.
Please disassemble the optical sensor which seems to be new, 6 LEDs and 8 photodiodes, please check for wavelength of LEDs (e.g. power them and check out the colors).
Thanks!
Yes, please do that! It’s very important to figure out how much better the sensor is. Thank you!
ps: I think it’s 4 LEDs
Annie B -
So just to confirm, the battery size is DOWN from 1.34 watt-hour of last year’s 42 mm watch to 1.12 watt-hour of this years 44 mm watch, is that the case here?
I’m not sure if the efficiency improvement in the S4 SiP compared to S3 of last year’s model would make up for that 20% battery loss and the 30% larger screen size. I would imagine the actual stand-by time would decrease by a fair margin compared to last year’s model (44 mm vs 42 mm).
I must say I don’t mind the tri-point screws. At these sizes, phillips screws are a real pain - like they aren’t at any size, think on - dropping to just three wings gives the screw a bit more meat.
But then again, I have a similar argument for pentalobe - that screw size is too small for torx or hex, Phillips is bad and wrong - pentalobe makes a nice, solid joint between screw and driver.
IFixit staff sure has a strange concept of that overall ‘repairability’ score. Based on the information I’ve seen, and the fact that you’ve permanently compromised the water proofing by opening the device and not replacing the adhesive pack with a new one that Apple won’t provide, I don’t see how this gets anything higher than a “3”. Looking at the pictures, there was also some pretty rippin’ adhesive in there, looking at the distortion on the battery envelope. 4 years ago, you would have crapped all over this thing.
It’s an optical rotary encoder—basically this sensor watches microscopic scratches on this cylinder and counts passing scratches as the crown turns to figure out when and how much it’s turning.
hi, so what was the gps (GNSS) chip used please?
The ECG sensing facility is an amazing addition to a consumer device. It isn’t obvious from usage or the tear-down when ECG pick-up is resistive i.e. the crown and rear pads are resistively coupled to an input, or whether it is capacitive i.e. the crown/rear pad is a dielectric with the finger acting as a capacitor plate. It is probably resistive, but anyone know for sure? The rear pads appear to be a pair, I wonder why?
is it more durable than the 3 in terms of water resistance? i’m hard on my watch from a sweat and swim perspective. I always have a popped screen. the 3 actually cracked from the inside all the way around the screen. will the 4 do better with battery swelling (which i suspect this is but haven’t dismantled it until i’m positive its out of warranty) and general water exposure?
To change the battery stays marks... I will not buy!
Is there any chance replacing the display against a new one without loosing the NFC functionality for apple pay? Is there a way to register the new nfc part of the display to the watch for getting back NFC? Does Apple help customers with this issue after installing a new display?
To reduce the likelihood of problems (no guaranty), delete all your ApplePay account info before the replacement, and then re-enter it with the new display installed (test functionality before closing the watch with new adhesive). But there is also a user guide to replace the NFC chip on a new display with the one from the old damaged display (Series 3 NFC on Series 2 display).
What is the black tape with two screw connectors that’s taped on the flex cable?
You mean in the final picture the second part from the top on the left? That’s the service port flex cable (with six golden contacts) that hides behind the display flex cables.
Anntena wifi, and Bluetooth. Where ?
On Step 11, there are 5 ribbon cables shown in the picture. What are the two side ones for (the ones that attach down with screws)? What would happen if one of those ripped?
Hello Pavlin, those might be a combination of grounding and heat distribution. Probably not a big thing if one rips, but if both are damaged your could get warmer than usual.
Hi .
Is it possible to swipe between the scrollbar and the main body of the clock, Something happens to the scroll????
I poked the little hole next to the button with a sim car ejector…(idiot)
would I have damaged anything I’m worried about it’s waterproofing if there is any there?
Tom Turner - 답글
Hi Tom, behind the hole there is the microphone. If you can still “talk” to Siri and she understands you, your mic is in good condition (let that be your first test). If not you might have damaged the mic. Depending on how hard you pushed there is a slight possibility that you’ve pushed the mic inwards a bit. If that’s the case I would not take the watch for a swim (or shower with it).
other than acids, any recommendations on epoxy removers to expose the chip-set on the board, post removal?
I have broken the glass on the back of the watch that covers the sensors, could this be easy removed and replaced without a total strip down?
This would come close to a total strip down—display, battery, taptic engine, and the logic board need to come out before being able to take out the bottom part. Assuming you’ll find a replacement part.
Hi.
I changed my 40mm Watch 4 stack screen and when I put the new one it stopped giving image.
The watch works because it vibrates and the iPhone recognizes it to match it, but I don't see anything on the screen. I put the old one back on, but nothing appeared on the screen either. The problem is not on the screen, but I don't know what it can be. Can anybody help me?
Thank you.
The display cables are very delicate and rip easily. also, there are two additional contacts to each side that ground to the frame which are equally fragile (see step 11). But to start with you might want to check the proper seating of the connectors in the ZIF sockets and that the contacts are clean.
hi I would like information if possible. in practice after replacing the display the AW does not remain connected if I move away from the iphone about 1mt and the wifi the same thing. I looked but I can't locate the antenna. can you tell me where it is? thanks
The NFC chip is on the back of the display. Did you unpair before the repair? Maybe unpairing with the old display and then pairing again with the new one might help. But that’s just a guess, the Apple Watch is quite tricky when it comes to NFC communication.
I’m not sure if you can answer this, but, does it look like the heart sensor array is the same on the 5 as on the 4? I have a 4 with busted sensor and the back of a 5 laying around and am interested in getting a working watch out of it!
I can’t say for sure (lockdown—don’t have both models at hand right now). But even if those sensors are similar, I doubt it is possible to fit S4 parts into an S5 case. Judging from this step in the S5 teardown compared to step 13 in this guide I’d say: Not compatible.
Where is located WiFi & Bluetooth antenna
Ok one comment my apple watch series 4 just lost the sticker seal and fell off even disconnected from ribbon cable… everything is working fine but (heart sensor) won’t stay any tips on a new seal or anything similar?
Esa banda negra fina que une los tres conectores de pantalla y que va atornillada ¿Sirve para algo?, en la mayoria de videos se rompe y no se reemplaza.
If I replace the rear glass which cracked after a fall, will the waterproof or water resistance be gone? I like using my apple watch to track my swim laps.