주요 콘텐츠로 건너뛰기

필요한 것

해당 분해도는 수리 안내서가 아닙니다. CANDY CON Wireless Controller 수리는 저희 서비스 설명서를 사용하십시오.

  1. CANDY CON Wireless Controller Teardown, Remove the faceplate: 1 단계, 이미지 1/2 CANDY CON Wireless Controller Teardown, Remove the faceplate: 1 단계, 이미지 2/2
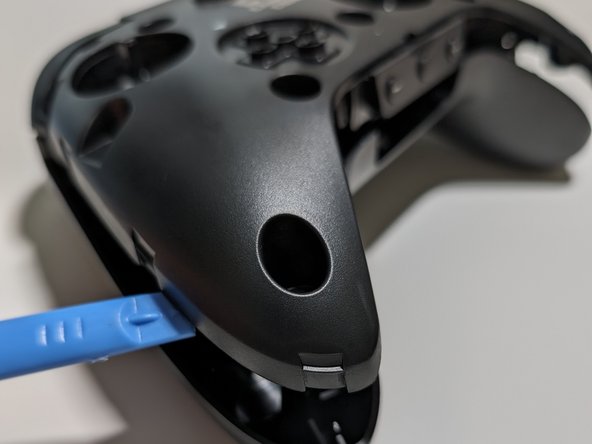
    • Locate the indentation on the bottom of the controller

    • Pull the faceplate off using a fingernail or spudger

  2. CANDY CON Wireless Controller Teardown, Remove Joysticks and D-pad: 2 단계, 이미지 1/2 CANDY CON Wireless Controller Teardown, Remove Joysticks and D-pad: 2 단계, 이미지 2/2
    • Remove both joysticks and the D-pad by carefully pulling up

  3. CANDY CON Wireless Controller Teardown, Begin opening the base controller: 3 단계, 이미지 1/3 CANDY CON Wireless Controller Teardown, Begin opening the base controller: 3 단계, 이미지 2/3 CANDY CON Wireless Controller Teardown, Begin opening the base controller: 3 단계, 이미지 3/3
    • Remove 8 Phillips screws with a Philips #1 screwdriver

    • Pry open the two main pieces by pulling up on the edges of the controller

  4. CANDY CON Wireless Controller Teardown, Finish opening the base controller: 4 단계, 이미지 1/2 CANDY CON Wireless Controller Teardown, Finish opening the base controller: 4 단계, 이미지 2/2
    • Separate the controller by flipping it on its face and then prying up near the bottom buttons

  5. CANDY CON Wireless Controller Teardown, Unplug the battery: 5 단계, 이미지 1/1
    • Unplug the battery using a spudger tool

  6. CANDY CON Wireless Controller Teardown, Unscrew the mainboard: 6 단계, 이미지 1/1
    • Unscrew the 2 Phillips #1 screws securing the mainboard to the controller housing

  7. CANDY CON Wireless Controller Teardown, Remove the mainboard and haptic motors: 7 단계, 이미지 1/3 CANDY CON Wireless Controller Teardown, Remove the mainboard and haptic motors: 7 단계, 이미지 2/3 CANDY CON Wireless Controller Teardown, Remove the mainboard and haptic motors: 7 단계, 이미지 3/3
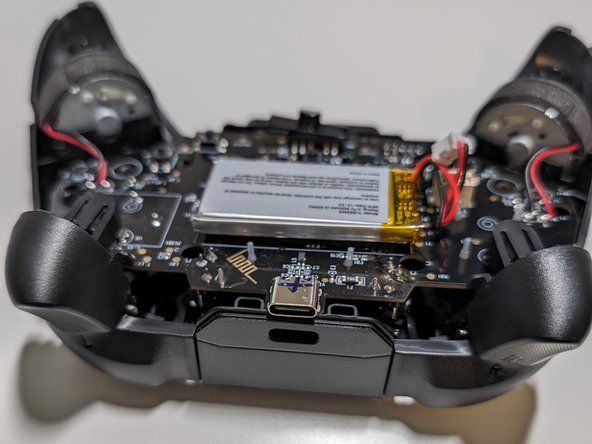
    • Carefully remove the mainboard and attached haptic motors by pulling it up from the bottom and then top

    • Be careful removing the haptic motors to ensure the wires do not break

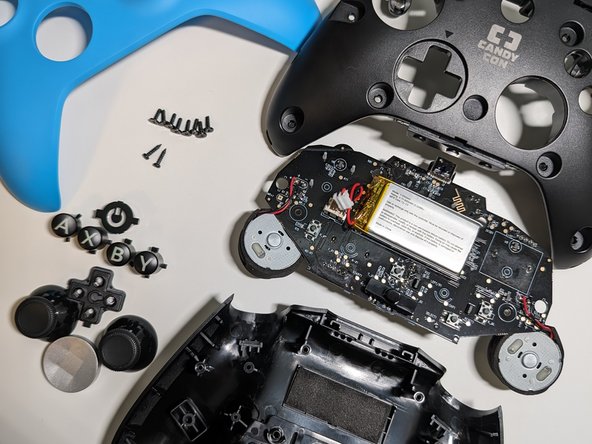
  8. CANDY CON Wireless Controller Teardown, Teardown Complete!: 8 단계, 이미지 1/2 CANDY CON Wireless Controller Teardown, Teardown Complete!: 8 단계, 이미지 2/2
    • All buttons are keyed so they can only go in the exact spot they belong

  9. CANDY CON Wireless Controller Teardown, Reassembly tips: 9 단계, 이미지 1/3 CANDY CON Wireless Controller Teardown, Reassembly tips: 9 단계, 이미지 2/3 CANDY CON Wireless Controller Teardown, Reassembly tips: 9 단계, 이미지 3/3
    • Follow the teardown guide in reverse to reassemble the controller

    • When reassembling the controller align the bottom buttons first and then work on the charging port side

    • Test all the buttons before or right after screwing in the mainboard

    • The D-pad has an arrow on the top that should point up (towards the arrow on the base controller)

Roger

회원 가입일: 04/23/24

229 평판

안내서 1개 작성함

댓글 0개

댓글 쓰기

조회 통계:

24 시간 전: 1

7일 전: 3

30일 전: 40

전체 시간: 272