주요 콘텐츠로 건너뛰기

필요한 것

해당 분해도는 수리 안내서가 아닙니다. D-Link DNS-323 수리는 저희 서비스 설명서를 사용하십시오.

  1. D-Link DNS-323 Teardown, D-Link DNS-323 Teardown: 1 단계, 이미지 1/3 D-Link DNS-323 Teardown, D-Link DNS-323 Teardown: 1 단계, 이미지 2/3 D-Link DNS-323 Teardown, D-Link DNS-323 Teardown: 1 단계, 이미지 3/3
    • The DNS-323 is a powerful NAS with Gigabit Ethernet, print server and extension via software. It can have a FTP server, DHCP, and even Bittorrent!

    • This is my first disassembling, please be patient, correct my grammar mistakes if you find some.

    • This was pretty easy, nothing compared to iPods or Macs.

  2. D-Link DNS-323 Teardown: 2 단계, 이미지 1/2 D-Link DNS-323 Teardown: 2 단계, 이미지 2/2
    • First thing first remove the frontal part by sliding it up and pulling out.

    • You will be able to see the hard disks.

    • By the way, the DNS-323 can support up to 3TB of disk space with the new firmware update. That's 1.5TB per disk! Could you imagine such capacity twenty years ago?

  3. D-Link DNS-323 Teardown: 3 단계, 이미지 1/3 D-Link DNS-323 Teardown: 3 단계, 이미지 2/3 D-Link DNS-323 Teardown: 3 단계, 이미지 3/3
    • Now it's time to remove the Hard Disks.

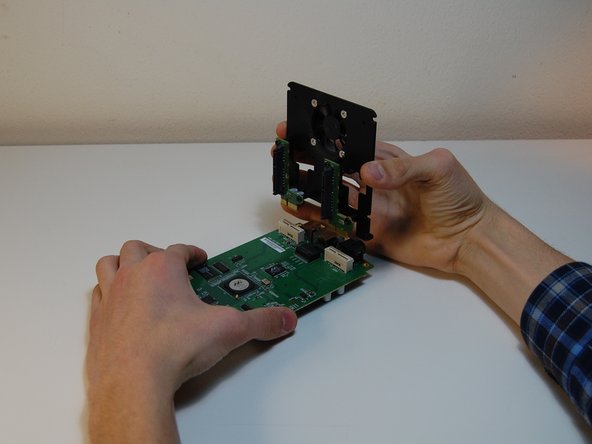
    • BE CAREFUL, when handling these parts do not touch the circuits, do not shock, and do not let your dog play with them. I'm serious, this could lead into data loss.

    • At the back of the DNS, pull out the two little levers to make the hard drives come out.

    • Gently put them in a safe place until the whole unit is reassembled.

    • The drives are order-specific! Remember if they were right or left, otherwise you will be prompted with a message when accessing the NAS after reassembly.

  4. D-Link DNS-323 Teardown: 4 단계, 이미지 1/2 D-Link DNS-323 Teardown: 4 단계, 이미지 2/2
    • Remove the frontal part.

    • There are two screws; remove them with a cross screwdriver.

    • Pull off the little sheet of metal that's covering the front.

  5. D-Link DNS-323 Teardown: 5 단계, 이미지 1/3 D-Link DNS-323 Teardown: 5 단계, 이미지 2/3 D-Link DNS-323 Teardown: 5 단계, 이미지 3/3
    • Now it's time to open the rear.

    • Locate the four rubber caps which cover the screws, then remove them with a flat screwdriver.

    • Remove the screws with a Phillips screwdriver.

  6. D-Link DNS-323 Teardown: 6 단계, 이미지 1/3 D-Link DNS-323 Teardown: 6 단계, 이미지 2/3 D-Link DNS-323 Teardown: 6 단계, 이미지 3/3
    • Take off the rear and unscrew the next four screw showed in the picture.

    • These screws are hard! Pay attention not to strip them!

  7. D-Link DNS-323 Teardown: 7 단계, 이미지 1/3 D-Link DNS-323 Teardown: 7 단계, 이미지 2/3 D-Link DNS-323 Teardown: 7 단계, 이미지 3/3
    • Pull the board to make it slide out of the case.

    • The board is quite simple, a little ARM-based computer mounting Linux. (is it?). The condensers are mostly for power supply, doubled because of the two HDDs.

    • Remove two more screws under the circuit.

  8. D-Link DNS-323 Teardown: 8 단계, 이미지 1/3 D-Link DNS-323 Teardown: 8 단계, 이미지 2/3 D-Link DNS-323 Teardown: 8 단계, 이미지 3/3
    • Time to remove the iron part.

    • Pull out the fan wire. If you need you can use a flat screwdriver, paying attention not to break it.

    • It's time to detach the SATA adapters with the fan, so you can contemplate the main circuit.

    • Don't remove the battery as this could lead to time loss, some basic (board-level) settings, and unwanted resets.

  9. D-Link DNS-323 Teardown: 9 단계, 이미지 1/3 D-Link DNS-323 Teardown: 9 단계, 이미지 2/3 D-Link DNS-323 Teardown: 9 단계, 이미지 3/3
    • Now all about the chips

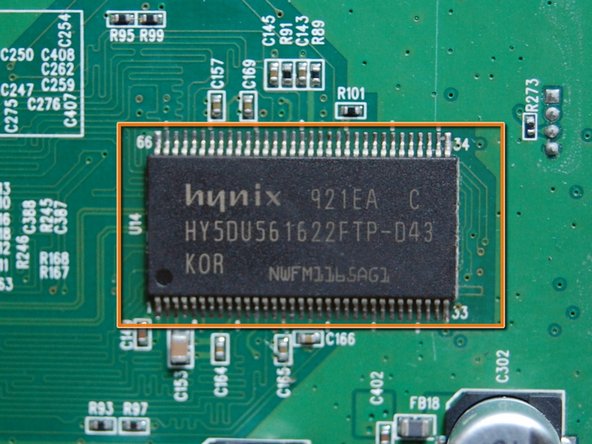
    • The first chip looks like a flash memory for the ROM, or the random memory for the OS, there are two of them; Labelled 921EA C HY5DU56 1622FTP-043 Made in Korea NWFM136SAG3

    • Marvell 88F8152-A2 "Feroceon(r)" Storage Networking SoC (System-on-Chip)

    • A 12 to 24 bit multiplexed D-type latch marked 94CJNQK ALVCH162260 , see more there -->

    • http://focus.ti.com/docs/prod/folders/pr...

    • Eon SiliconSolution Inc EN29LV640B-90TIP 64Mbit Flash memory

  10. D-Link DNS-323 Teardown: 10 단계, 이미지 1/2 D-Link DNS-323 Teardown: 10 단계, 이미지 2/2
    • Last chip... Marvell Alaska 88E1111 single-port GbE transceiver. Markings: 88E1111-BAB1 6MAE490301.4 0914 B2P Taiwan

    • Remove the last screws.

    • That's not useful unless you want to replace the fan; six screws keep the two SATA connectors and...

    • ...four tapping screws hold the fan.

  11. D-Link DNS-323 Teardown: 11 단계, 이미지 1/2 D-Link DNS-323 Teardown: 11 단계, 이미지 2/2
    • That'all folks! The DNS-323 is now disassembled. If you want to put things back just follow this guide backwards!

    • Guide made by Mc128k.

Mc128k

회원 가입일: 02/16/10

243 평판

안내서 2개 작성하였습니다

댓글 8개

Awesome teardown G!

Miroslav Djuric - 답글

Thank you so much! It's only my first guide, but I'm going to post fun stuff lately!

Please always watch for grammar mistakes!

Mc128k - 답글

Very nice teardown. The pictures were very clear unlike my iPhone dock tear down. I'm making another teardown today. Keep up the good work Mc128k! :)

Nicholas Ouimet - 답글

Yes, that's PER disk, thank you.

Mc128k - 답글

I'm having to buy a replacement power supply for my DNS-323. Do you know the pinout set up for it?

Dave - 답글

댓글 쓰기

조회 통계:

24 시간 전: 4

7일 전: 24

30일 전: 74

전체 시간: 38,750