주요 콘텐츠로 건너뛰기

필요한 것

해당 분해도는 수리 안내서가 아닙니다. Hitachi KC30 Radio Alarm Clock 수리는 저희 서비스 설명서를 사용하십시오.

  1. Hitachi KC30 Radio Alarm Clock Teardown, Removing top cover 1: 1 단계, 이미지 1/2 Hitachi KC30 Radio Alarm Clock Teardown, Removing top cover 1: 1 단계, 이미지 2/2
    • Turn the clock upside down

    • Remove the 6 screws.

    • The two front screws are shorter and slimmer.

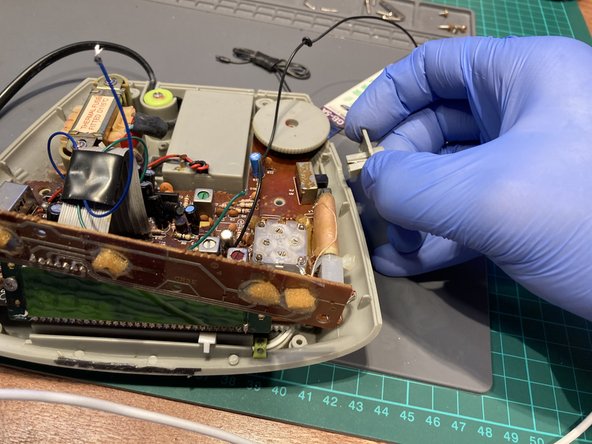
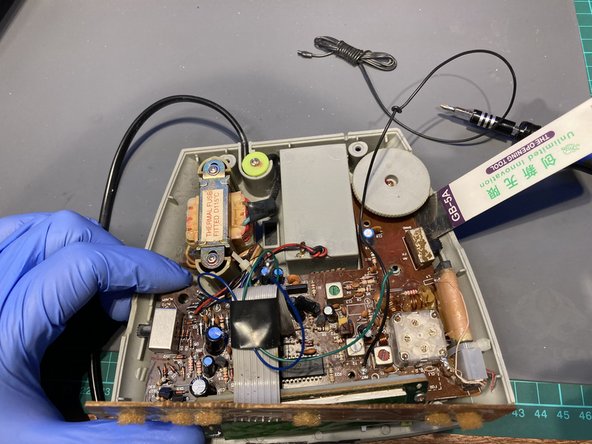
  2. Hitachi KC30 Radio Alarm Clock Teardown, Removing top cover 2: 2 단계, 이미지 1/3 Hitachi KC30 Radio Alarm Clock Teardown, Removing top cover 2: 2 단계, 이미지 2/3 Hitachi KC30 Radio Alarm Clock Teardown, Removing top cover 2: 2 단계, 이미지 3/3
    • With the help of a pry tool, pop the cover open.

    • Open it from the back towards the clock display.

    • Don't try to separate the cover as both the speaker and the motherboard is still connected!

  3. Hitachi KC30 Radio Alarm Clock Teardown, Removing top cover 3 / Speaker disconnect: 3 단계, 이미지 1/3 Hitachi KC30 Radio Alarm Clock Teardown, Removing top cover 3 / Speaker disconnect: 3 단계, 이미지 2/3 Hitachi KC30 Radio Alarm Clock Teardown, Removing top cover 3 / Speaker disconnect: 3 단계, 이미지 3/3
    • De-solder the speaker connections.

    • Unscrew the button panel from the top cover.

    • Pry out the button panel form the cover.

  4. Hitachi KC30 Radio Alarm Clock Teardown, Removing ALARM switch: 4 단계, 이미지 1/2 Hitachi KC30 Radio Alarm Clock Teardown, Removing ALARM switch: 4 단계, 이미지 2/2
    • Remove the ALARM ON/OFF button

  5. Hitachi KC30 Radio Alarm Clock Teardown, Removing FM/AM switch: 5 단계, 이미지 1/2 Hitachi KC30 Radio Alarm Clock Teardown, Removing FM/AM switch: 5 단계, 이미지 2/2
    • Remove the FM/AM selector knob

  6. Hitachi KC30 Radio Alarm Clock Teardown, Removing transformer: 6 단계, 이미지 1/2 Hitachi KC30 Radio Alarm Clock Teardown, Removing transformer: 6 단계, 이미지 2/2
    • Unscrew the transformer securing screws

    • Pull it out of the socket

  7. Hitachi KC30 Radio Alarm Clock Teardown, Remove motherboard from case: 7 단계, 이미지 1/3 Hitachi KC30 Radio Alarm Clock Teardown, Remove motherboard from case: 7 단계, 이미지 2/3 Hitachi KC30 Radio Alarm Clock Teardown, Remove motherboard from case: 7 단계, 이미지 3/3
    • Remove the screws that secures the motherboard to the base.

    • Grab the motherboard on one side and pry it on the opposite side to release it from the base.

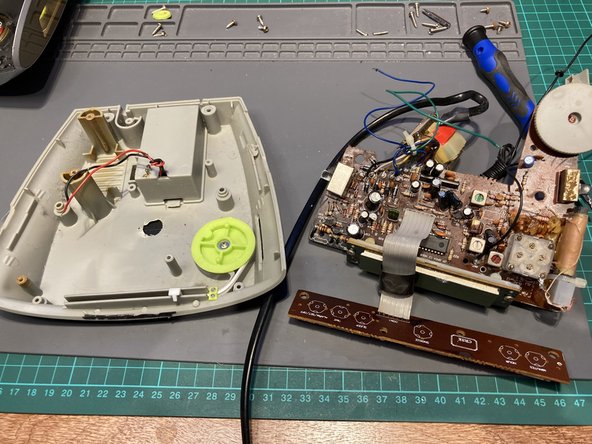
  8. Hitachi KC30 Radio Alarm Clock Teardown, Complete disassembly: 8 단계, 이미지 1/3 Hitachi KC30 Radio Alarm Clock Teardown, Complete disassembly: 8 단계, 이미지 2/3 Hitachi KC30 Radio Alarm Clock Teardown, Complete disassembly: 8 단계, 이미지 3/3
    • For complete disassembly de-solder the transformer.

    • ...and the button (control) board

    • Remember the labelling/wire colours

honakrisi

회원 가입일: 01/28/20

3,385 평판

안내서 7개 작성하였습니다

댓글 0개

댓글 쓰기

조회 통계:

24 시간 전: 0

7일 전: 0

30일 전: 12

전체 시간: 224