필요한 것
-
-
Unplug machine from the mains electricity.
-
Tape down the water refill cover.
-
-
-
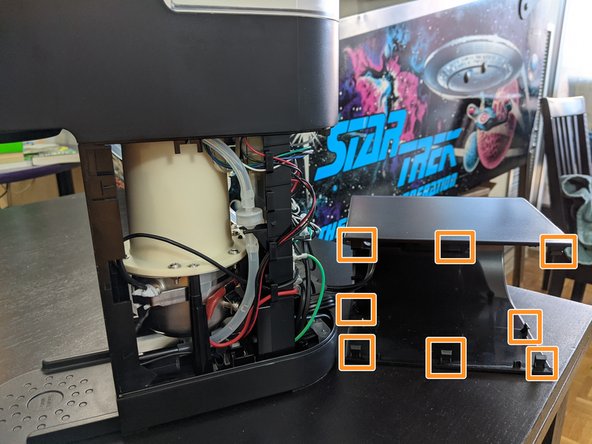
This clip on the rear of the unit is particularly tricky to pop off, but popped off when the other chassis clips were all removed and held open, while pulling it backwards.
-
There are 3 clips down each vertical side, 2 on the top middle and 2 on the bottom middle.
-
This is where the screws screw in to. They need to be unhooked from the base to be able to pull it backwards and off.
-
Getting the chassis off was particularly tricky, I recommend borrowing a second pair of hands if you can.
-
-
-
-
Flip the unit upside down.
-
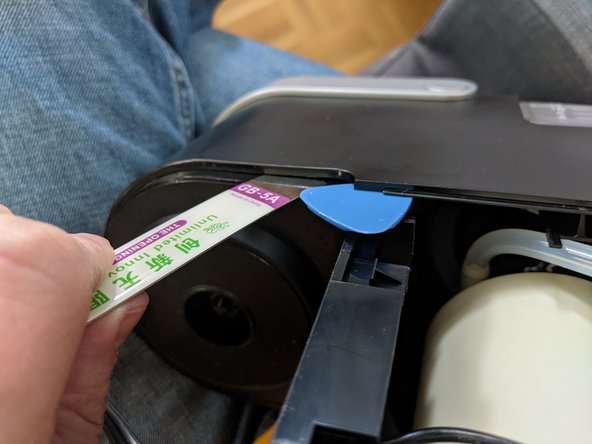
The top of the unit is held in by one clip near the circuit board and clips around the cup spout
-
Holding the unit upside down, work pry bars around the curve and the top will pop off.
-
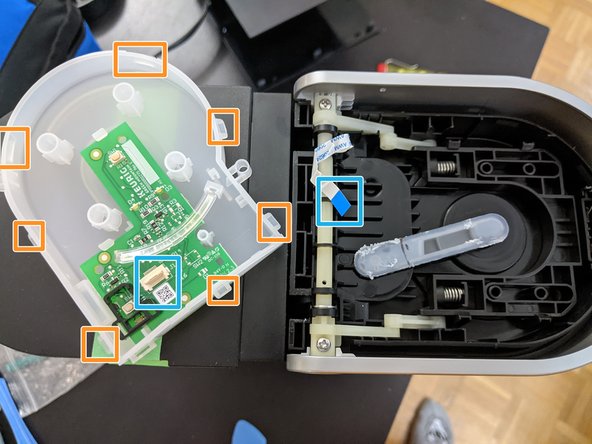
Once the front is popped off, you can wiggle the top section and it will separate from the base
-
-
-
There are six clips around the curved section and four clips along the hinge holding the top of the lid in place.
-
Apply pry bars around the curved section of the lid until the middle can be pulled out.
-
Once the curved section has popped off, the lid will still be attached at the hinge section. Close the lid and pry along the back of the hinge section, pushing the lid top away from the water refill area until the lid pops off.
-


댓글 16개
I plugged mine into 220V
Can I change the fuse?
How ?
and where can I find the part
There is a heavy current heater circuit. These machine are not dual voltage. Machine is made for local voltage and modification is unlikely possible. There is a thermal fuse for safely right after the main, hiding in red sleeve, but I did not open and inspect the rating. Circuit continuity can be verified easily.
I don’t recall seeing a fuse, but maybe it’s there. Take it apart and find out.. then document it here ;-)
Took it apart, power button and strong button comes on but brewing button does not work (no light seen). Can this be the board that controls the switches or is it a defective strip?
I accidentally plugged my Keurig K-mini to 220V. when I opened it, I found out that the R7 resistor (10 ohms) and the MOV1 parts got burned and blown, makings its identity no longer visible. Does anyone know if this is a thermistor or a varistor? and its correct value? I couldn't find a Keurig K-mini circuit diagram online. Would highly appreciate a response. Thank you in advance.