소개
What's in side this ball-shaped camera?
필요한 것
-
-
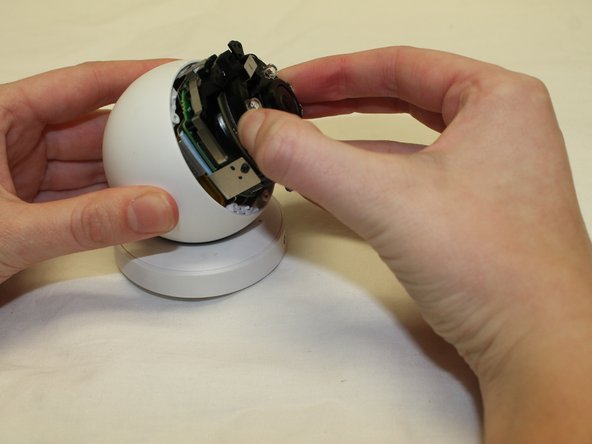
The Circle camera has no external screws. The first step to get in requires a plastic spludger: the dark colored ring is held on with double sticky tape.
-
Note: the ring is made of infrared transparent plastic, and includes lenses to help direct the night vision LEDs.
-
-
-
It's all screws from this point out: a lot of them. Consider using bags to hold groups of screws together for reassembly.
-
Unscrew the four screws circled in order to remove the first ring.
-
-
-
-
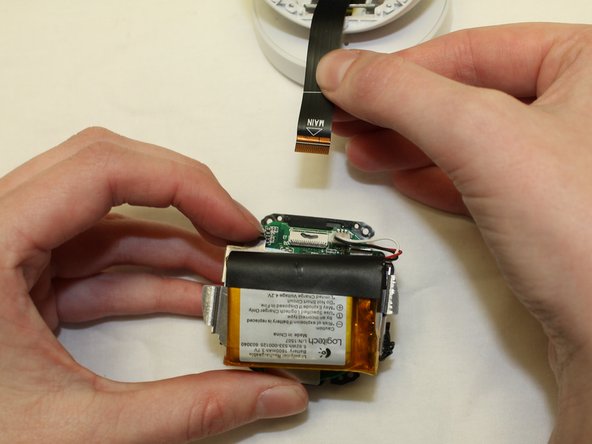
Take care not to damage the flexible cable. On the connector, flip up the black plastic cam to release the cable. You can then remove the camera / battery assembly from the ball.
-
Note the extensive use of heat sinks and thermal interface (TIM) materials. This camera is delicately balanced thermally.
-
-
-
Ho! What's that? Under a soft spot in the base is a hidden USB connector, presumably used for firmware loading in production.
-
To disassemble the base find 3 screws under the soft spot, punch through using a screwdriver, and remove the screws. After that both parts can be easily separated.
-
-
-
The outer ring has lenses to focus IR light, and a hole for the camera lens.
-
The six infrared LEDs are on a thick board, with an aluminum heat spreader, and a connection to two solid metal blocks attached to the sensor board.
-
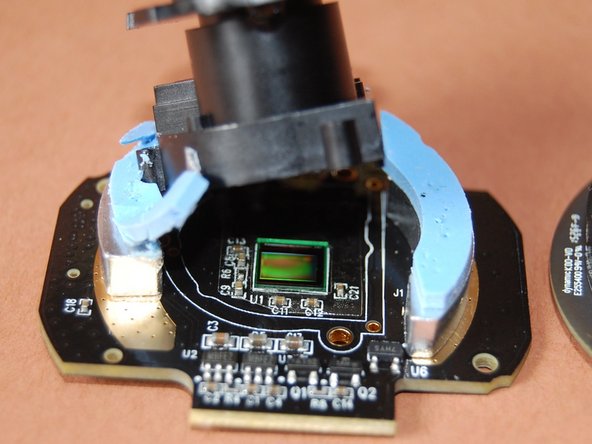
The lens is manually focused and secured with what looks like hot melt glue (this may cause focus issues over time).
-
There is just one piece of filter glass, flipped in place for day mode (higher end cameras use separate glass for day and night mode).
-
The optical sensor is at the bottom of the stack. It's surrounded by a clear plastic sticker (if you know why, post in the comments!).
-


댓글 25개
any ideas where get a replacement ribbon cable? I dropped the camera when opening the box and the base and camera separated (ribbon cable tore). I was able to disassemble with this guide, but now I need a new cable and Logitech is no help (I asked).
Thanks
David
We just had it fall off the table it was on and it did exactly the same thing... the base and camera separated (ribbon cable tore).
I emailed the manufacturer of the cable to see if they can help, will let you know if they answer.
any word from them?
bradowenco - 답글
Nothing yet, I'll have to send another email.
That company sent me to Logitech, which was a dead end. So looks like we have some spare parts going forward. I may rummage through some old broken laptops I have to see if there might be something in those.
Im in need of a ribbon cable as well.
Unfortunately I dropped the camera too. The ball separated from the mount and the cable broke.
I would be very interested in a replacement ribbon too. But even if I had the replacement cable I wouldn't know how to assemble the cable, the ball and the mount again...
I'm in the same boat. I was able to get into the base of the camera and disassembled it enough to get the cable out. Its got a part number printed on it but I haven't been able to locate it yet. Maybe someone else has better luck finding it from this picture
Has anyone been lucky enough to get the flex cable yet?, It is a shame that there is nothing to do but throwing this thing away.
Just purchased this and it works for me. http://m.ebay.com/itm/31PIN-120mm-0-3mm-...
about a 4 hour job but mine works after some serious redesign work. I ordered mine about 4 weeks ago. When I installed it I had to make several modifications. I removed the old silver skinny metal piece that held the camera on to the base and replaced it with two screws with nuts (the same size as light and plug cover screws in the house), one screw on each side of the new ribbon cable. I also had to remove some of the plastic on the base side to allow the screws and new cable to fit. I added some regular 3M electrical tape to protect the new cable. I also had to bend the new cable 90 degrees because it’s a flat cable. Pretty tough job but it works.
What exact model number and specifications for the cable? Digikey is usually a good source for such things.
Or can I buy the battery? I have two dead?