주요 콘텐츠로 건너뛰기

필요한 것

해당 분해도는 수리 안내서가 아닙니다. Logitech Webcam Pro 9000 수리는 저희 서비스 설명서를 사용하십시오.

  1. Logitech Webcam Pro 9000 Teardown, Logitech Webcam Pro 9000 Teardown: 1 단계, 이미지 1/2 Logitech Webcam Pro 9000 Teardown, Logitech Webcam Pro 9000 Teardown: 1 단계, 이미지 2/2
  2. Logitech Webcam Pro 9000 Teardown: 2 단계, 이미지 1/2 Logitech Webcam Pro 9000 Teardown: 2 단계, 이미지 2/2
    • Remove screws where shown by the green arrows.

  3. Logitech Webcam Pro 9000 Teardown: 3 단계, 이미지 1/2 Logitech Webcam Pro 9000 Teardown: 3 단계, 이미지 2/2
    • Remove e-ring to detach grommet.

  4. Logitech Webcam Pro 9000 Teardown: 4 단계, 이미지 1/3 Logitech Webcam Pro 9000 Teardown: 4 단계, 이미지 2/3 Logitech Webcam Pro 9000 Teardown: 4 단계, 이미지 3/3
    • Remove screws indicated by the green arrows.

    • Do not remove the screws indicated by the red arrows at this point.

    • Autofocus system contains magnets.

  5. Logitech Webcam Pro 9000 Teardown: 5 단계, 이미지 1/3 Logitech Webcam Pro 9000 Teardown: 5 단계, 이미지 2/3 Logitech Webcam Pro 9000 Teardown: 5 단계, 이미지 3/3
    • Remove cover.

  6. Logitech Webcam Pro 9000 Teardown: 6 단계, 이미지 1/1
  7. Logitech Webcam Pro 9000 Teardown: 7 단계, 이미지 1/3 Logitech Webcam Pro 9000 Teardown: 7 단계, 이미지 2/3 Logitech Webcam Pro 9000 Teardown: 7 단계, 이미지 3/3
    • The screws indicated in red can now be removed. The screws are glued into place and removal can be assisted by heating gently with a soldering iron.

    • Autofocus motor connections can be removed by desoldering using desoldering braid where indicated.

  8. Logitech Webcam Pro 9000 Teardown: 8 단계, 이미지 1/3 Logitech Webcam Pro 9000 Teardown: 8 단계, 이미지 2/3 Logitech Webcam Pro 9000 Teardown: 8 단계, 이미지 3/3
    • Almost done.

  9. Logitech Webcam Pro 9000 Teardown: 9 단계, 이미지 1/3 Logitech Webcam Pro 9000 Teardown: 9 단계, 이미지 2/3 Logitech Webcam Pro 9000 Teardown: 9 단계, 이미지 3/3
    • The lens can be fully removed from the autofocus mount.

    • The infrared filter looks to be difficult to remove.

    • Further disassembly appears to be challenging.

    • They did not need to glue it on because the magnets held it in place.

    • The camera was fully reassembled and works.

I Heart Robotics

회원 가입일: 11/09/09

210 평판

안내서 3개 작성하였습니다

댓글 2개

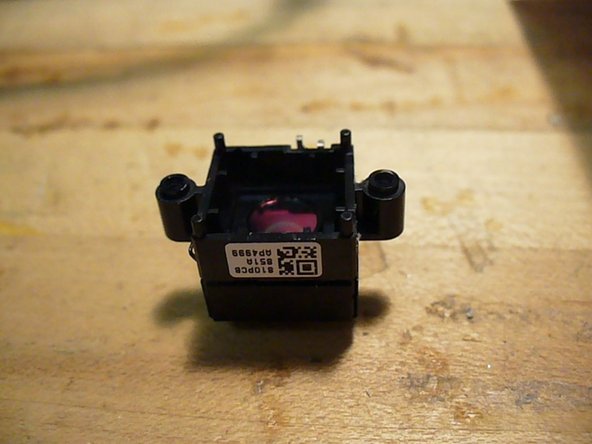
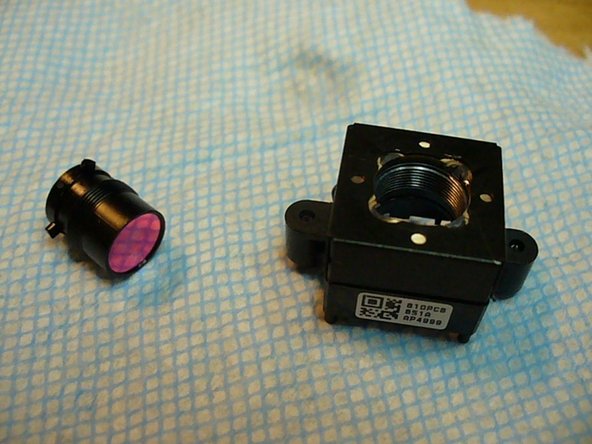
The IR filter can be removed.

Wear eye protection.

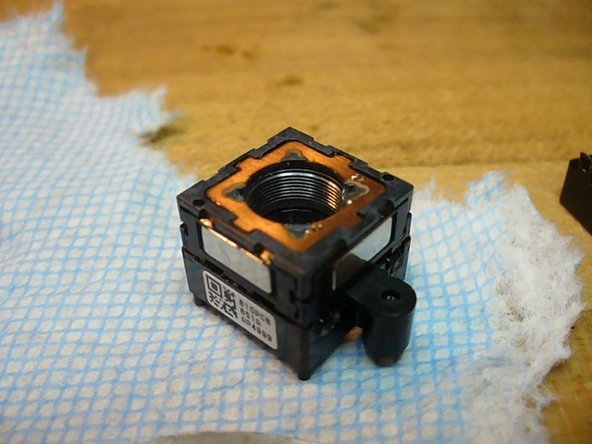
Take a sharp pocket knife or utility knife and slowly, carefully score around the edge of the IR filter where it bumps up against the inside of the round lens body. Keep doing this around and around and around. Remove shards of material every couple of passes.

Try slipping a very thin jewelers screwdriver under the filter at various points along the edge where you have scored. If it does not get in, repeat steps above.

At some point enough of the filter will have been removed by the scoring process that you can slip the screwdriver (or whatever thin prying instrument you can think of) under the filter, and lever against the lens body to pop it out.

You will not be able to put it back in. Or if you can, I don't know how because I did not need to for my purposes.

Benjamin Cox - 답글

I cut out the IR filter with a box cutter. Cut 1mm from the end at a 45 degree angle while holding the lens in place. The filter comes off after a few tries. Be sure to cut off any rough edges, as the debris can fall ontop of the image sensor and cause dark cluster defects.

Simeon Trieu - 답글

댓글 쓰기

조회 통계:

24 시간 전: 0

7일 전: 2

30일 전: 14

전체 시간: 18,046