소개
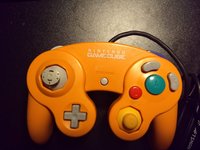
This controller (and its brother, not featured here) were bought at a thrift shop and were filthy. I disassembled this to clean it, but this would also work for modification/painting, trigger/button/stick repair, or power cord replacement.
필요한 것
-
이 단계에 사용된 도구:Plastic Cards$2.99
-
Locate and remove six (6) tri-point screws.
-
Gently pry the two halves of the controller apart using plastic cards or tools.
-
-
-
Remove four (4) phillips head screws from the interior trigger guards. Pull the trigger guards straight out to access the interior triggers.
-
Push up on the trigger base and pull it up and out of the slot it's sitting in. Pull the trigger assembly down and out of the case back. Left side shown, right side similar.
-
Separate the trigger base from the trigger itself by popping the retention bar out of the bottom of the trigger (purple circle)
-
-
-
-
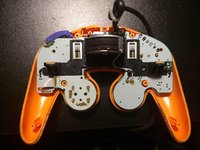
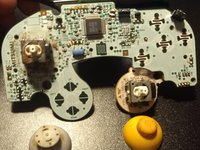
Gently pull the circuit board up and out of the front case and set aside.
-
There's nothing holding either the pads to your board or the buttons into your front case, so take a moment to make sure you didn't drop any.
-
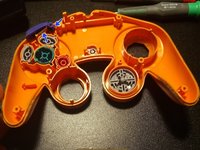
Remove any buttons you need from the front case. The Z button is the only one of note; there is a metal lever that sits in a groove and a post on the back side of it that sits in a hole to align the trigger.
-
-
-
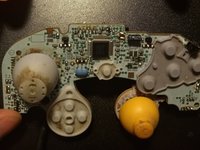
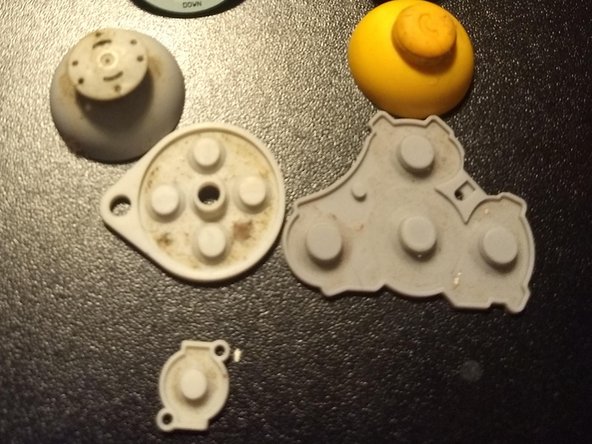
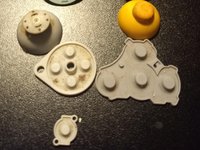
Gently pull the analog stick, C-Pad stick, and the pads for the D-Pad and face buttons.
-
Reassemble is opposite of disassembly. Most pieces only fit one way.
-


댓글 2개
i cannot find any replacement screws for the controller online. at all. please any equivalent screws if not oem? for the shell not internals.
(6) M2.63 x 8mm pan head self-tapping screws (coarse threads) should do the trick.. if by any chance you're still searching 5 years later. 😅 This kit includes torx replacements for the shell and internals: https://handheldlegend.com/products/torx...