주요 콘텐츠로 건너뛰기

필요한 것

해당 분해도는 수리 안내서가 아닙니다. Nokia N900 수리는 저희 서비스 설명서를 사용하십시오.

  1. Nokia N900 Teardown, Nokia N900 Teardown: 1 단계, 이미지 1/1
    • First, flip the phone so the back is facing upwards.

  2. Nokia N900 Teardown: 2 단계, 이미지 1/1
    • Next, locate the slit on the side of the phone and remove the back cover.

  3. Nokia N900 Teardown: 3 단계, 이미지 1/1
    • Once the back has been removed, take out the battery.

  4. Nokia N900 Teardown: 4 단계, 이미지 1/1
    • Using a small bit screwdriver, unscrew all six screws located in the back of the phone. If necessary, iFixit has 16 to 112 Bit Driver kits available for purchase.

  5. Nokia N900 Teardown: 5 단계, 이미지 1/2 Nokia N900 Teardown: 5 단계, 이미지 2/2
    • Once all six screws have been removed, gently pull the phone apart. You should now be left with two pieces.

  6. Nokia N900 Teardown: 6 단계, 이미지 1/2 Nokia N900 Teardown: 6 단계, 이미지 2/2
    • Taking the back of the phone, remove the qwerty key mat. It should come off easily.

  7. Nokia N900 Teardown: 7 단계, 이미지 1/3 Nokia N900 Teardown: 7 단계, 이미지 2/3 Nokia N900 Teardown: 7 단계, 이미지 3/3
    • Using the blue opening tool, pry out the green motherboard.

  8. Nokia N900 Teardown: 8 단계, 이미지 1/2 Nokia N900 Teardown: 8 단계, 이미지 2/2
    • Now, take the front half of the phone. Use the screwdriver to remove all six screws.

  9. Nokia N900 Teardown: 9 단계, 이미지 1/1
    • Once pulled apart, you should be left with two pieces.

  10. Nokia N900 Teardown: 10 단계, 이미지 1/2 Nokia N900 Teardown: 10 단계, 이미지 2/2
    • With the touch screen now removed from the keyboard slider, use the blue, plastic opening tool to remove the cover of the screen.

    • It is highly advised to take off one side at a time.

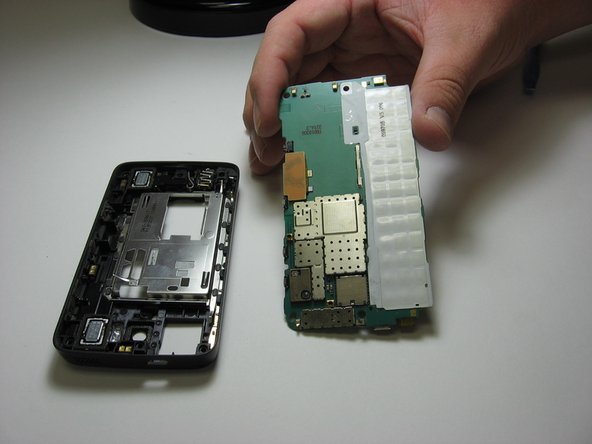
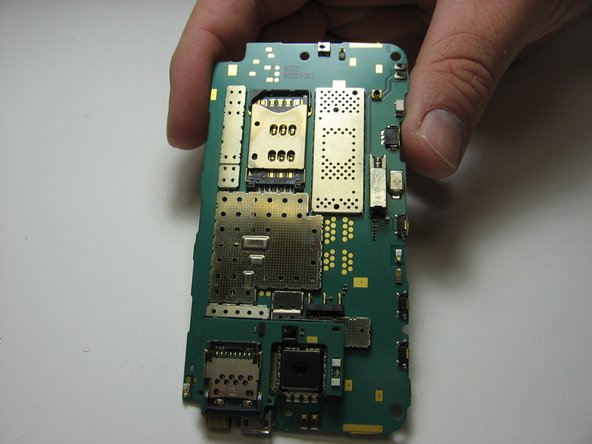
    • Once one section of the cover has been removed, the second cover will be removable. You have officially completed tearing down a Nokia N900.

Juan Haro

회원 가입일: 03/13/14

284 평판

안내서 2개 작성하였습니다

New Mexico State, Team 1-4, Easley Spring 2014 New Mexico State, Team 1-4, Easley Spring 2014 회원

NMSU-EASLEY-S14S1G4

4 회원들

안내서 4개 작성하였습니다

댓글 한 개

Looks like the LCD flex cable ripped off on this teardown, ouch!

Leonard Putra - 답글

댓글 쓰기

조회 통계:

24 시간 전: 2

7일 전: 7

30일 전: 20

전체 시간: 5,597