주요 콘텐츠로 건너뛰기

해당 분해도는 작업 중 입니다 – 최신 변경 사항을 보려면 주기적으로 다시 로드 하십시오!

  1. Panasonic Lumix GX80/85 Teardown, Panasonic Lumix GX80/85 Teardown: 1 단계, 이미지 1/3 Panasonic Lumix GX80/85 Teardown, Panasonic Lumix GX80/85 Teardown: 1 단계, 이미지 2/3 Panasonic Lumix GX80/85 Teardown, Panasonic Lumix GX80/85 Teardown: 1 단계, 이미지 3/3
    • I have dust particles underneath the sensor glass, so sensor swabs didn't help me. I will try to get inside and under the glass. Additionally the EVF is overbright after a drop and maybe can be rearranged in the process.

    • You can spot dust marks yourself best if you set the camera to the "A" mode at f/22 and take a picture of the sky

  2. Panasonic Lumix GX80/85 Teardown: 2 단계, 이미지 1/1
    • Start with these two screws. Remember screw sizes and position, there are many different lengths used!

  3. Panasonic Lumix GX80/85 Teardown: 3 단계, 이미지 1/3 Panasonic Lumix GX80/85 Teardown: 3 단계, 이미지 2/3 Panasonic Lumix GX80/85 Teardown: 3 단계, 이미지 3/3
    • remove the flash spring as shown and the four screws

  4. Panasonic Lumix GX80/85 Teardown: 4 단계, 이미지 1/1
    • Remove this screw

  5. Panasonic Lumix GX80/85 Teardown: 5 단계, 이미지 1/1
    • remove the bottom screws

  6. Panasonic Lumix GX80/85 Teardown: 6 단계, 이미지 1/2 Panasonic Lumix GX80/85 Teardown: 6 단계, 이미지 2/2
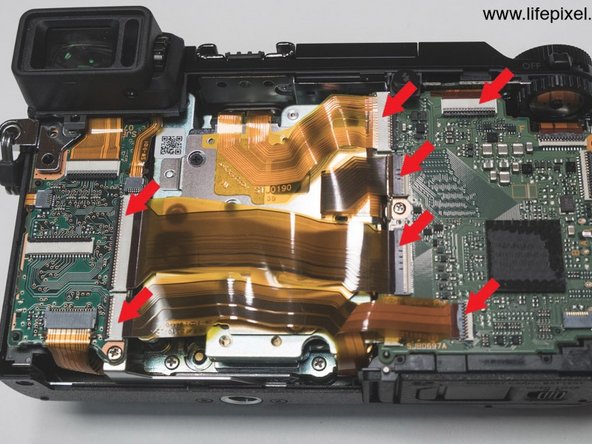
    • remove the backplate and remove the ribbon cables

  7. Panasonic Lumix GX80/85 Teardown: 7 단계, 이미지 1/1
    • remove the 3 screws

  8. Panasonic Lumix GX80/85 Teardown: 8 단계, 이미지 1/3 Panasonic Lumix GX80/85 Teardown: 8 단계, 이미지 2/3 Panasonic Lumix GX80/85 Teardown: 8 단계, 이미지 3/3
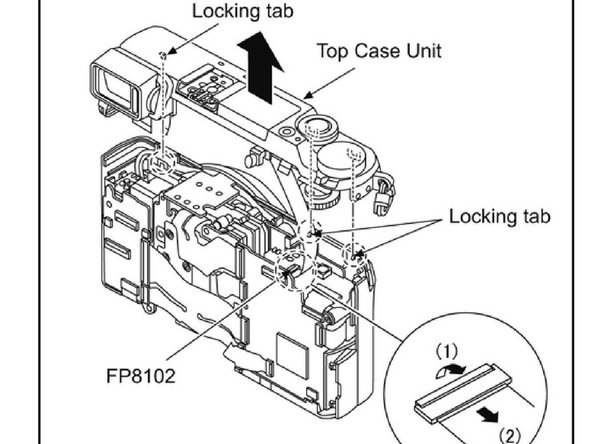
    • to remove the sensor more easily you can remove the top bar before

  9. Panasonic Lumix GX80/85 Teardown: 9 단계, 이미지 1/1
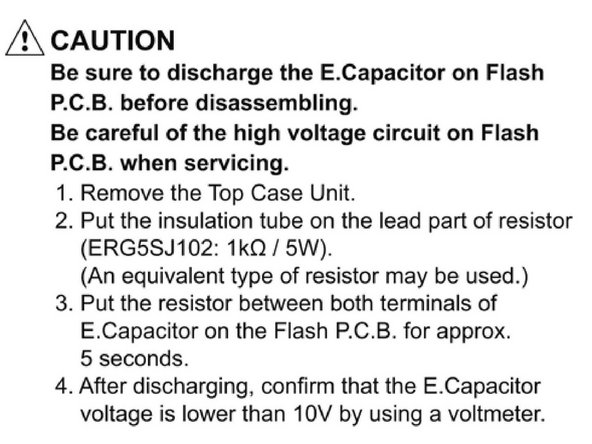
    • Flash E.Capacitor removal

  10. Panasonic Lumix GX80/85 Teardown: 10 단계, 이미지 1/2 Panasonic Lumix GX80/85 Teardown: 10 단계, 이미지 2/2
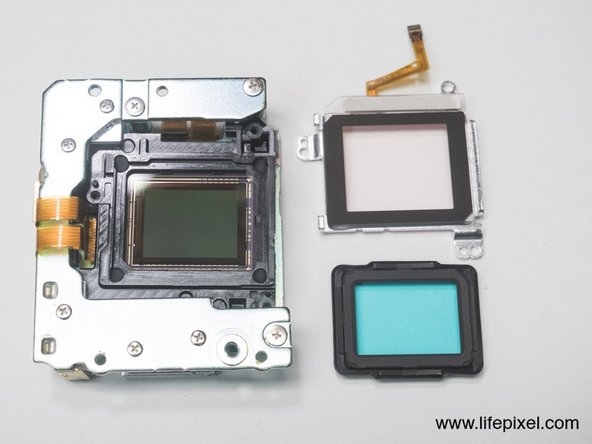
    • Remove the 3 screws to get the sensor cover glass off. Be Careful not to let them fall inside the housing. There are extremely strong magnets!

Andi

회원 가입일: 01/21/17

271 평판

안내서 1개 작성함

댓글 15개

Hello,

and what about Flange back adjustment? Did you solve it somehow?

Štěpán Karásek - 답글

Hi, what exactly do you mean? I managed to wipe the sensor clean, but correct reassembly is difficult. I might have missaligned the magnets holding the sensor and now the camera sometimes seems to focus very slow.

Andi -

How do you remove the top case unit or top bar?

Nigel - 답글

I need to access the SD card slot, as I am afraid something is stuck in the slot. The camera is giving messages “insert the card again”

vibishika - 답글

SD card is known as “delicate” one. Use MicroSD adapter with 2-3 plies of adhesive tape on “title side” over contacts. Plus two 5mm stripes near MicroSD slot. Insert adapter and use two stripes to secure your adapter to battery compartment walls. Never move adapter until you need to replace it. Then only use MicroSD cards with some adhesive tape stripe to pull the card from your new slot. Once properly contacted, adapter will avoid “insert SD card back” message on screen.

c64club - 답글

Hello, I will be referring to the last image on the left side. Is it normal or is it the case with your camera that the piece where the sensor is attached is basically moving freely in the frame? I was opening the camera in order to fix it but now I think it might be normal?

Sophia - 답글

Hi, the sensor is supposed to be "floating" on magnets, it's called IBIS, In Body Image Stabilization.

Andi -

Ah perfect...at least I know now ;) Lets see if I manage to put it back together. Thank you Andi :)

Sophia -

Good luck! Try not to use a magnetic screwdriver. I didn't unfortunately, now the autofocus isn't working anymore and I have to use manual :(

Andi - 답글

Hey Andi, so I managed to put it back together but now the screen doesnt work anymore. The camera turns on but nothing on the screen or through the view finder. Do you know what this could be about?

Sophia -

so the screen is all black, or do the menus still work and only the sensor not working?

Andi - 답글

The screen is all black. The camera itself is turnung on, so I can hear it working and theres the green light, but besides that there is nothing. You have any idea what to do next? My initial problem was that the screen sometimes went black when I was holding the camera at a certain angle. I know nothing about cameras, as you can probably tell already, just thought Id try ;)

Sophia -

try putting the screen connector out and in again. maybe it didn't sit right?
If that doesnt help you can look for screen replacement parts on ebay.

Andi - 답글

I tried it but it still doesnt work. I will figure it out somehow but thank you for your help :)

Sophia -

I only need to replace my top bar assembly which was damaged (2 small hairline cracks in it). Can this be done without full camera disassembly? Are there instructions for this procedure?

SGB - 답글

댓글 쓰기

조회 통계:

24 시간 전: 7

7일 전: 19

30일 전: 78

전체 시간: 5,396