주요 콘텐츠로 건너뛰기

필요한 것

해당 분해도는 수리 안내서가 아닙니다. Picstart Plus Development Programmer 수리는 자사의 서비스 설명서를 사용하세요.

  1. Picstart Plus Development Programmer Teardown, Picstart Plus Development Programmer Teardown: 1 단계, 이미지 3개 중 1개 Picstart Plus Development Programmer Teardown, Picstart Plus Development Programmer Teardown: 1 단계, 이미지 3개 중 2개 Picstart Plus Development Programmer Teardown, Picstart Plus Development Programmer Teardown: 1 단계, 이미지 3개 중 3개
    • Remove 4 Phillips screws located on the back side of the holding plate.

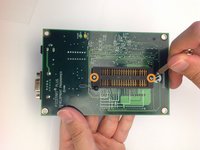
    • After the screws are removed, remove the case of the development programmer.

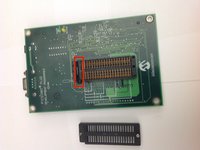
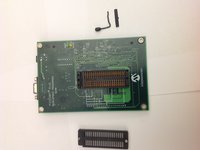
    • Carefully take out the circuit board with component side facing up. Put the case aside.

  2. Picstart Plus Development Programmer Teardown: 2 단계, 이미지 2개 중 1개 Picstart Plus Development Programmer Teardown: 2 단계, 이미지 2개 중 2개
    • Disconnect the microcontroller module from the main board using a spudger or a similar tool.

    • Set the microcontroller module aside.

  3. Picstart Plus Development Programmer Teardown: 3 단계, 이미지 2개 중 1개 Picstart Plus Development Programmer Teardown: 3 단계, 이미지 2개 중 2개
    • Flip over the mainboard so that the component side is facing down and remove the small Pan head screws that holds the cover of the IC holder

    • Remove the cover of the IC holder.

  4. Picstart Plus Development Programmer Teardown: 4 단계, 이미지 2개 중 1개 Picstart Plus Development Programmer Teardown: 4 단계, 이미지 2개 중 2개
    • Remove the IC holder lever along with the small metal plate that covers the lever.

    • Set the lever and the lever cover aside.

  5. Picstart Plus Development Programmer Teardown: 5 단계, 이미지 1개 중 1개
    • Congratulations! You have completely dismantled the PICSTART Plus Development Programmer!

    • All the extracted components are shown in the picture.

작성자

3다른 기여자 명과 함께

Brad

회원 가입일: 11/17/13

656 평판

안내서 2개를 작성함

0가이드 댓글

댓글 쓰기

조회 통계:

지난 24시간: 0

지난 7일: 4

지난 30일: 28

전체 시간: 2,730