주요 콘텐츠로 건너뛰기

해당 분해도는 수리 안내서가 아닙니다. PlayStation 3 수리는 저희 서비스 설명서를 사용하십시오.

  1. PlayStation 3 Fat 4 USB Teardown, The console case: 1 단계, 이미지 1/1
    • Inserir instruções aqui.

  2. PlayStation 3 Fat 4 USB Teardown, Remove the screws: 2 단계, 이미지 1/3 PlayStation 3 Fat 4 USB Teardown, Remove the screws: 2 단계, 이미지 2/3 PlayStation 3 Fat 4 USB Teardown, Remove the screws: 2 단계, 이미지 3/3
    • Inserir instruções aqui.

  3. PlayStation 3 Fat 4 USB Teardown, Open the console: 3 단계, 이미지 1/1
    • Inserir instruções aqui.

  4. PlayStation 3 Fat 4 USB Teardown, Remove the power supply: 4 단계, 이미지 1/2 PlayStation 3 Fat 4 USB Teardown, Remove the power supply: 4 단계, 이미지 2/2
    • Inserir instruções aqui.

  5. PlayStation 3 Fat 4 USB Teardown, The power supply board: 5 단계, 이미지 1/3 PlayStation 3 Fat 4 USB Teardown, The power supply board: 5 단계, 이미지 2/3 PlayStation 3 Fat 4 USB Teardown, The power supply board: 5 단계, 이미지 3/3
    • Inserir instruções aqui.

  6. PlayStation 3 Fat 4 USB Teardown, Remove the bluray driver: 6 단계, 이미지 1/3 PlayStation 3 Fat 4 USB Teardown, Remove the bluray driver: 6 단계, 이미지 2/3 PlayStation 3 Fat 4 USB Teardown, Remove the bluray driver: 6 단계, 이미지 3/3
    • Be very careful to do not break the data connector because it is very fragile.

  7. PlayStation 3 Fat 4 USB Teardown, Remove the SD card slot: 7 단계, 이미지 1/3 PlayStation 3 Fat 4 USB Teardown, Remove the SD card slot: 7 단계, 이미지 2/3 PlayStation 3 Fat 4 USB Teardown, Remove the SD card slot: 7 단계, 이미지 3/3
    • Inserir instruções aqui.

  8. PlayStation 3 Fat 4 USB Teardown, Remove the bluethoot board: 8 단계, 이미지 1/2 PlayStation 3 Fat 4 USB Teardown, Remove the bluethoot board: 8 단계, 이미지 2/2
    • Inserir instruções aqui.

  9. PlayStation 3 Fat 4 USB Teardown, Remove the intire motherboard from the case: 9 단계, 이미지 1/3 PlayStation 3 Fat 4 USB Teardown, Remove the intire motherboard from the case: 9 단계, 이미지 2/3 PlayStation 3 Fat 4 USB Teardown, Remove the intire motherboard from the case: 9 단계, 이미지 3/3
    • Inserir instruções aqui.

  10. PlayStation 3 Fat 4 USB Teardown, Remove the coller and mother board shield: 10 단계, 이미지 1/3 PlayStation 3 Fat 4 USB Teardown, Remove the coller and mother board shield: 10 단계, 이미지 2/3 PlayStation 3 Fat 4 USB Teardown, Remove the coller and mother board shield: 10 단계, 이미지 3/3
    • Inserir instruções aqui.

  11. PlayStation 3 Fat 4 USB Teardown, The cooler specifications and ball bearing: 11 단계, 이미지 1/2 PlayStation 3 Fat 4 USB Teardown, The cooler specifications and ball bearing: 11 단계, 이미지 2/2
    • Inserir instruções aqui.

  12. PlayStation 3 Fat 4 USB Teardown, The gigantic and unefective cooler: 12 단계, 이미지 1/3 PlayStation 3 Fat 4 USB Teardown, The gigantic and unefective cooler: 12 단계, 이미지 2/3 PlayStation 3 Fat 4 USB Teardown, The gigantic and unefective cooler: 12 단계, 이미지 3/3
    • Inserir instruções aqui.

  13. PlayStation 3 Fat 4 USB Teardown, The mother board: 13 단계, 이미지 1/3 PlayStation 3 Fat 4 USB Teardown, The mother board: 13 단계, 이미지 2/3 PlayStation 3 Fat 4 USB Teardown, The mother board: 13 단계, 이미지 3/3
    • Inserir instruções aqui.

  14. PlayStation 3 Fat 4 USB Teardown, The processors: 14 단계, 이미지 1/3 PlayStation 3 Fat 4 USB Teardown, The processors: 14 단계, 이미지 2/3 PlayStation 3 Fat 4 USB Teardown, The processors: 14 단계, 이미지 3/3
    • Inserir instruções aqui.

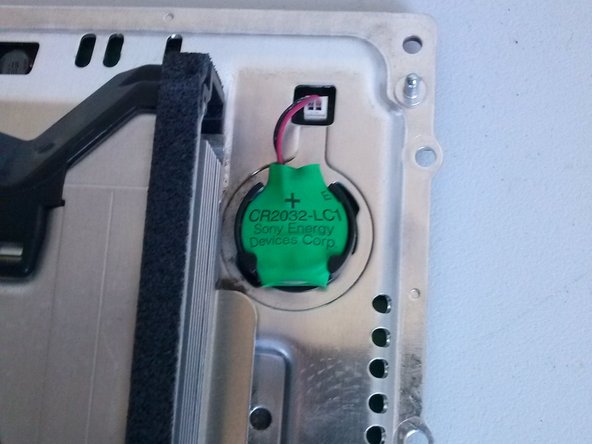
  15. PlayStation 3 Fat 4 USB Teardown, Some details: 15 단계, 이미지 1/3 PlayStation 3 Fat 4 USB Teardown, Some details: 15 단계, 이미지 2/3 PlayStation 3 Fat 4 USB Teardown, Some details: 15 단계, 이미지 3/3
    • Bios battery

    • Power on and eject sensors

    • Main AC power conector and ground conector

  16. PlayStation 3 Fat 4 USB Teardown, Some details: 16 단계, 이미지 1/2 PlayStation 3 Fat 4 USB Teardown, Some details: 16 단계, 이미지 2/2
    • HD Slot

    • HD case screw

Vinicius Rodrigues Bellini

회원 가입일: 12/12/22

956 평판

안내서 6개 작성하였습니다

댓글 0개

댓글 쓰기

조회 통계:

24 시간 전: 7

7일 전: 74

30일 전: 326

전체 시간: 5,290