주요 콘텐츠로 건너뛰기

Polaroid PMID4312 Digitizer Teardown

필요한 것

  1. Polaroid PMID4312 Digitizer Teardown, Digitizer: 1 단계, 이미지 1/3 Polaroid PMID4312 Digitizer Teardown, Digitizer: 1 단계, 이미지 2/3 Polaroid PMID4312 Digitizer Teardown, Digitizer: 1 단계, 이미지 3/3
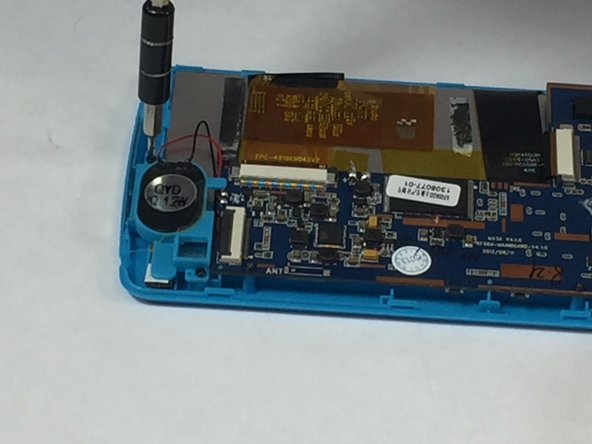
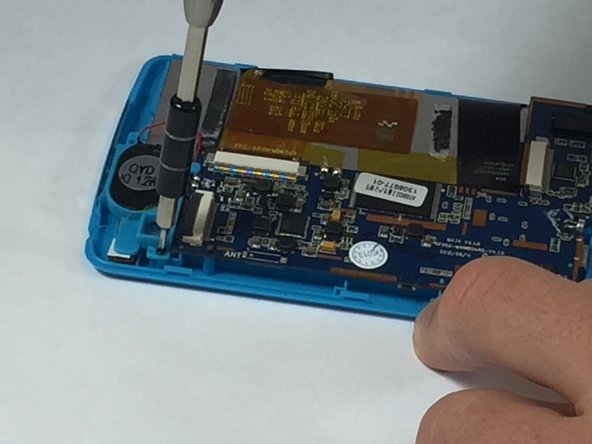
    • Insert the plastic opening tool into the groove between the two halves of the cover. Pry the two halves apart working your way around the perimeter of the case.

  2. Polaroid PMID4312 Digitizer Teardown: 2 단계, 이미지 1/3 Polaroid PMID4312 Digitizer Teardown: 2 단계, 이미지 2/3 Polaroid PMID4312 Digitizer Teardown: 2 단계, 이미지 3/3
    • Pry the battery from the casing by sliding an ID or credit card underneath and applying some force.

    • Peel back any yellow tape not directly attached to the battery.

    • Using a soldering iron, desolder the two wires that connect the battery to the motherboard.

  3. Polaroid PMID4312 Digitizer Teardown: 3 단계, 이미지 1/2 Polaroid PMID4312 Digitizer Teardown: 3 단계, 이미지 2/2
    • With a Phillips head #00 screwdriver, remove the two screws holding down the speaker.

  4. Polaroid PMID4312 Digitizer Teardown: 4 단계, 이미지 1/2 Polaroid PMID4312 Digitizer Teardown: 4 단계, 이미지 2/2
    • Using the ph#00 screwdriver, remove the four 5mm screws that connect the motherboard to the casing.

  5. Polaroid PMID4312 Digitizer Teardown: 5 단계, 이미지 1/3 Polaroid PMID4312 Digitizer Teardown: 5 단계, 이미지 2/3 Polaroid PMID4312 Digitizer Teardown: 5 단계, 이미지 3/3
    이 단계에 사용된 도구:
    Tweezers
    $4.99
    구매
    • Using a spudger, detach the two ribbons from the motherboard by pushing the gray plastic tabs away from their white receivers.

    • The parts are very delicate, so use minimal force.

    • Once the casing is unlocked, remove the two ribbons from the motherboard.

    • Tweezers are recommended to pull back the ribbons.

  6. Polaroid PMID4312 Digitizer Teardown: 6 단계, 이미지 1/1
    • Now remove the motherboard and all of the connected components.

  7. Polaroid PMID4312 Digitizer Teardown: 7 단계, 이미지 1/2 Polaroid PMID4312 Digitizer Teardown: 7 단계, 이미지 2/2
    • Using a heat gun, apply heat to the front of the screen for 3-5 minutes to release the glue.

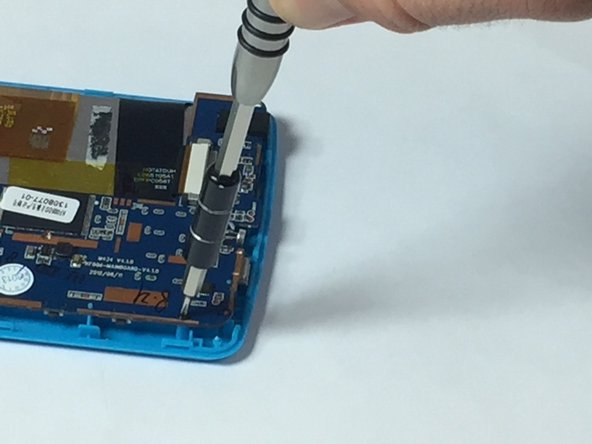
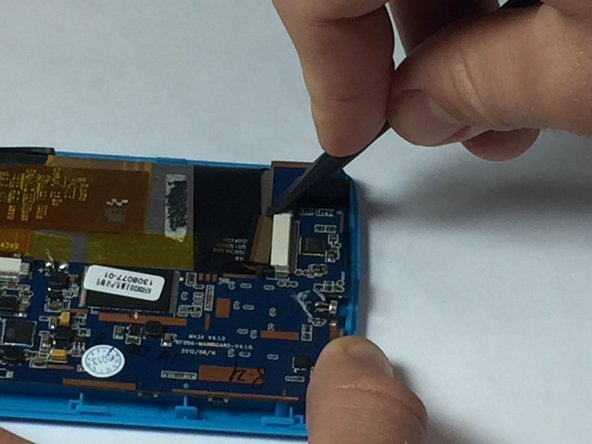
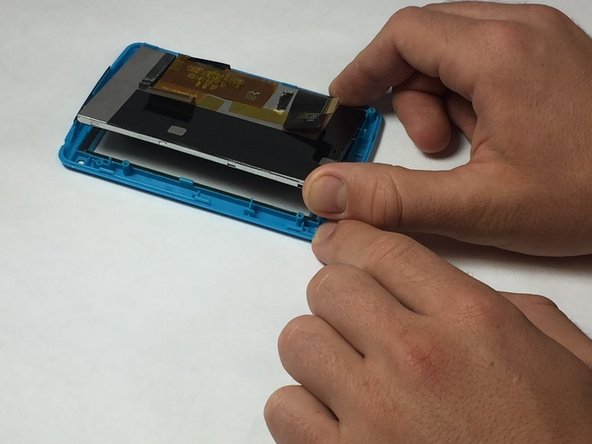
    • Using a plastic opening tool, pull back on the plastic blue tabs to release the digitizer and pry it back from the screen.

    • Remove the black trim the lines perimeter of the screen and is attached to the digitizer.

    • This step will be very easy if the heat gun that was mentioned previously is used.

결론

To reassemble your device, follow these instructions in reverse order.

Ryan

회원 가입일: 10/06/16

101 평판

안내서 1개 작성함

USF Tampa, Team 5-4, Lacy Fall 2016 USF Tampa, Team 5-4, Lacy Fall 2016 회원

USFT-LACY-F16S5G4

4 회원들

안내서 10개 작성하였습니다

댓글 0개

댓글 쓰기

조회 통계:

24 시간 전: 2

7일 전: 3

30일 전: 8

전체 시간: 206