주요 콘텐츠로 건너뛰기

필요한 것

해당 분해도는 수리 안내서가 아닙니다. Ratchet 수리는 저희 서비스 설명서를 사용하십시오.

  1. Ratchet Teardown, Duralast Ratchet Teardown: 1 단계, 이미지 1/1
    • Complete ratchet

  2. Ratchet Teardown, Removing the flexible head: 2 단계, 이미지 1/1
    • The head is attached with a machine screw and a split washer to make the head hold its position.

    • If the head slips sometimes the helical split washer can be bent out or replaced.

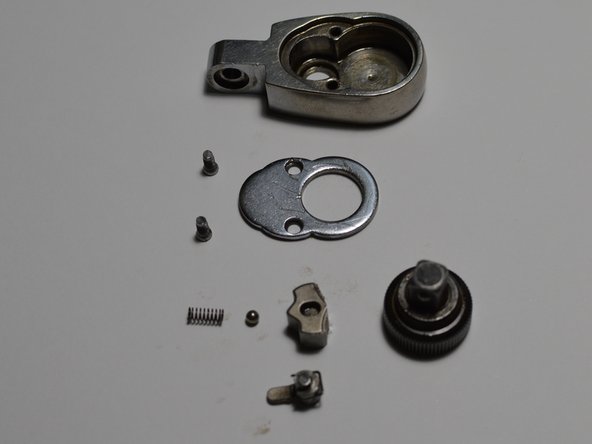
  3. Ratchet Teardown, Removing the ratcheting mechanism: 3 단계, 이미지 1/2 Ratchet Teardown, Removing the ratcheting mechanism: 3 단계, 이미지 2/2
    • Head opened and in pieces

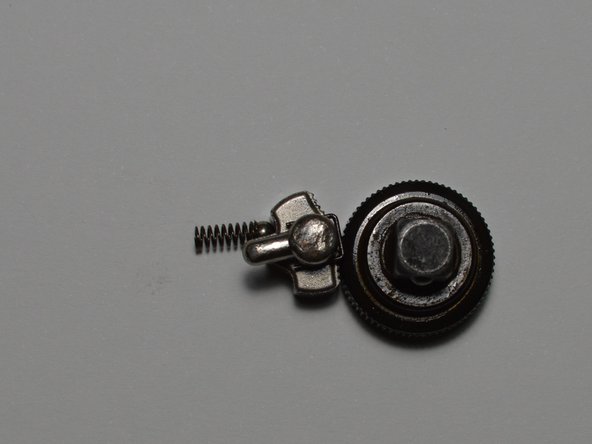
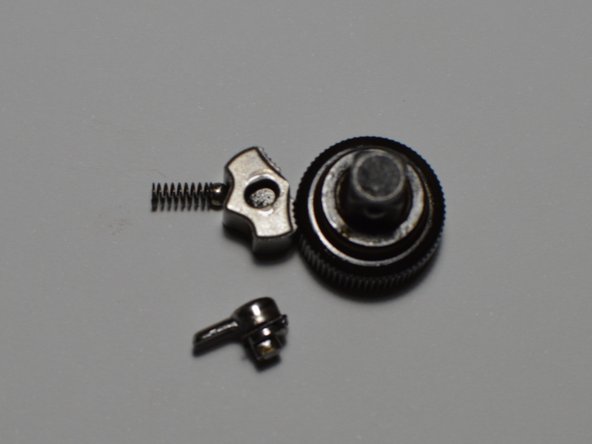
  4. Ratchet Teardown, Ratcheting Mechanism: 4 단계, 이미지 1/3 Ratchet Teardown, Ratcheting Mechanism: 4 단계, 이미지 2/3 Ratchet Teardown, Ratcheting Mechanism: 4 단계, 이미지 3/3
    • Ratcheting mechanism in various views

  5. Ratchet Teardown, Ratchet Mechanism Parts: 5 단계, 이미지 1/1
    • Spring: holds ball bearing against pawl

    • Ball bearing: holds pawl in its position

    • Pawl: allows gear/tang to rotate in only one direction

    • Gear/Tang: part that rotates

    • Lever: selects the pawls position and what direction the gear turns

  6. Ratchet Teardown, Complete Ratchet: 6 단계, 이미지 1/1
    • All parts laid out

Wieli

회원 가입일: 01/08/23

1,707 평판

안내서 10개 작성하였습니다

댓글 0개

댓글 쓰기

조회 통계:

24 시간 전: 0

7일 전: 8

30일 전: 36

전체 시간: 573