주요 콘텐츠로 건너뛰기

필요한 것

해당 분해도는 수리 안내서가 아닙니다. RedOctane X-Plorer 수리는 저희 서비스 설명서를 사용하십시오.

  1. RedOctane X-Plorer Teardown, Case: 1 단계, 이미지 1/1
    • Remove all 16 #10-torx screws from the back side of the case.

    • Gently separate the case pieces.

    • A strong magnet helps greatly when taking out the screws.

    • Keep in mind when resembling, the case is plastic so, don't tighten the screws too tight.

  2. RedOctane X-Plorer Teardown, Neck: 2 단계, 이미지 1/1
    • Unscrew the 4 #10-torx screws.

  3. RedOctane X-Plorer Teardown, Colored Keys: 3 단계, 이미지 1/3 RedOctane X-Plorer Teardown, Colored Keys: 3 단계, 이미지 2/3 RedOctane X-Plorer Teardown, Colored Keys: 3 단계, 이미지 3/3
    • Unscrew the 2 Philips head screws
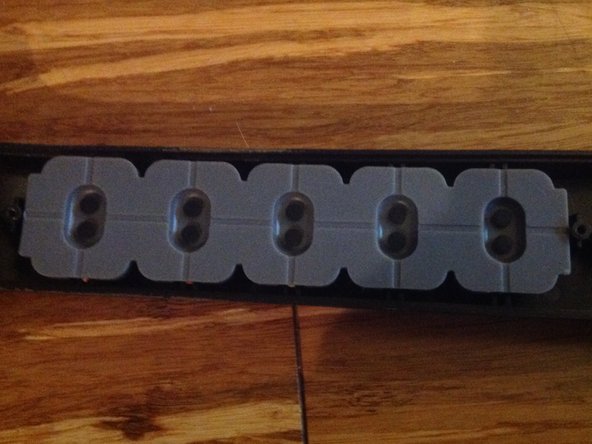
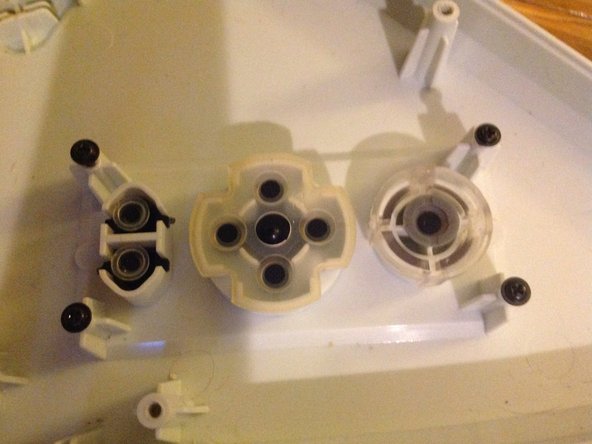
    • Peel off the pads.

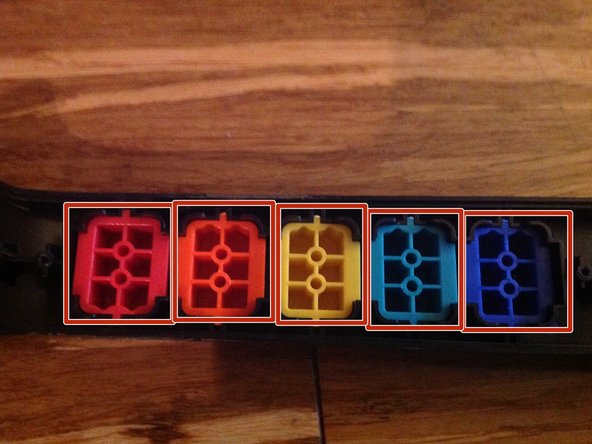
    • Push the colored keys out from the other side.

  4. RedOctane X-Plorer Teardown, Strum Bar: 4 단계, 이미지 1/3 RedOctane X-Plorer Teardown, Strum Bar: 4 단계, 이미지 2/3 RedOctane X-Plorer Teardown, Strum Bar: 4 단계, 이미지 3/3
    • Unscrew the red screws and pull the board out.

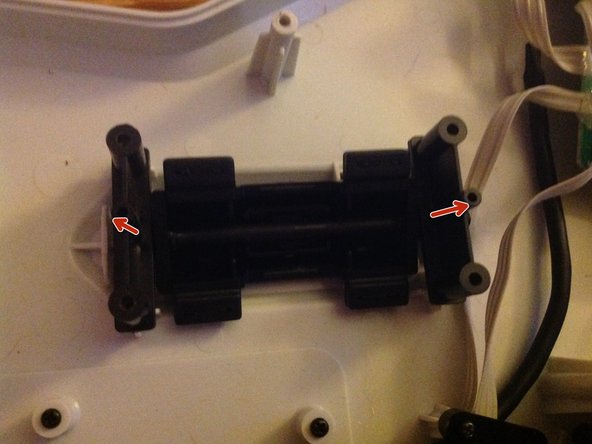
    • Then, unscrew the blue screws

    • Pull the bracket things off.
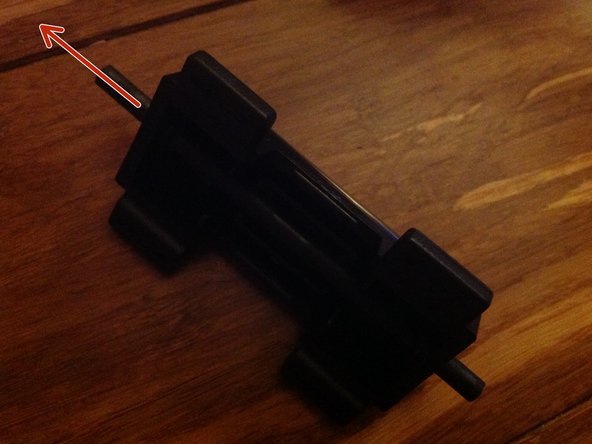
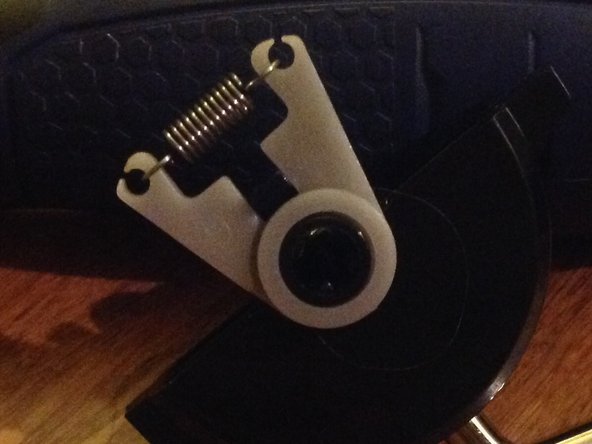
    • Pull out the pin.

  5. RedOctane X-Plorer Teardown, Unused port: 5 단계, 이미지 1/1
    • Unscrew the 4 Philips head screws.

  6. RedOctane X-Plorer Teardown, Aux Port: 6 단계, 이미지 1/1
    • Unscrew these 2 Philips head screws.

  7. RedOctane X-Plorer Teardown, Whammy Bar: 7 단계, 이미지 1/2 RedOctane X-Plorer Teardown, Whammy Bar: 7 단계, 이미지 2/2
    • Push from the other side until it comes out.

    • Take the spring off with the connector

  8. RedOctane X-Plorer Teardown, Motherboard: 8 단계, 이미지 1/2 RedOctane X-Plorer Teardown, Motherboard: 8 단계, 이미지 2/2
    • Unscrew the 4 Philips head screws.

    • Peel off the contact pads.

Jackson Poer

회원 가입일: 04/08/17

671 평판

안내서 2개 작성하였습니다

댓글 한 개

"unused port" is for a footpedal switch,not positive but believe all GH style guitars have one

Valden Tharbosen - 답글

댓글 쓰기

조회 통계:

24 시간 전: 2

7일 전: 21

30일 전: 66

전체 시간: 3,350