주요 콘텐츠로 건너뛰기

해당 분해도는 작업 중 입니다 – 최신 변경 사항을 보려면 주기적으로 다시 로드 하십시오!

필요한 것

  1. S167 Drone Teardown, S167 Drone Teardown: 1 단계, 이미지 1/1
    • This will be a tutorial on how to Tear down an S167 Drone made by Toys-Sky

  2. S167 Drone Teardown: 2 단계, 이미지 1/1
    • The first thing we will do is use a small Phillips head screwdriver to unscrew all the blades of the drone.

  3. S167 Drone Teardown: 3 단계, 이미지 1/2 S167 Drone Teardown: 3 단계, 이미지 2/2
    • Next, we are going to unscrew everything that connects the two main bodies together. This should be a total of 10 screws. Once uncrewed you'll be left with the two separate bodies with wires and plugs holding them together, carefully unplug the connectors just by pulling.

  4. S167 Drone Teardown: 4 단계, 이미지 1/2 S167 Drone Teardown: 4 단계, 이미지 2/2
    • Next is to unscrew the folding arms. 3 screws to an arm. This should leave you with what is seen in the second image when the arms are disconnected.

  5. S167 Drone Teardown: 5 단계, 이미지 1/3 S167 Drone Teardown: 5 단계, 이미지 2/3 S167 Drone Teardown: 5 단계, 이미지 3/3
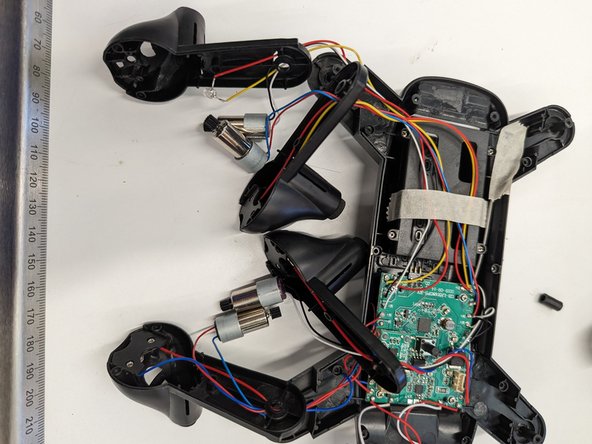
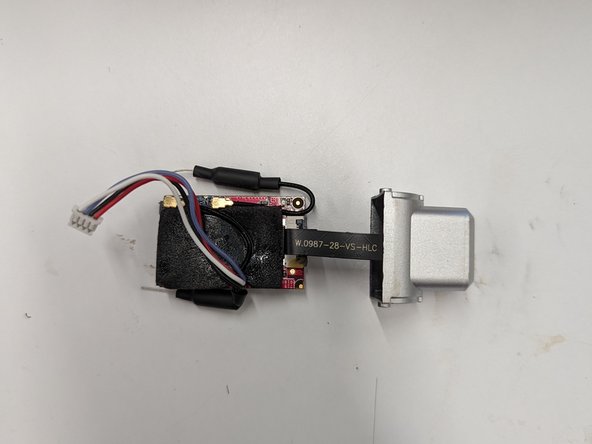
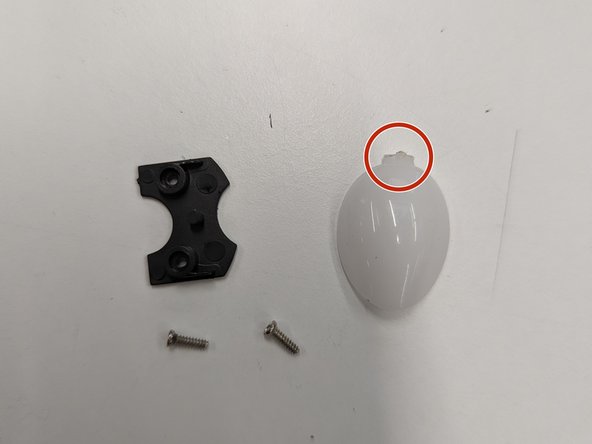
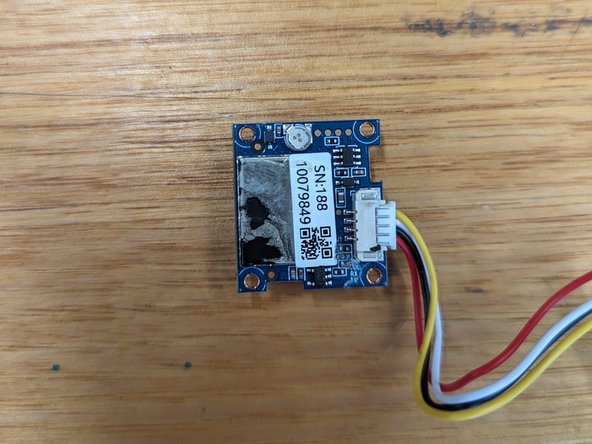
    • Continuing on we are going to get rid of the tape to free the wires and undo the screws holding in the main circuit board. There will be four of them, when undone the circuit board should come away with the wires and legs. We can then flip over the body and undo two screws and riggle out the camera.

  6. S167 Drone Teardown: 6 단계, 이미지 1/3 S167 Drone Teardown: 6 단계, 이미지 2/3 S167 Drone Teardown: 6 단계, 이미지 3/3
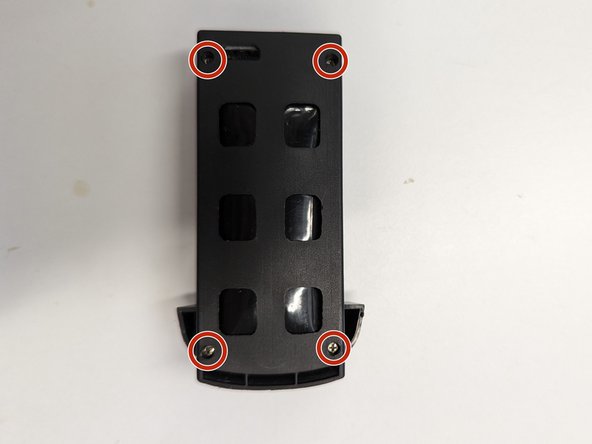
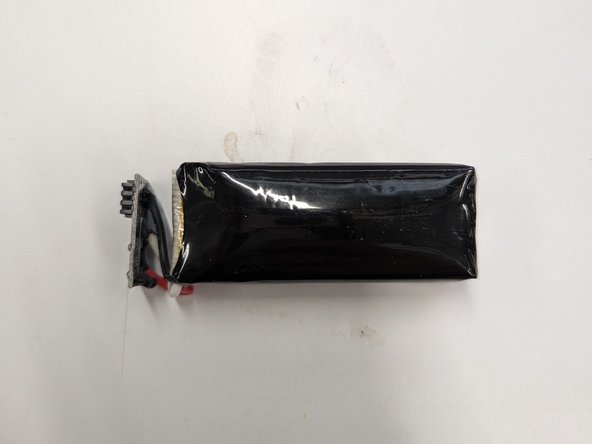
    • Unscrew the four screws that hold this restrainer for the battery. Then push the clip at the end of the battery and pull it out. Then you can undo the four screws that hold the casing of the battery together. Be careful not to puncture the battery and wear gloves if there is any sign of acid.

  7. S167 Drone Teardown: 7 단계, 이미지 1/2 S167 Drone Teardown: 7 단계, 이미지 2/2
    • Back to the camera, all that needs to be done to take this apart is undo the 4 screws

  8. S167 Drone Teardown: 8 단계, 이미지 1/2 S167 Drone Teardown: 8 단계, 이미지 2/2
    • Here we will be removing the LED lights and their diffusers. To do this we just need to undo the two screws to release the plastic retainer holding in the LED. Then using a flat head screwdriver we can pry off the clips of the diffuser where the arrow is pointing, on the outside.

  9. S167 Drone Teardown: 9 단계, 이미지 1/3 S167 Drone Teardown: 9 단계, 이미지 2/3 S167 Drone Teardown: 9 단계, 이미지 3/3
    • Back to the upper body. We are going to unscrew the PCB's and pull out the small LED holder at the front of the drone. You'll need to pull back the shiny protective sheet to access one of the PCBS's

  10. S167 Drone Teardown: 10 단계, 이미지 1/1
    • Now you should have everything dismantled and in front of you. Altogether its pretty simple, just a lot of screws to undo. Have fun putting it back together!

    • Note in this photo some parts have been partly assembled for ease of storage.

Luke Kelly

회원 가입일: 03/27/24

121 평판

안내서 1개 작성함

댓글 0개

댓글 쓰기

조회 통계:

24 시간 전: 0

7일 전: 1

30일 전: 11

전체 시간: 23