주요 콘텐츠로 건너뛰기

필요한 것

해당 분해도는 수리 안내서가 아닙니다. Samsung Freeform 4 수리는 저희 서비스 설명서를 사용하십시오.

  1. Samsung Freeform 4 Teardown, Samsung Freeform 4 Teardown: 1 단계, 이미지 1/1
    • Here stands the Samsung Freeform 4. This phone has a full QWERTY keyboard, 2MP camera, and even a built in web browser!

    • This phone tips the scales at just 3.35 ounces! It comes in at 4.35" tall, 2.39" wide, and 0.43" thick!

    • Has a Single core, 480 MHz, ARM11 processor.

  2. Samsung Freeform 4 Teardown: 2 단계, 이미지 1/2 Samsung Freeform 4 Teardown: 2 단계, 이미지 2/2
    • This phone packs in a 1000mAh 3.7v LiPo battery, for a 6.5 hour talk time and 288 hour standby time.

    • That means this phone can go almost two weeks without charging!

  3. Samsung Freeform 4 Teardown: 3 단계, 이미지 1/1
    • After further tearing down, we can see that flex cables are used. This increases repairability, as flex cables are easier to replace then soldered cables.

  4. Samsung Freeform 4 Teardown: 4 단계, 이미지 1/1
    • 2MP Camera

    • Vibrator Motor

    • Earpiece Speaker

    • MicroSD Card Reader

    • Liquid Damage Indicator (Normally white, but red when touches liquid)

    • Headphone Jack

  5. Samsung Freeform 4 Teardown: 5 단계, 이미지 1/1
    • This is the otherside of the motherboard.

    • The motherboard has contact points underneath a film. When you press a key, it presses that contact point which completes the circuit and registers the "button push".

  6. Samsung Freeform 4 Teardown: 6 단계, 이미지 1/1
    • Here is the other part we removed. The keypad is just set in by gravity, and is easily removed from the frame.

    • Since there is nothing to corrode or damage, now is an excellent time to clean the keypad!

  7. Samsung Freeform 4 Teardown: 7 단계, 이미지 1/1
    • The display is a mere 360x240 pixels, making for a 167 PPI display.

    • The display has adhesive around it, attaching it to the frame.

  8. Samsung Freeform 4 Teardown: 8 단계, 이미지 1/2 Samsung Freeform 4 Teardown: 8 단계, 이미지 2/2
    • I am giving this phone a 5 on a scale of 1 to 10, with 10 being easiest to repair, and 1 the hardest.

    • Flex cable used for LCD

    • Rear panel easily removable, as well as battery.

    • Earpiece speaker removal requires soldering.

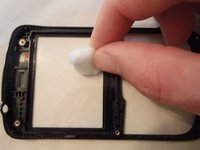
    • LCD is glued into the front bezel.

    • Volume buttons and SD card reader are soldered permanently fixed onto the motherboard.

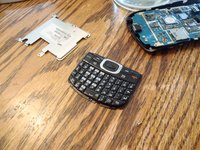
    • QWERTY keypad is unrepairable, and liquid can easily get trapped inside, causing shorts and issues.

    • The rear panel with the antennas and external speaker were accidentally left out of this pic. Also, the cotton ball was used just to clean up the plastic. It doesn't come with the phone :-)

Todd

회원 가입일: 02/07/12

835 평판

안내서 3개 작성하였습니다

댓글 0개

댓글 쓰기

조회 통계:

24 시간 전: 0

7일 전: 0

30일 전: 0

전체 시간: 1,266