주요 콘텐츠로 건너뛰기

필요한 것

해당 분해도는 수리 안내서가 아닙니다. Samsung Jitterbug 수리는 저희 서비스 설명서를 사용하십시오.

  1. Samsung Jitterbug Teardown, Samsung Jitterbug Teardown: 1 단계, 이미지 1/3 Samsung Jitterbug Teardown, Samsung Jitterbug Teardown: 1 단계, 이미지 2/3 Samsung Jitterbug Teardown, Samsung Jitterbug Teardown: 1 단계, 이미지 3/3
    • First remove the battery and rubber feet from base and under phone number inside.

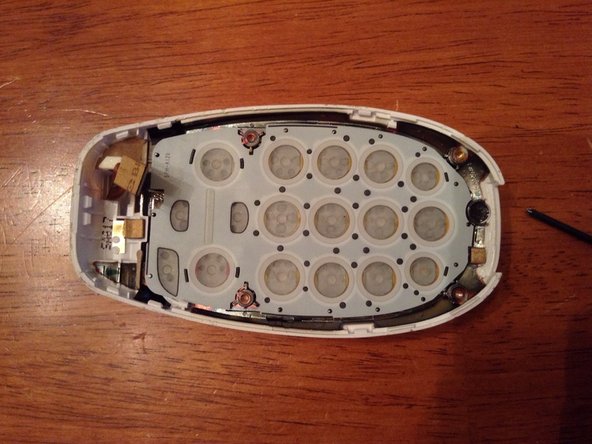
    • Undo all six screws. Only the two under the battery will come out fully.

  2. Samsung Jitterbug Teardown: 2 단계, 이미지 1/2 Samsung Jitterbug Teardown: 2 단계, 이미지 2/2
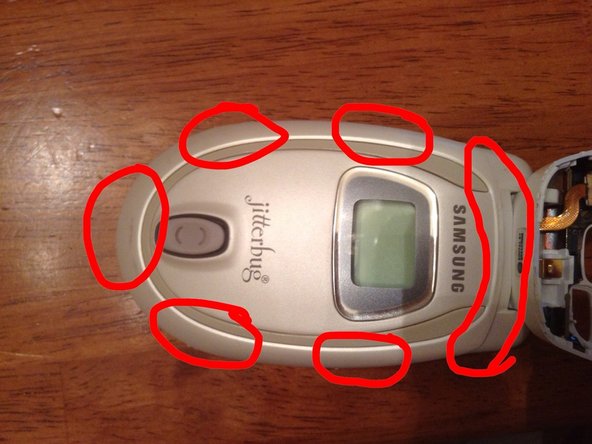
    • Pop the six clips indicated in green and remove back. I removed the two on the sides first, but it was a huge pain to open the rest of the way. I suggest starting from the top four.

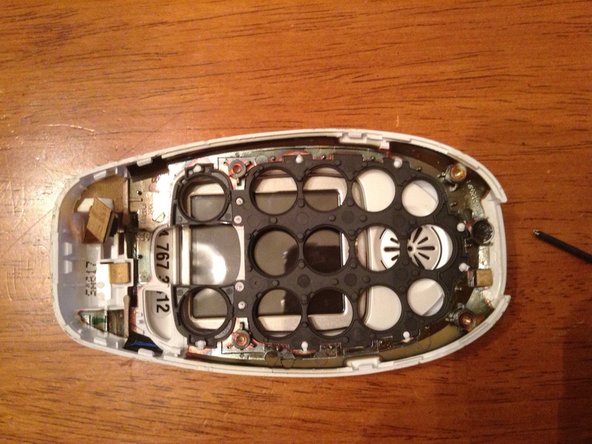
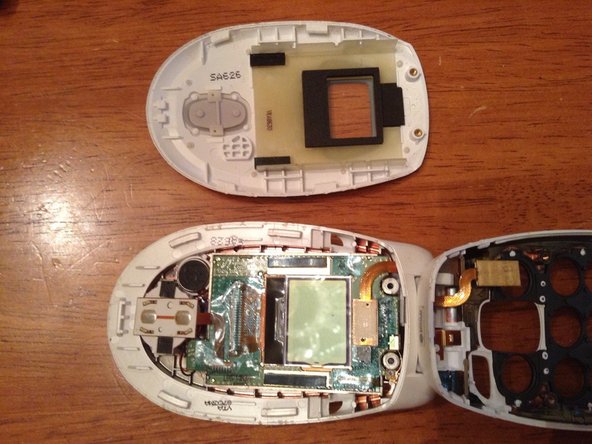
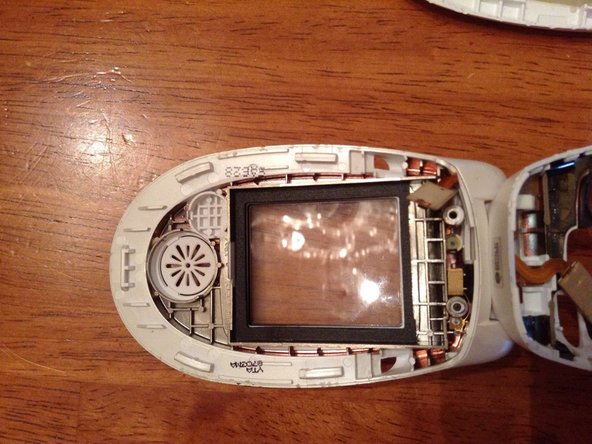
    • Blue is the connector to the screen and speaker board in the top of the phone.

    • Purple is the chip and orange is charging port.

    • The opposite side of the board (not pictured) has the microphone on it, it's a small black round bump on the bottom.

  3. Samsung Jitterbug Teardown: 3 단계, 이미지 1/3 Samsung Jitterbug Teardown: 3 단계, 이미지 2/3 Samsung Jitterbug Teardown: 3 단계, 이미지 3/3
    • Unhook screen connector and pop out board (just put a screwdriver under and pop).

    • Peel off button pad.

  4. Samsung Jitterbug Teardown: 4 단계, 이미지 1/3 Samsung Jitterbug Teardown: 4 단계, 이미지 2/3 Samsung Jitterbug Teardown: 4 단계, 이미지 3/3
    • Remove rubber front, then turn over.

    • Pop all five clips. Start at the top near the hinge and work down.

  5. Samsung Jitterbug Teardown: 5 단계, 이미지 1/3 Samsung Jitterbug Teardown: 5 단계, 이미지 2/3 Samsung Jitterbug Teardown: 5 단계, 이미지 3/3
    • Blue is main screen and mini screen board. Green is button and underneath is the main speaker. Purple is

    • Pop out all pieces. Be careful not to break the cabling connecting the outer bits to the board.

Kari Fox

회원 가입일: 06/24/13

125 평판

안내서 1개 작성함

댓글 0개

댓글 쓰기

조회 통계:

24 시간 전: 1

7일 전: 4

30일 전: 8

전체 시간: 2,101