주요 콘텐츠로 건너뛰기

해당 분해도는 작업 중 입니다 – 최신 변경 사항을 보려면 주기적으로 다시 로드 하십시오!

필요한 것

  1. Toshiba Click 2 Pro P35W-B3226 Teardown, Back Cover: 1 단계, 이미지 1/2 Toshiba Click 2 Pro P35W-B3226 Teardown, Back Cover: 1 단계, 이미지 2/2
    • After this procedure there seemed to be more back light bleed on my tablet. Not sure if it was there before so be careful.

    • Remove the tablet from the dock.

    • Find the best place to insert your plastic pry tool (I used the Micro-SD slot). Carefully go around the perimeter of the tablet and unclip the back cover.

    • Take note off all the clips. The back cover is held in place with a ton of these all around.

  2. Toshiba Click 2 Pro P35W-B3226 Teardown, Internals Part 1: 2 단계, 이미지 1/3 Toshiba Click 2 Pro P35W-B3226 Teardown, Internals Part 1: 2 단계, 이미지 2/3 Toshiba Click 2 Pro P35W-B3226 Teardown, Internals Part 1: 2 단계, 이미지 3/3
    • Once you have the back cover off you are free to replace what you'd like.

    • Msata SSD Part #MZMTE128HMGR-0000

    • M.2 2230 WiFi Model #7260NGW

  3. Toshiba Click 2 Pro P35W-B3226 Teardown, Internals Part 2: 3 단계, 이미지 1/3 Toshiba Click 2 Pro P35W-B3226 Teardown, Internals Part 2: 3 단계, 이미지 2/3 Toshiba Click 2 Pro P35W-B3226 Teardown, Internals Part 2: 3 단계, 이미지 3/3
    • Battery Model #PA5190U-1BRS

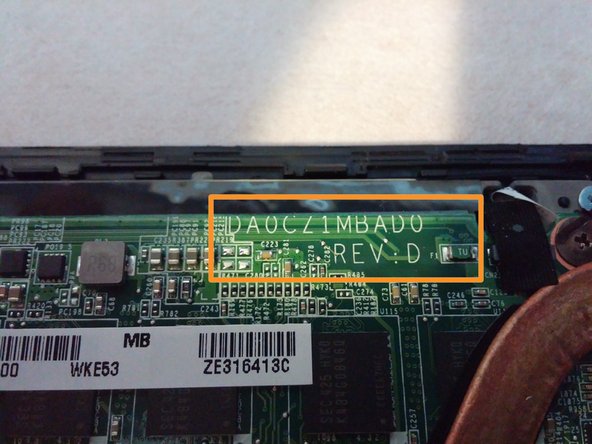
    • Motherboard Part #DAOZC1MBADO REV:D

    • Capacitive button/dock board Part #3TCZ1T80000

    • Re-assembly in reverse order.

  4. Toshiba Click 2 Pro P35W-B3226 Teardown, Keyboard Disassembly: 4 단계, 이미지 1/3 Toshiba Click 2 Pro P35W-B3226 Teardown, Keyboard Disassembly: 4 단계, 이미지 2/3 Toshiba Click 2 Pro P35W-B3226 Teardown, Keyboard Disassembly: 4 단계, 이미지 3/3
    • With the keyboard separated remove all the screws in the bottom. The top 4 screws are longer then the bottom 6.

    • Keyboard back cover Part #ZYE35CZ1BA0100140810-01 REV:3A

    • Keyboard boards and weights.

  5. Toshiba Click 2 Pro P35W-B3226 Teardown, Keyboard Parts: 5 단계, 이미지 1/3 Toshiba Click 2 Pro P35W-B3226 Teardown, Keyboard Parts: 5 단계, 이미지 2/3 Toshiba Click 2 Pro P35W-B3226 Teardown, Keyboard Parts: 5 단계, 이미지 3/3
    • The keyboard dock board. Looks like there is a way to add a second HDD/SSD here but the connector is not soldered on.

    • Keyboard board Part #CZ1D30E51001CC

    • Mouse board, left-hand weight, front LED board.

    • Re-assembly in reverse order.

Sasa Macura

회원 가입일: 08/05/14

177 평판

안내서 2개 작성하였습니다

댓글 3개

lindas fotos pero no hay un video que muestre como demontar la tapa.

ximena - 답글

muy ilustrativas las imagenes.. tendras algunas donde se vea el mecanismo del teclado donde sujeta a la pantalla ?

carlos - 답글

i need keyboard for this lap how i can get it

Hussien Mahmoud - 답글

댓글 쓰기

조회 통계:

24 시간 전: 0

7일 전: 1

30일 전: 6

전체 시간: 7,481