주요 콘텐츠로 건너뛰기
보관된 가이드
해당 안내서는 단지 역사적인 목적으로 보관됩니다. 최신 버전 안내서를 사용하여 수리 하십시오.

필요한 것

해당 분해도는 수리 안내서가 아닙니다. iPhone 6 수리는 저희 서비스 설명서를 사용하십시오.

  1. iPhone 6 Teardown, iPhone 6 Teardown: 1 단계, 이미지 1/3 iPhone 6 Teardown, iPhone 6 Teardown: 1 단계, 이미지 2/3 iPhone 6 Teardown, iPhone 6 Teardown: 1 단계, 이미지 3/3
    • Unboxing the iPhone 6: yup, it's a phone.

  2. iPhone 6 Teardown: 2 단계, 이미지 1/1
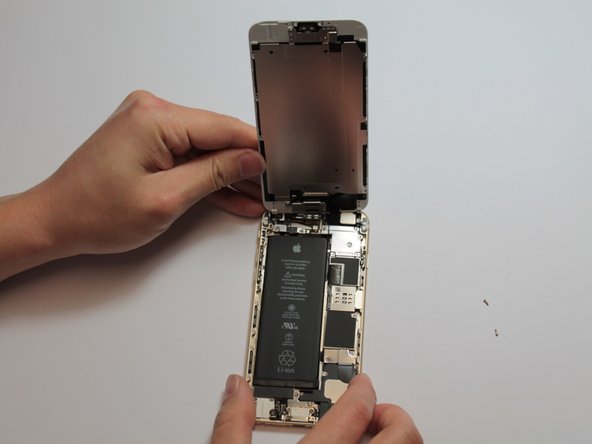
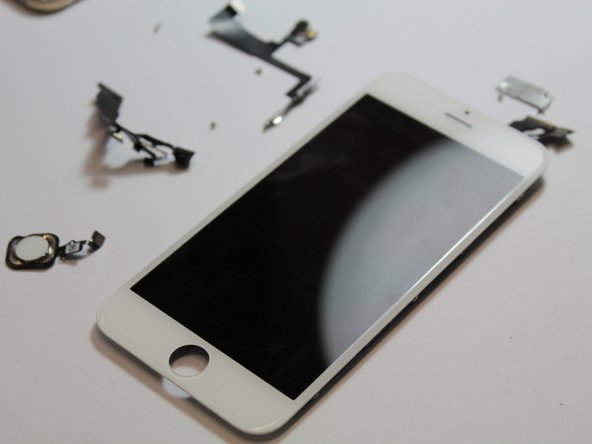
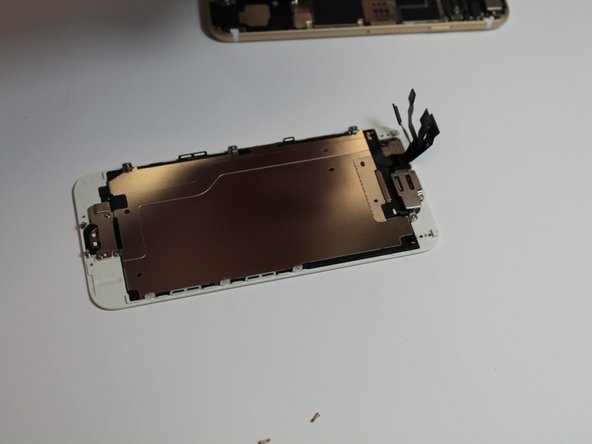
    • After removing the familiar two Pentalobe screws we use a suction cup to carefully lift up the screen to give us enough space to run a plastic tool down the edges to release the screen clips

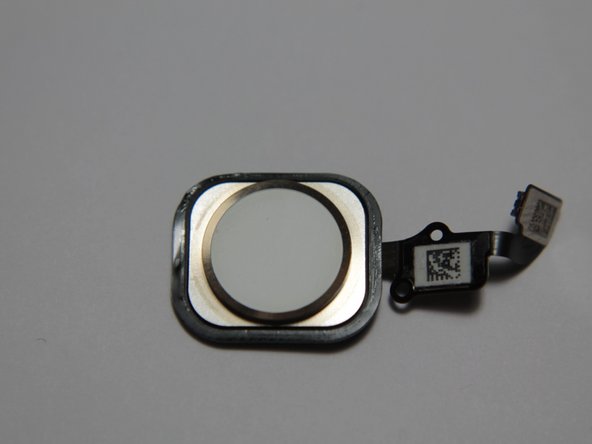
    • Unlike the 5s, The 6 Touch ID cable is now routed up the back of the screen, so we don't have to worry about accidentally ripping the touch ID cable.

  3. iPhone 6 Teardown: 3 단계, 이미지 1/2 iPhone 6 Teardown: 3 단계, 이미지 2/2
    • The screen connectors are covered by a metal plate, similar to the previous models.

    • This plate is held by 5 screws this time.

    • There are 5 connectors under this plate: LCD/Touch Sensor/Front Camera, Rear Camera and TouchID.

  4. iPhone 6 Teardown: 4 단계, 이미지 1/2 iPhone 6 Teardown: 4 단계, 이미지 2/2
    • The battery is very well stuck in. With a bit of heat and a little deformation of the battery, we were able to get it out. (There's probably a pull tab to remove the battery, but we didn't find it.)

    • The battery is rated at 3.82V, 6.91Whr.

  5. iPhone 6 Teardown: 5 단계, 이미지 1/1
    • Removing the logic board requires the removal of many screws.

    • Fortunately for DIYers, Apple have placed the chips away from most of the screws so there is less risk of tool slip damage.

  6. iPhone 6 Teardown: 6 단계, 이미지 1/1
    • The iPhone 6 rear camera: not as big as its optically stabilized brother.

  7. iPhone 6 Teardown: 7 단계, 이미지 1/1
    • The iPhone 6 logic board.

  8. iPhone 6 Teardown: 8 단계, 이미지 1/1
    • The vibration motor is now inside a metal case!

  9. iPhone 6 Teardown: 9 단계, 이미지 1/1
    • The loudspeaker.

  10. iPhone 6 Teardown: 10 단계, 이미지 1/1
    • The Lightning port.

  11. iPhone 6 Teardown: 11 단계, 이미지 1/1
    • The Touch ID sensor.

  12. iPhone 6 Teardown: 12 단계, 이미지 1/1
    • The front camera and proximity sensor flex cable.

  13. iPhone 6 Teardown: 13 단계, 이미지 1/3 iPhone 6 Teardown: 13 단계, 이미지 2/3 iPhone 6 Teardown: 13 단계, 이미지 3/3
    • The iPhone 6 display assembly. It's thinner than the iPhone 5s/5c/5 screen.

    • The Touch ID Cable runs from the home switch to the top of the screen, adding a 4th connector at the top.

  14. iPhone 6 Teardown: 14 단계, 이미지 1/3 iPhone 6 Teardown: 14 단계, 이미지 2/3 iPhone 6 Teardown: 14 단계, 이미지 3/3
    • After the usual painful desoldering of the shielding, we have the logic board in all its naked glory.

    • Analysis to follow with iFixit's full teardown.

  15. iPhone 6 Teardown: 15 단계, 이미지 1/3 iPhone 6 Teardown: 15 단계, 이미지 2/3 iPhone 6 Teardown: 15 단계, 이미지 3/3
    • More chip pics!

  16. iPhone 6 Teardown: 16 단계, 이미지 1/3 iPhone 6 Teardown: 16 단계, 이미지 2/3 iPhone 6 Teardown: 16 단계, 이미지 3/3
    • Even more ICs.

  17. iPhone 6 Teardown: 17 단계, 이미지 1/2 iPhone 6 Teardown: 17 단계, 이미지 2/2
    • And that's all she wrote! We'll be back soon with a complete teardown and analysis from iFixit with higher resolution photos.

Patrick Lee

회원 가입일: 09/19/13

2,605 평판

안내서 1개 작성함

iExperts iExperts 회원

Business

1 회원

안내서 1개 작성하였습니다

댓글 한 개

I have 2 small pieces that fell out and I have no idea where they go. One has this code on it 1-00095A 344. And the other looks like a toggle switch, it is black. Can you help.

linda.lloyd - 답글

댓글 쓰기

조회 통계:

24 시간 전: 0

7일 전: 2

30일 전: 4

전체 시간: 87,133