소개
Apple's gone and skipped its iPhone “S" update, so we followed suit and skipped ahead a couple timezones. We're here at Circuitwise headquarters in Sydney, Australia, bringing you the iPhone 8 teardown (and the 8 Plus too!) as early as you can get it. Time to find out if Apple's playing a game of mere numerical catch-up to Samsung’s Galaxy S8 line, or if glass backing and wireless charging warrants skipping ahead a grade. Let’s crack the front and back open it up to see!
Come for the teardowns, stay for the repair goodness! Check us out on Facebook, Twitter, and Instagram to stay up-to-date on all things repair!
필요한 것
동영상 개요
-
-
The 8 has some slick new tech, but is it enough to warrant the upgraded digit? You be the judge:
-
A11 Bionic chip with embedded M11 motion coprocessor
-
64 or 256 GB onboard storage capacity
-
4.7-inch IPS multitouch Retina HD display with 1334 × 750 resolution (326 ppi)
-
12 MP camera with ƒ/1.8 aperture, optical image stabilization, and 5x digital zoom
-
7 MP FaceTime HD camera with ƒ/2.2 aperture and 1080p HD recording capability
-
Support for fast-charge and Qi wireless charging
-
802.11a/b/g/n/ac Wi‑Fi w/MIMO + Bluetooth 5.0 + NFC
-
-
-
As we start our teardownunder we're greeted by a now-familiar face. Features include:
-
Solid-state home "button" with Touch ID fingerprint sensor.
-
A (still) IPS display similar to the one we found in the iPhone 7 (but now featuring True Tone).
-
On the backside, we spy the iPhone's snazzy new glass backing with its seven-layer color finish.
-
Apple assures everyone that this rear panel is reinforced with "an internal laser-welded steel and copper structure," but time and durability tests will tell if this phone will suffer from a snap, crackle, pop—or yet another Bendgate.
-
Finally, before getting to work, we take a second to line up our new gold iPhone 8 and yesteryear's rose gold 6s. Apple has certainly refined (and re-refined) this design, in addition to stripping a little pink from the finish.
-
-
-
Before we excavate, we X-ray!
-
Our pals at Creative Electron came down under to Circuitwise and snagged some stellar sneak peek imagery.
-
The seamless back gives way to some intricate insides. The first thing we spy is the brand new wireless charging coil!
-
More on that later. For now, we put down the X-ray goggles to plan our attack.
-
Turns out you don't need X-ray vision to see the model number on this blank-backed phone—it's here on the rosy gold box—A1863!
-
It seems that when Apple set out to clean up the back of the iPhone, it decided to follow all the way through. We're guessing we won't find a cute ID card in the SIM tray, though.
-
-
-
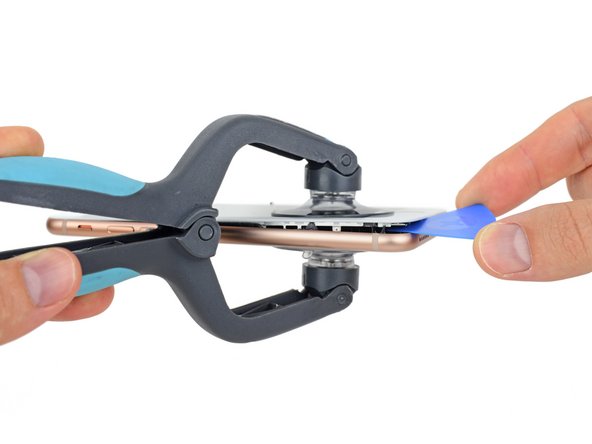
Time to get this teardown underway. After twirling away the pentalobe screws, we need some heat as an antidote to the waterproof display seals.
-
iOpener—bam! Seals softened. Next we pull the iSclack out of our tool bag for some pulling power, and slice through the adhesive with a little help from
our friendsopening picks. -
... and we're in! A first glance reveals nothing new—yet. But we've only just scratched the glassy surface.
-
-
-
As we crack open this
bookdisplay, we are greeted by the familiar display cable bracket. But instead of the cursed tri-point screws, we're happy to report that we're met with friendly Phillips #000 screws! -
We quickly decouple a few cables—the battery, display, and home button cables to be exact—and the display is free!
-
We note a lack of gaskets on the display's pentalobe tabs, which was previously seen in the iPhone 7.
-
-
-
We make a grab for the battery's stretch-release adhesive strips, and find there are two more of these guys than we're used to.
-
But that's okay—we just ask for a hand (or two), and remove all four at once!
-
We easily throw back the
mozzarella stickspull tabs as the battery springs free effortlessly.
-
-
-
-
Now that this juicy battery pack is out, we can see how it compares to its competitors!
-
Fully topped off, this 3.82 V, 1821 mAh cell will deliver up to 6.96 Wh of power.
-
Before you get hopping mad about battery news: despite the drop in capacity, Apple claims battery life will be comparable to last year’s unit.
-
-
-
We pluck the main camera in pursuit of the logic board.
-
The iPhone 8 has the same ƒ/1.8, 6-element lens that we saw on the iPhone 7, but everything else about the camera is new and improved.
-
The 8's sensor is bigger than the 7's, but specs the same 12 MP resolution. This means the individual pixels are larger—letting in more light, improving colors, and decreasing noise.
-
But wait, there's more! Improved image processing software shows Apple still has a few clever tricks up its sleeve.
-
We've seen this before, but not with the naked eye! Neat X-rays reveal magnets in the four corners of the camera—giving this camera some advanced vision of its own through OIS.
-
-
-
As our quest continues, we find some quirky cables and brackets!
-
First out: a new Lightning port bracket that seems to reinforce the new peach-colored port and trap the Taptic engine.
-
Up to now, we've gleefully plugged along with our Phillips screwdriver—but alas, all good things must come to an end. In removing this bracket, we encountered our first tri-point screw. Still, it's no match for our 64 Bit Driver Kit!
-
Next: a strange interconnect/antenna cable over the speaker.
-
Finally: the Taptic Engine nestled in a series of tiny fiddly connectors.
-
-
-
Drumroll please—it's chip time! Special thanks to the folks at TechInsights for helping scope out this silicon:
-
Apple 339S00434 A11 Bionic SoC layered over SK Hynix H9HKNNNBRMMUUR 2 GB LPDDR4x RAM
-
Qualcomm MDM9655 Snapdragon X16 LTE modem
-
Skyworks SkyOne SKY78140
-
Avago 8072JD130
-
P215 730N71T - likely an envelope tracking IC
-
Skyworks 77366-17 quad-band GSM power amplifier module
-
NXP 80V18 secure NFC module
-
-
-
And on the back side:
-
Apple/USI 170804 339S00397 WiFi/Bluetooth module
-
Apple 338S00248, 338S00309 PMIC, and S3830028
-
Toshiba TSBL227VC3759 64 GB NAND flash storage
-
Qualcomm WTR5975 Gigabit LTE RF transceiver and PMD9655 PMIC
-
Broadcom 59355—Likely an iteration of BCM59350 wireless charging IC
-
NXP 1612A1—Likely an iteration of the 1610 tristar IC
-
Skyworks 3760 3576 1732 RF Switch and SKY762-21 247296 1734 RF Switch
-
-
-
Logic board dispatched, we get down to
brass tacksplastic bits. Today's bits feature the speaker and barometric vent. -
Another small spec bump: Apple touts that the speakers are 25% louder in the iPhone 8—although there is some debate as to whether it is noticeable.
-
The same dozen
donutspeaker holes line the bottom of this iPhone as the 7. -
We also find familiar signs of waterproofing in the form of seals and little rubber gaskets.
-
-
-
The rear case is looking a little thin on components, but we still find a few pieces that invite inquiry.
-
The peach-colored Lightning connector looks like it has changed a li'l since the iPhone 7. Without getting distracted by the desert camo, we notice a new form factor. Better ingress protection, mayhaps?
-
We dig through some black tape that covers some copper tape that covers some
black tape... wait a second ... -
That ain't just black tape, it's the elusive Apple-branded, Qi (pronounced "chee")-enabled wireless charging coil!
-
-
-
We take a stab at separating the rear glass, but after a lot of heat and wetwork, we've instead shivved our way under the reinforcement panel.
-
After more arduous stabbing, we finally get the seven-layer
burritoglass sandwich off of the midframe. -
The process left the backing plate a bit bent out of shape—we have no idea how Apple plans to do this, but they seem to be keeping the secret squirreled away...
-
And no, we didn't let snails figure-skate on the back—that's glue. Lots of it.
-
-
-
We finally turn back to the well-known display and pluck the final features away.
-
Goodbye home button.
-
Goodbye front-facing sensor cable.
-
Goodbye LCD shield.
-
Oh, but hey li'l chip we can't identify.
-
-
-
That's all she wrote! Well, at least for now—we've got a few more words and photos in store for you in the next few days!
-
Thanks heaps to Circuitwise for hosting us at their sweet facility in Sydney. (Seriously, check out that sweeet soldering video.)
-
And big thanks to the Creative Electron team for providing some serious X-ray support!
-
- The two most commonly replaced components, display and battery, remain straightforward to access with the proper knowledge and tools.
- The addition of wireless charging means less strain on your Lightning port, a common point of failure.
- Water and dust seals complicate repair, but make the need for difficult liquid damage repairs less likely.
- The battery connector once again sports common Phillips/JIS fasteners—but you’ll still need up to four different driver types for many repairs.
- The durability of the glass back remains to be seen—but replacements are likely to be very difficult.
- The iPhone’s lower components, once readily removed, now lie trapped under a fussy combination of brackets and delicately folded flex cables.


최종 결론
수리 용이성 점수


(10은 가장 쉬운 수리를 뜻합니다)

댓글 82개
Live stream it on twitch.tv or youtube!
Link anyone?
It looks like it's the same screen as the iPhone 7, something like the iPhone 5S and SE, maybe?
Hopefully, although since the new one supports true tone, it may not. However, those sensors may not be integrated into the display and just be a part of the camera and speakerphone assembly.
Edit: also, the black stuff isn't present on any iPhone 7 displays Ive got, also, the top clip on the left side seems to be rounded off, while on my 7 displays, they have a little sharpish point coming out of each side.
Also, on the 8 display, there is a little bit of text on a black bit of plastic which reads “F08+C”, on my 8 display, it reads “F06+A”
Edit: also there are metal clips at the top of the 8 display, on the 7 they're made from plastic