주요 콘텐츠로 건너뛰기

필요한 것

해당 분해도는 수리 안내서가 아닙니다. Countertop Ice Maker 수리는 저희 서비스 설명서를 사용하십시오.

  1. ikich Countertop Ice Maker Teardown, safety first: 1 단계, 이미지 1/1
    • Remember that ice makers contain toxic refrigerant. Hand and eye protection are recommended

    • A medium phillips-head screwdriver is also required

  2. ikich Countertop Ice Maker Teardown, unplug and drain: 2 단계, 이미지 1/2 ikich Countertop Ice Maker Teardown, unplug and drain: 2 단계, 이미지 2/2
    • unplug your countertop ice maker

    • place over the sink and pull out the rubber stopper from the bottom

    • wait for all fluid to drain

  3. ikich Countertop Ice Maker Teardown, remove back housing: 3 단계, 이미지 1/1
    • Once drained, place ice maker on its side. Remove the highlighted screws that hold the back plastic cover in place.

    • Then remove the black plastic cover.

  4. ikich Countertop Ice Maker Teardown, remove top housing: 4 단계, 이미지 1/1
    • remove the screws holding the top cover in place.

    • Don't forget the other side!

  5. ikich Countertop Ice Maker Teardown, remove tray motor and water intake: 5 단계, 이미지 1/1
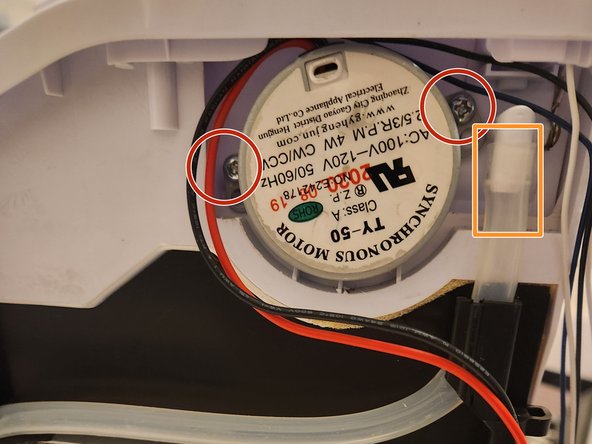
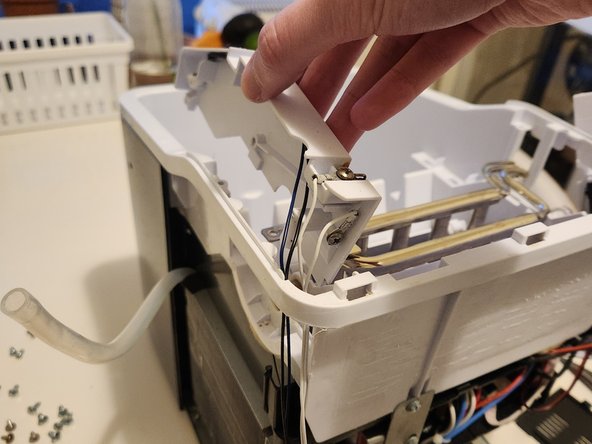
    • remove two screws holding the tray motor in place. Then pull the tray motor straight out. It may require a bit of force if rust is sticking it onto the tray

    • remove the water intake hose by pulling it straight down

  6. ikich Countertop Ice Maker Teardown, remove side panel wires: 6 단계, 이미지 1/2 ikich Countertop Ice Maker Teardown, remove side panel wires: 6 단계, 이미지 2/2
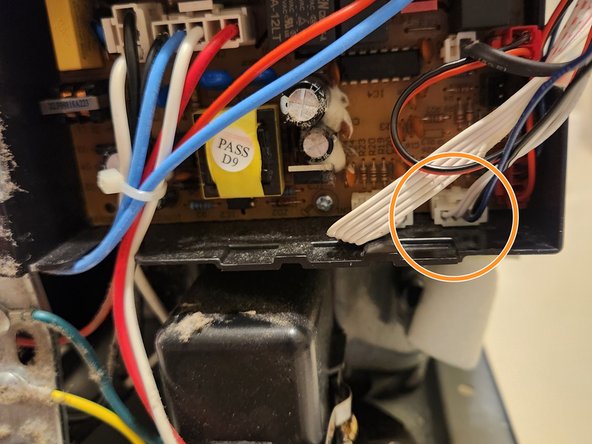
    • uncover the electronics by unclipping the specified points

    • unplug the wire connecting to the right side panel

  7. ikich Countertop Ice Maker Teardown, remove side panels: 7 단계, 이미지 1/2 ikich Countertop Ice Maker Teardown, remove side panels: 7 단계, 이미지 2/2
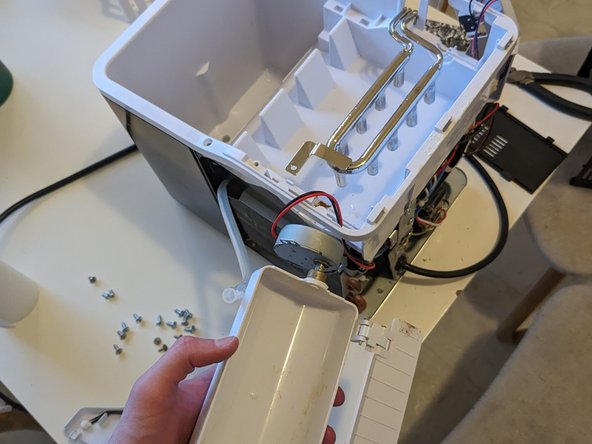
    • remove the screws holding the side panels in-place

    • unscrew the refrigerant pipes from the side panel

    • carefully remove both side panels

  8. ikich Countertop Ice Maker Teardown, remove ice tray: 8 단계, 이미지 1/2 ikich Countertop Ice Maker Teardown, remove ice tray: 8 단계, 이미지 2/2
    • at this point, the ice tray should be freed up for removal (and cleaning)

macro

회원 가입일: 09/02/23

157 평판

안내서 1개 작성함

댓글 0개

댓글 쓰기

조회 통계:

24 시간 전: 8

7일 전: 36

30일 전: 136

전체 시간: 201