주요 콘텐츠로 건너뛰기

First Generation Electric Motorized Longboard released by Boosted, June 2014.

8 질문 전체 보기

Replace new battery in Boosted board 1 gen

Hi,

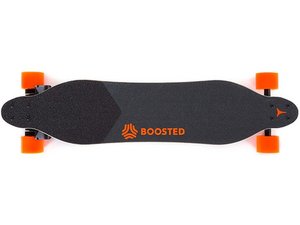
i have a boosted board first generation and my battery is dead. Can somebody explain how i can replace the batteries and the board will work later on :)

I went to an batterie shop and they told me that the batteries are broke for sure they got new batteries but they said it will not work because of the BMS (battery management system)

So my question is: what batteries should i buy which tools do i need and how can i make my boosted board work again. If i charge it now it only runns for 2-3 minutes and then dead :(

the battery shop already took the batteries out from the board and the would make a new akku for me but i also would try it on my own

i would highly appriciate if somebody can help me to get my board fixed, i am from central europe and the shipping to USA would cost me 200 USD. So i would rather try it on my own before sending it to boosted for 200 usd and then pay additional for the repair work

thank you all for any hints

BR

Simon

답변되었습니다! 답변 보기 저도 같은 문제를 겪고 있습니다

좋은 질문 입니까?

점수 5
댓글 9개

Do you still have the BMS?

where can i find the bms? now i just took the old batteries out,

i have some pictures how it looks like now

Hey guys, has anybody was able to replace the batteries? and what happened?

The battery is too dead to charge. All you have to do is get the wheels spinning for ~5min (I used a drill and duct tape) then put the charger in immediately after. The regenerative braking "jump starts" the battery. The light should now be solid red instead of flashing. If it's still flashing try 15 min.

We also have the 1st boosted board and like all of you guys our battery is dead and we have tried the drill thing as well as the treadmill started with 10-15 min and went up to an hour because it wasn’t doing anything... and after all that it still flashes red!

댓글 4개 더보기

댓글 달기

답변 7개

선택된 답변

You will need to replace the dead 12S1P pack of A123 26650 cells with new ones by spot welding a new pack together.

Here's a battery diagram.

Block Image

해당 답변은 도움이 되었습니까?

점수 6

댓글 18개:

just replaycing the battery pack? are you sure there will be no problem with the bms?

did you do it before?

Hi,

I have exactly the same problem on my boosted board v1 (I live in Europe too). I will have to disassemble the battery pack and make a new one. Is it difficult to assemble the new battery pack with the bms ? Thanks so much for your answer. Stephane

Yes it is extremely difficult. You will need some quite expensive tools to properly put together a identical pack. You will need capacitive discharge spot welder for battery welding, battery nickel tabs preferibly, .25mm or larger and 12 A123 cells. Dissassembling the battery is dangerous enough considering its high voltage and intricate design.

I'd suggest either sending it back to Boosted for repair or finding a local battery shop that knows what they are doing.

I would offer to help, but I am in the USA.

Hi,

Yes, I think I will send it back to Boosted for repair. I have to find a company that accepts to transport dangerous products (class 9 dangerous products). Not easy to find ! Maybe Fedex or DHL. Thanks very much for your answer

댓글 13개 더보기

댓글 달기

Change of plans. I just swapped out the boosted v1's original electronics with something else. I took out the 39.6 volt battery with the BMS and took out the esc (circuit board)

Currently I am using a 24/36 volt esc I got from eBay and I am using a Ryobi 40 volt 6.0 ah lithium battery.

I ran it Thursday night (8/13). it ran pretty good. I am sharing the motor wires from each motor for the single connection.

In other words 2 motor wires from each motor are into each if the 3 connections.

And I have to run it without the hall sensors. Because for some strange reason, when the hall sensors are plugged in, I can not turn on the power….. however with the hall sensors unplugged, I can turn on the power.

Other than that, it runs pretty decent. Only thing is jerky take off. I think its because there is no hall effect.

해당 답변은 도움이 되었습니까?

점수 1

댓글 2개:

Cool got any pics/imgur link?

DO you have the drawing of it?

댓글 달기

Anyone got any updates removing the old battery completely?

Following the guide: https://www.youtube.com/watch?v=z7LOwbEp... , was able to strap a secondary battery to the board, works; but the old battery is dead weight yet is still needed by the BMS.

I assume there is a message being sent back to the motor circuit.

해당 답변은 도움이 되었습니까?

점수 0

댓글 6개:

What are you trying to do? Is your original battery dead?

Replace the old battery completely. Sadly made a 10S battery pack: https://drive.google.com/file/d/0B-CZIb7...

The BMS will flash critical red and the remote will beep.

Saw your diagram, does the battery need to soldered to the BMS like along C1, C2 ? Exactly like the diagram? And it worked for you?

@samrad as I'm trying to do the same thing as you, I did a bit of searching - based on most BMS diagram, you have to wire-in all of the balancing point.

Similar to this:

https://i.ebayimg.com/images/g/kxQAAOSwb...

Except the c1,c2, c3, etc. represent your cells

I've also got a dead v1 and thinking of building a new battery pack for it. I'm pretty new to this kind of work. If I build a new battery pack, and plan to use the existing v1 BMS board, will I need to balance the battery pack separately, or can I let the v1 BMS do that for me?

Is it reasonable to expect that I would just need to buy 12 batteries, build the pack, solder them back onto the existing v1 BMS and be good to go? What else should I be thinking of?

@TeckniX

I did in fact end up making the pack with a123 cells and a cheap spot welder. It wasn't easy and sadly a short happened and might have fried my BMS. Be smart in how you assemble the pack and make those folded nickle/copper tabs between the cells. If I were to smart again, I would do in series of 4 and then group.

Now my BMS just flashes red and I'm not sure it's even charging the new pack. Will check and report back.

@aaronv

Most of the guides online are about making an extra 10cell pack you charge with an iCharger and carry around as dead weight, tapping into parallel to the existing v1 whether it holds a charge or not. This worked. Design a good system for attaching it. I had it in a shoulder bag so I could shread still (good times ;_;). didn't solve the long wires though.

Ripping apart to hastly the v1 battery was a mistake. It's very sealed and you can damage easily. Take photos.

Sadly now I have nothing working, a useless 10pack that hasnt been used in months.

댓글 1개 더보기

댓글 달기

I have a V1, kinda not happy with the distance. Is there no way at all to buy a V2 battery and somehow make the BMS compatible with the V1? Read the responses and diagram lol, not making a new battery. What can I buy? Besides a new board lol

해당 답변은 도움이 되었습니까?

점수 0
댓글 달기

Just swap out the boosted ESC for the flipsky duel get a new remote and enjoy the freedom of using any battery you can fit in your enclosures

해당 답변은 도움이 되었습니까?

점수 0
댓글 달기

i ordered all the parts and will try to make a new v1 battery pack for 110€

stay tuned:)

해당 답변은 도움이 되었습니까?

점수 0

댓글 2개:

So i made a short while soldering the last wire.

The BMS is fried and i burned my thumb:(

If anyone has a V1 batterie or only the V1 BMS hit me up:D

@CH40S Kappa , could you elaborate on what did you mess up ? or steps putting the batteries and spot welding sequence. I got my batteries today. planning to spot weld the nickel strips this weekend. Now I'm scared to put them together :P

댓글 달기

Hi @jacobmethner , Im planning to replace my v1 battery pack (all batteries are dead and not reviving) and put together a new one. Im based out of Texas. Need your help in understanding the disassembling process.

Appreciate your help

해당 답변은 도움이 되었습니까?

점수 0

댓글 1개:

Would you be willing to help me making a new battery? I'd pay you for it and shipping

댓글 달기

귀하의 답변을 추가하세요

Simon B 님은 대단히 고마워 할 것입니다.
조회 통계:

24 시간 전: 3

7일 전: 18

30일 전: 60

전체 시간: 16,125