주요 콘텐츠로 건너뛰기

ASUS F550 Wifi Card Replacement

필요한 것

  1. ASUS F550 Wifi Card Replacement, ASUS F550 HDD/Ram Cover Removal: 1 단계, 이미지 1/2 ASUS F550 Wifi Card Replacement, ASUS F550 HDD/Ram Cover Removal: 1 단계, 이미지 2/2
    • Remove the battery, using release clips.

    • Ensure device has no residual power by attempting boot once battery is removed.

    • Remove either 2 (or 4 for a full teardown) 12mm phillips screws, then removing the bottom cover to gain access to the HDD and RAM.

    • Remove HDD and RAM cover
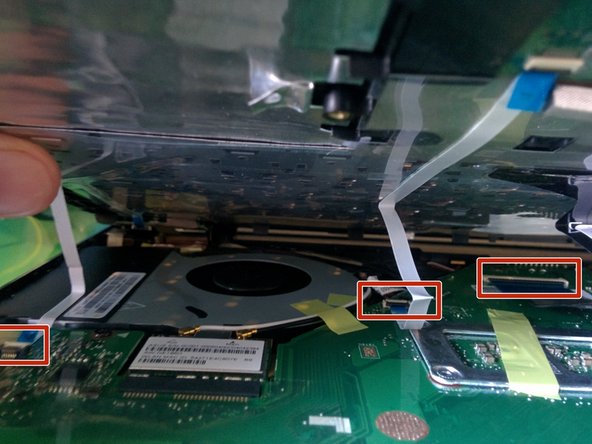
  2. ASUS F550 Wifi Card Replacement, HDD: 2 단계, 이미지 1/1
    • Remove 3 5mm Phillips screws

    • Slide HDD caddy back, remove using the black pull tab.

  3. ASUS F550 Wifi Card Replacement, HDD Removal from Caddy: 3 단계, 이미지 1/1
    • Remove 4 Phillips screws, 2 per side

    • Remove HDD from caddy.

  4. ASUS F550 Wifi Card Replacement, Keyboard: 4 단계, 이미지 1/1
    • Remove 7 5mm Phillips screws

  5. ASUS F550 Wifi Card Replacement: 5 단계, 이미지 1/3 ASUS F550 Wifi Card Replacement: 5 단계, 이미지 2/3 ASUS F550 Wifi Card Replacement: 5 단계, 이미지 3/3
    • Flip laptop and open lid. Separate the keyboard plate from the main housing, using a plastic prying tool. Being careful not to damage the LED indicators or other peripheries.

    • Disconnect the LED, trackpad, and keyboard ribbon cables.

    • The keyboard can now be removed

  6. ASUS F550 Wifi Card Replacement, Wifi Card: 6 단계, 이미지 1/2 ASUS F550 Wifi Card Replacement, Wifi Card: 6 단계, 이미지 2/2
    • Locate Wifi Card

    • Remove the antenna cables using a spudger tool.

    • Remove the Philips screw The Wifi Card will pop up and should be easily removed.

결론

To reassemble your device, follow these instructions in reverse order.

다른 4명이 해당 안내서를 완성하였습니다.

Ryan

회원 가입일: 08/19/15

1,414 평판

안내서 14개 작성하였습니다

댓글 0개

댓글 쓰기

조회 통계:

24 시간 전: 0

7일 전: 5

30일 전: 28

전체 시간: 6,538