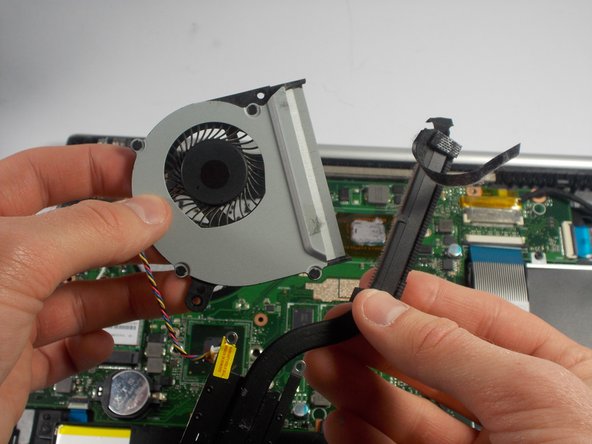
주요 콘텐츠로 건너뛰기

ASUS VivoBook S300CA-BBI5T01 Fan Replacement

필요한 것

  1. ASUS VivoBook S300CA-BBI5T01 Fan Replacement, Fan: 1 단계, 이미지 1/1
    • Place the laptop upside down so that the bottom panel is facing upwards.

  2. ASUS VivoBook S300CA-BBI5T01 Fan Replacement: 2 단계, 이미지 1/1
    • Unscrew the following 10 screws

    • Eight 5 mm Phillips head screws

    • Two 10 mm Phillips head screws

  3. ASUS VivoBook S300CA-BBI5T01 Fan Replacement: 3 단계, 이미지 1/1
    • Carefully peel the panel off of the bottom of the laptop.

  4. ASUS VivoBook S300CA-BBI5T01 Fan Replacement: 4 단계, 이미지 1/1
    • Remove the following 6 screws:

    • Two 5 mm screws holding the fan down.

    • Four 3 mm screws holding the heat sink down

    • Removing one of these screws voids the device's warranty.

  5. ASUS VivoBook S300CA-BBI5T01 Fan Replacement: 5 단계, 이미지 1/1
    • Carefully disconnect the only sliding connector by using a plastic opening tool to pry the connector out.

  6. ASUS VivoBook S300CA-BBI5T01 Fan Replacement: 6 단계, 이미지 1/1
    • Remove the fan and heat sink by lifting it upwards.

  7. ASUS VivoBook S300CA-BBI5T01 Fan Replacement: 7 단계, 이미지 1/2 ASUS VivoBook S300CA-BBI5T01 Fan Replacement: 7 단계, 이미지 2/2
    • Remove the tape holding the fan and heat sink together.

    • Before reassembly it is essential to clean off the old thermal paste from the processor and the heatsink and to apply new. How to apply thermal paste explains how.

결론

To reassemble your device, follow these instructions in reverse order.

Keith Rachels

회원 가입일: 03/04/16

595 평판

안내서 5개 작성하였습니다

UMass Dartmouth, Team 3-4, Bhusal Spring 2016 UMass Dartmouth, Team 3-4, Bhusal Spring 2016 회원

UMASSD-BHUSAL-S16S3G4

2 회원들

안내서 5개 작성하였습니다

댓글 0개

댓글 쓰기

조회 통계:

24 시간 전: 0

7일 전: 0

30일 전: 1

전체 시간: 1,742