소개
This guide will show you on how to replace the display screen on your laptop.
Only replace the screen if it has been physically damaged (e.g. cracks). If there are any other problems, such as the touch screen not functioning or freezing, then this guide will not help you resolve those issues. Instead, view the troubleshooting guide to find a more appropriate solution.
필요한 것
-
-
Unscrew the (10) screws on the bottom of the computer chassis using the JIS #0 screwdriver.
-
-
-
-
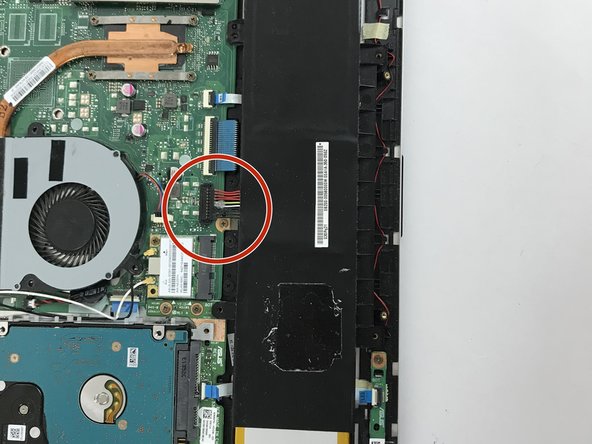
Remove the screws connecting the display to the laptop. Furthermore, detach the wires connecting the screen to the motherboard.
-


To reassemble your device, follow these instructions in reverse order.
To reassemble your device, follow these instructions in reverse order.
팀

USF Tampa, Team S5-G1, Walkup Fall 2017 USF Tampa, Team S5-G1, Walkup Fall 2017 회원
USFT-WALKUP-F17S5G1
4 회원들
안내서 6개 작성하였습니다